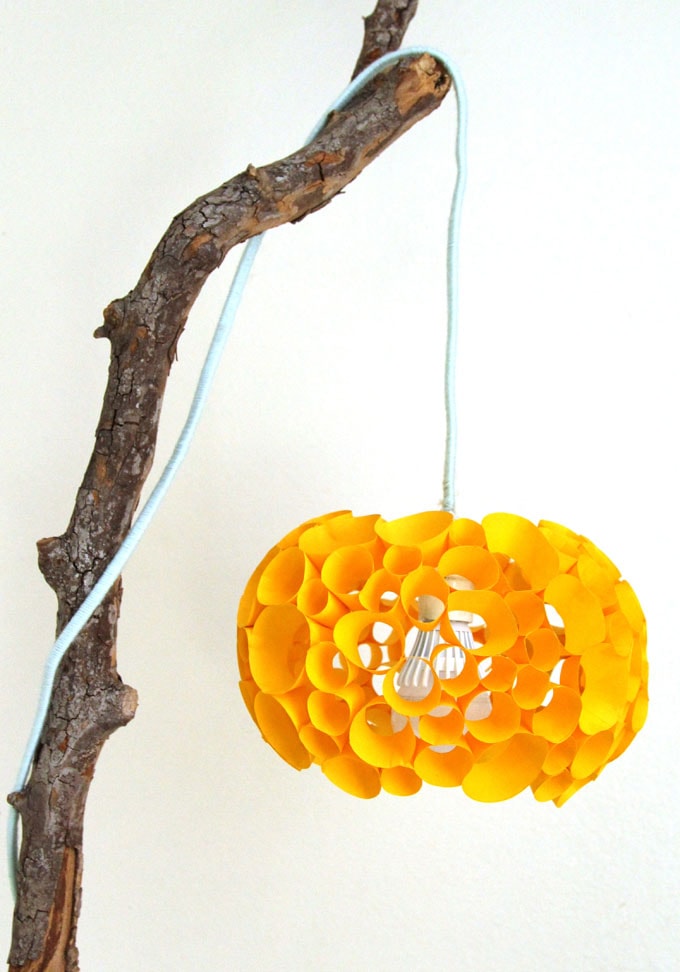
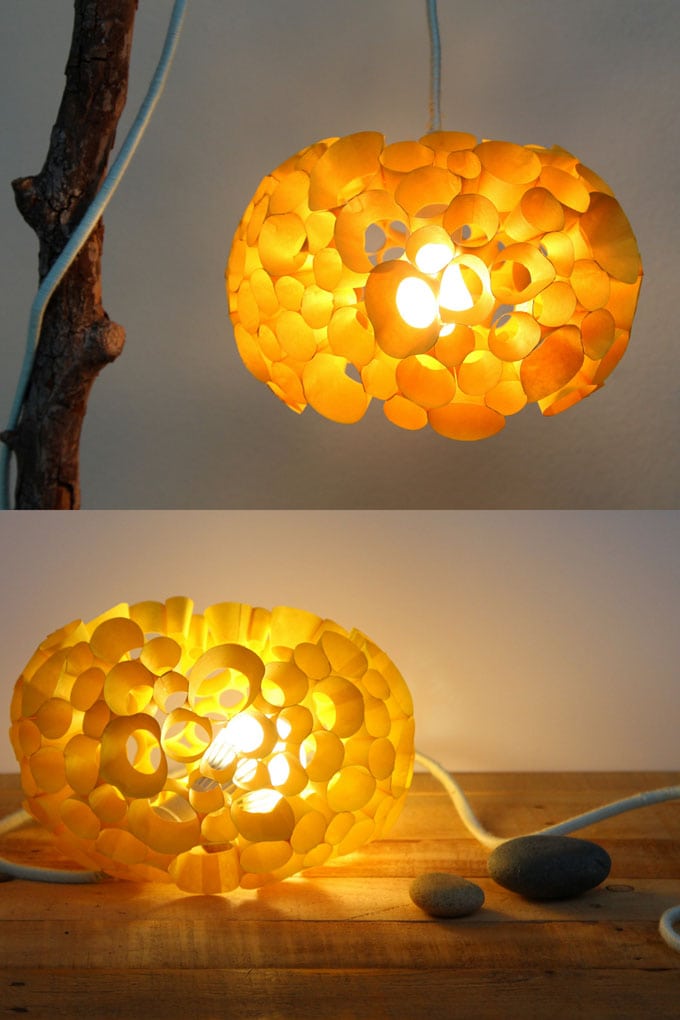
This super easy and almost free DIY paper lamp is inspired by the beautiful organic shapes of coral reef. It is also quite versatile: you can use it as either a table lamp or a pendant lamp.
I think paper and light are a magical combination for people throughout history. The creating of paper lantern started in China somewhere in 230 BC. Many popular Ikea paper lamps are inspired by historic Japanese rice paper lamps.
Before we begin, I want to mention something very IMPORTANT when making a DIY paper lamp:
Always use quality LED light bulbs, which are low heat, and less danger of fire. Do not leave your paper lamp unattended, and always follow good safety practices!
Materials and tools to make DIY paper lamp:
( Some of the helpful resources are affiliate links. Full disclosure here. )
- construction paper like these, or these. It took 5 sheets of 8.5″x11″ paper to make a shade about 14″ diameter.
- glue or Mod Podge, and paper clips to help with the gluing process
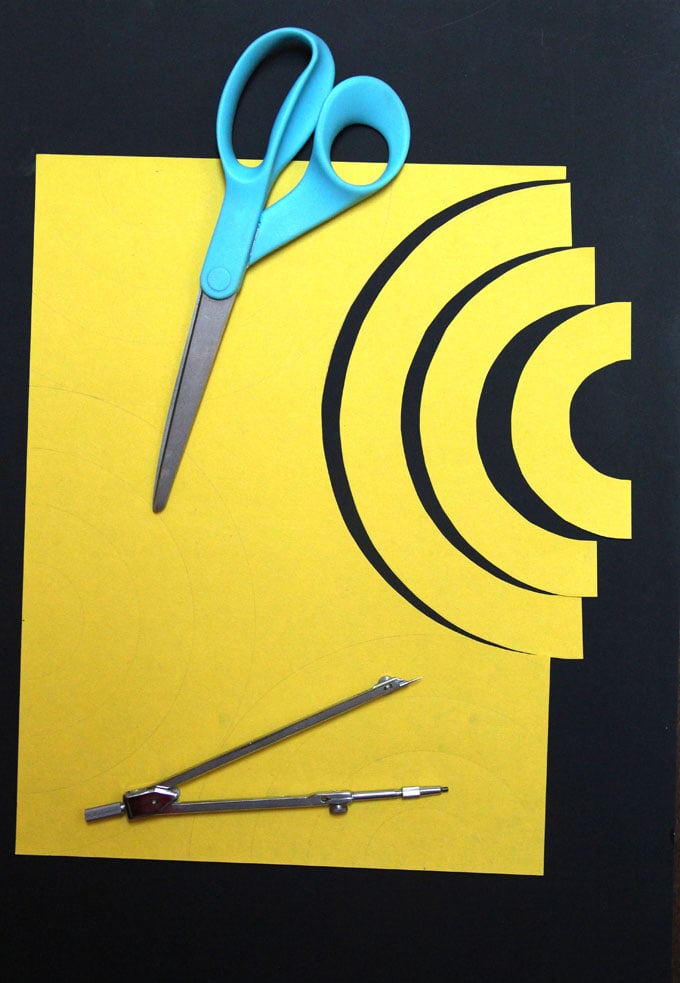
- compass to draw (you can also use circle lids of many sizes) and scissors to cut paper
- pendant cord, optional yarns to transform the cord
- LED bulb : it’s important to use LED bulb with paper, because it generates much less heat. 7.5 watt LED bulbs like these light up like 40 watt bulbs, which is plenty bright. Again- NEVER use incandescent bulb with paper!
Step 1: cut and glue paper tubes
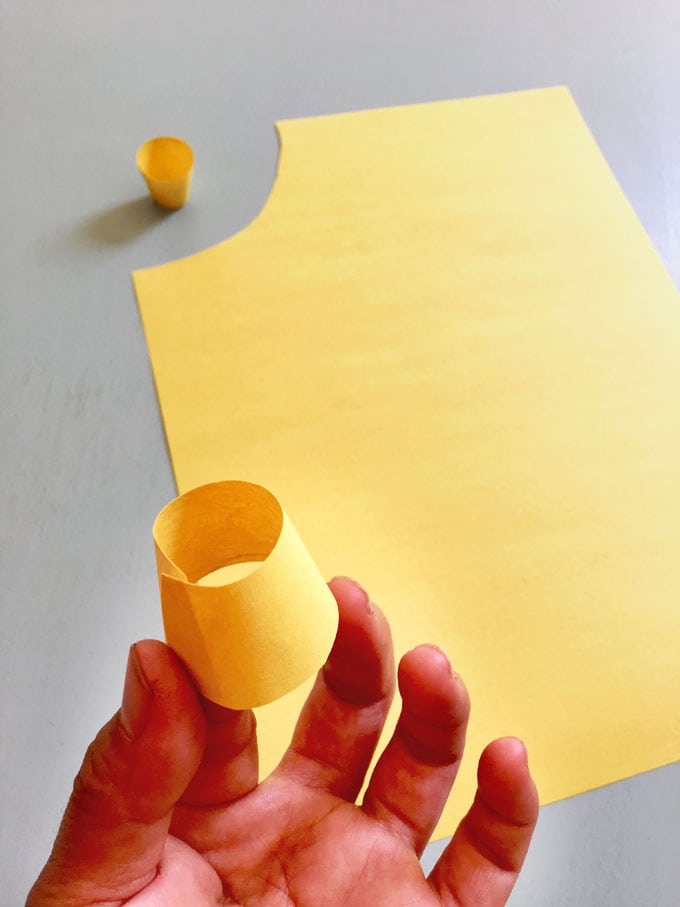
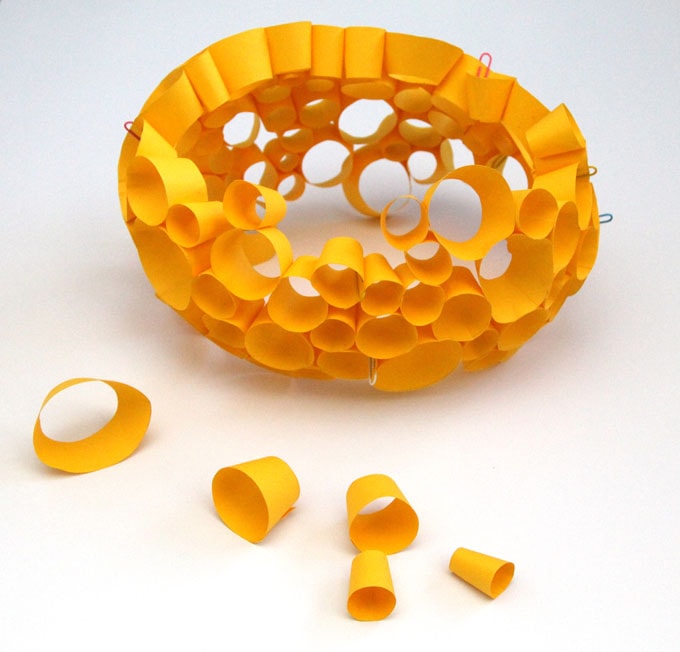
Draw a series of curves on the paper. These are about 1″ wide. Cut them into smaller sections anywhere between 2″ to 5″ long arc to get various sizes of little “tubes”.
Glue each piece into a little tube like shape. One end of it is smaller than the other. So when we glue more together, it will start to form a dome.
Step 2: make DIY paper lamp shade
Start gluing a few pieces into smaller clusters, then into bigger clusters. The paper clips are so helpful in holding clusters together as the glue dries.
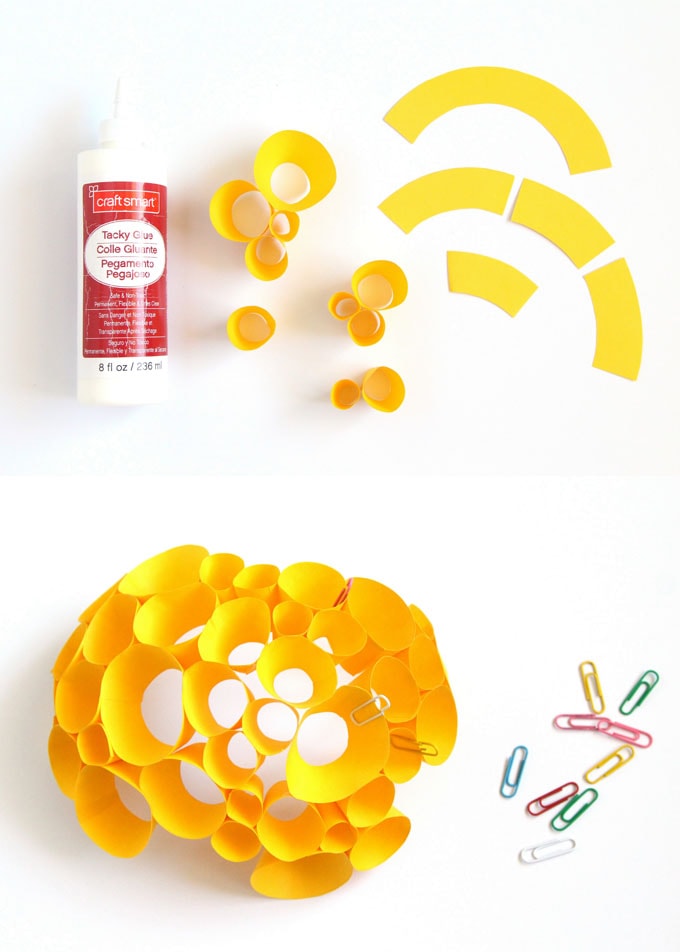
Once we get enough of them to form a circle, we can finish the form with some final touches – add some more tubular pieces till it looks complete. I left about 7″ diameter of opening at the top and bottom. Feel free to improvise. The organic look is very forgiving!
Step 3: add light to DIY paper lamp
Now let’s give this mass produced pendant cord a beautiful custom look! We can accomplish this easily by wrapping some nice colored yarn around the cord. Use a clip to hold it when you go take a break =)
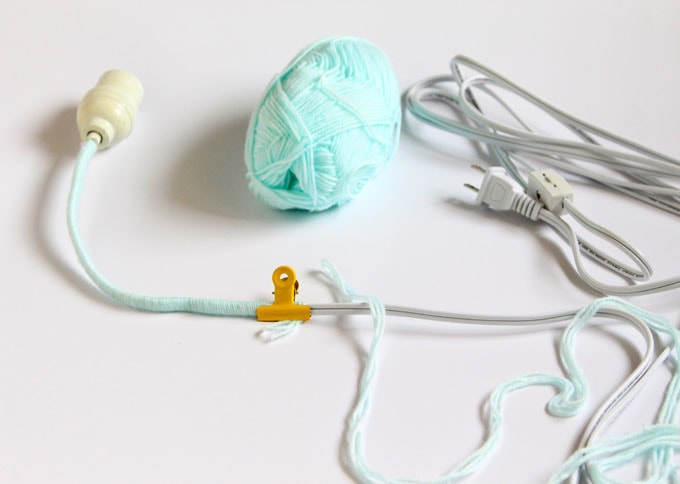
It only took 20 minutes to wrap this cord. I stopped at the switch since the rest will be behind a table. Put a little dab of glue, or tie a knot at the start and at the end.
Step 4: finish the DIY paper lamp
If you want to use this as a desk lamp, we are done!
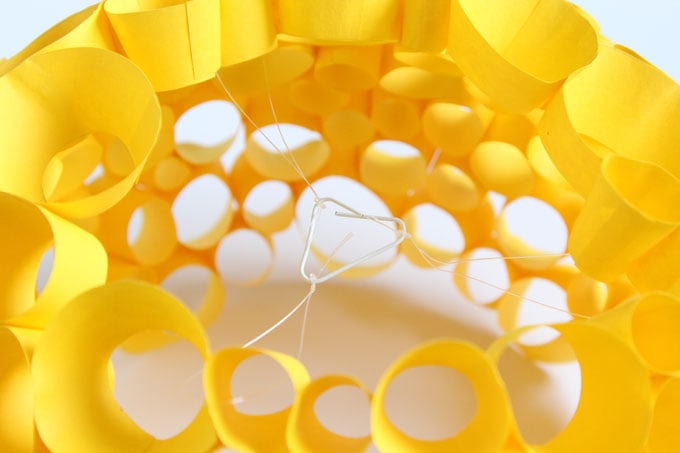
If you want a hanging pendant lamp, use a paper clip and some fishing line. Tie a few knots like shown in photo below, so the triangle made from the paper clip can sit on top of the pendant socket. Easy, right?
Important tip to remember: NEVER use incandescent bulb in close contact with paper! Paper lamp shades are sold at many fancy stores. But always remember to use LED bulb, which generates much less heat.
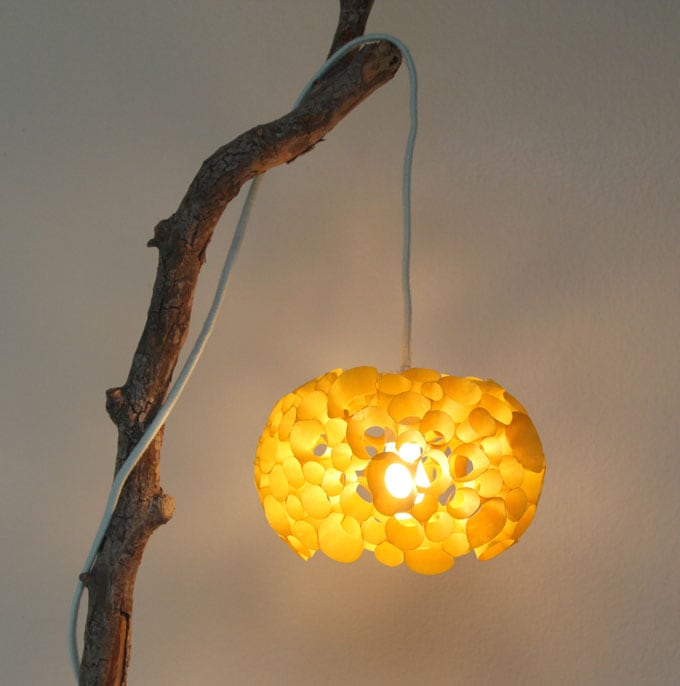
For the hanging pendant, I used a branch and just propped it between a desk and the wall. You can add a wood or concrete base to it to fit the need of your space. Now let’s enjoy the beautiful glow of our one-of-a-kind DIY paper lamp!
More DIY paper lights ideas:
these paper house luminaries I shared here recently.

If you love paper and goemetric designs, this DIY space-saving shoe rack is so chic and useful!

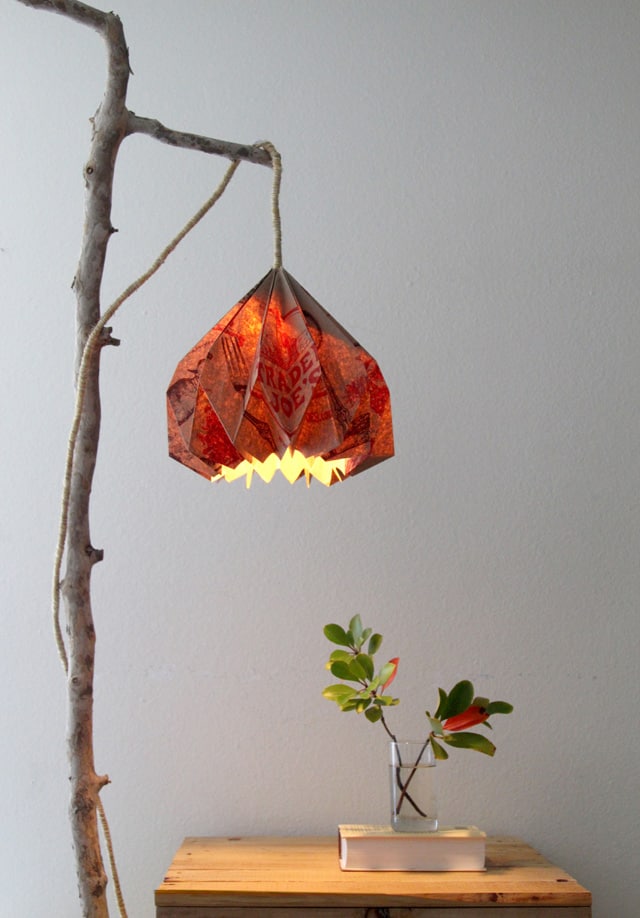
And this grocery bag DIY pendant lamp is a conversation piece for sure! Can you guess what it is made of?
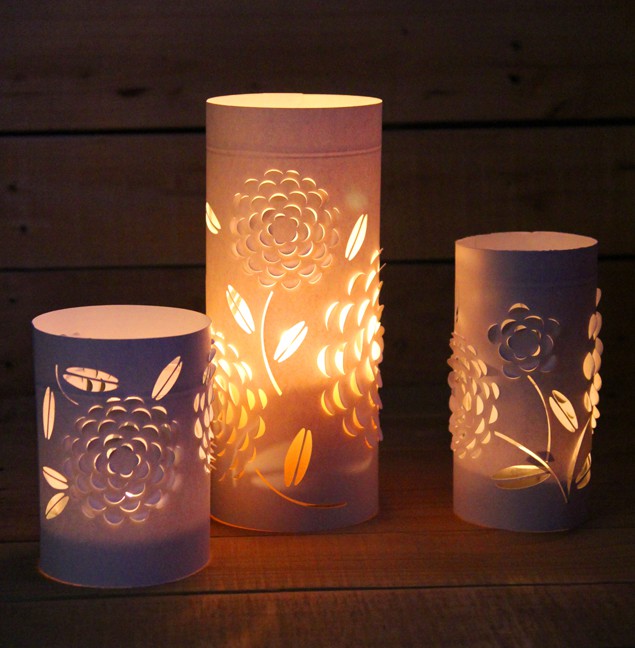
Or download the free template to make these dimensional paper flower lanterns!
Happy creating!
Source: apieceofrainbow.com
