 I love, LOVE, (repeat 100 times) greenhouses! One day when we have more room, there will be greenhouses in our yard! For now, these simple DIY bottle greenhouses made from cut plastic bottles are enough to keep me happy and inspired.
Yes they are the easiest “greenhouses” to make, and they will extend your growing season quite a bit. Today I want to share a few simple tips on how to use a DIY bottle greenhouse with more success!


It really can’t get any simpler. Just cut off the bottom of a plastic bottle, and unscrew the cap. That gives you a mini “greenhouse”!
 Although it’s so simple, it is surprisingly effective at raising the temperature about 10+ (Fahrenheit) degrees, an easy way to give warm season plants a headstart such as tomatoes, peppers, eggplants
Here are 3 tips we found to be quite useful-
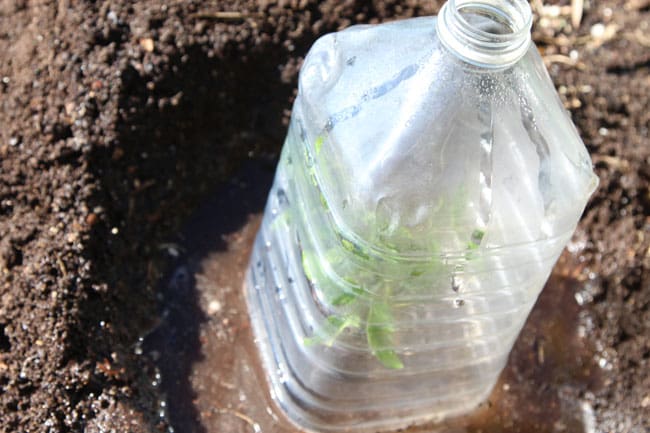
- select larger bottles such as gallon juice or water jugs, so plants can grow bigger in them for longer time if the weather is still cold
- leave the top cap off! The mini greenhouses can get too hot at noon if it’s completely enclosed. The best time to use them is when outside temperature ranges from 45 to 65 degrees Fahrenheit.
- when seedlings are still small, a good way to ensure that water can get to them is to create a soil basin larger than the bottom of the cut bottle, so water can seep through the basin, like in the photos below


Next week I will share a collection of my favorite DIY greenhouses!
And there’s a little present for garden lovers coming later this week( update: here it is!! Free vintage French seed packets printables! ) xo
Similar posts: Super Fast Way to Start Seeds! 
Build an easy Strawberry Tower!
Source: apieceofrainbow.com
