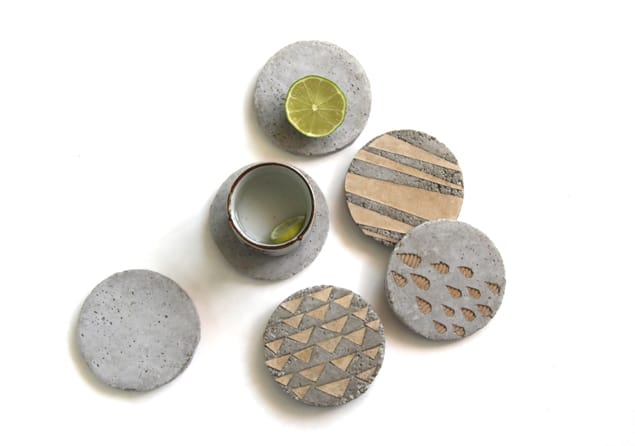
Made with concrete and cardboard inserts, these common household coasters are elevated to modern and chic conversational pieces of table decor!
Materials and tools: ( Some of the helpful resources are affiliate links. Full disclosure here. )
- pourable concrete mix, such as Quikrete 3000lb (used here) or 5000lb.
- thick and glossy magazine covers, card stock, or cereal boxes for making the molds
- corrugated cardboard for making the inserts
- plastic containers to mix concrete, plastic bags for curing concrete
- exacto knife or scissors, hot glue and tape for the molds
- gloves, dust mask


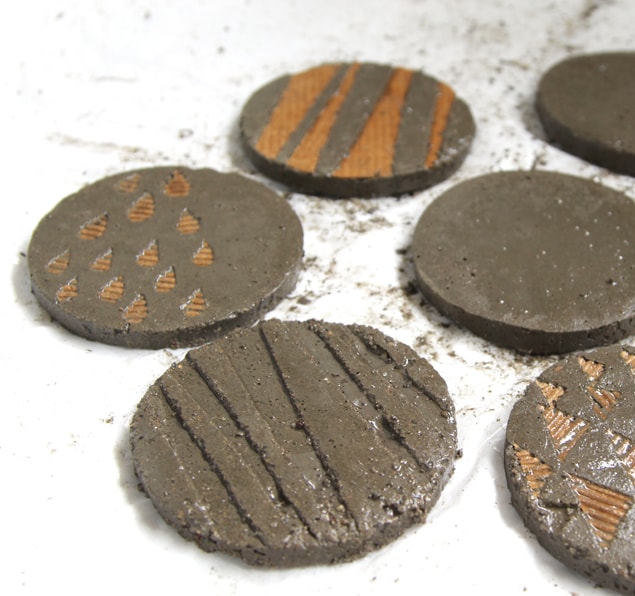
Step 1: Make Molds and Decorative Accents
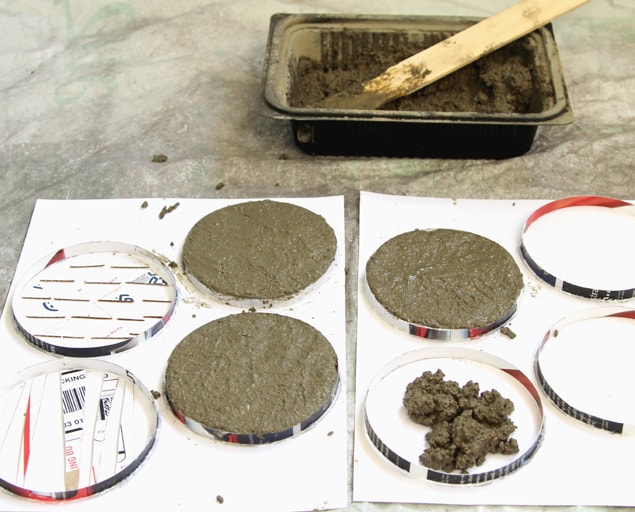
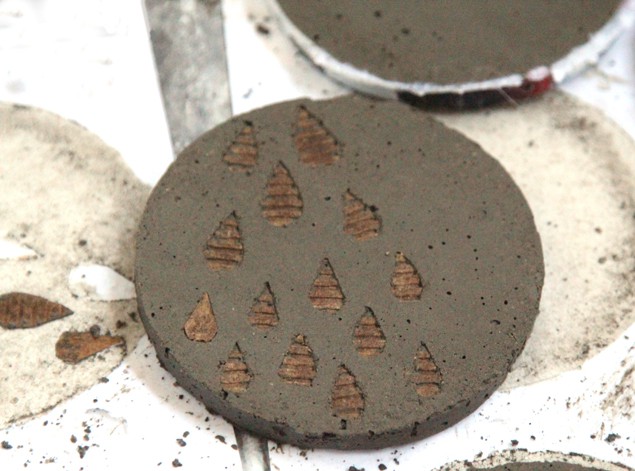
Start by drawing 4 inch diameter circles onto card stock – one more great use for a can of tomatoes! I love the modern graphic elements such as triangles, raindrops, strips, etc. Cut out shapes from the corrugated cardboard, arrange and glue them onto the card stock inside the circles we drew. Cut long strips of thick magazine paper at 1/4″ to 3/8″ thick. This will be the thickness of the coasters. Tape the ends together using the can as a guide, and glue them onto the card stock with hot glue.
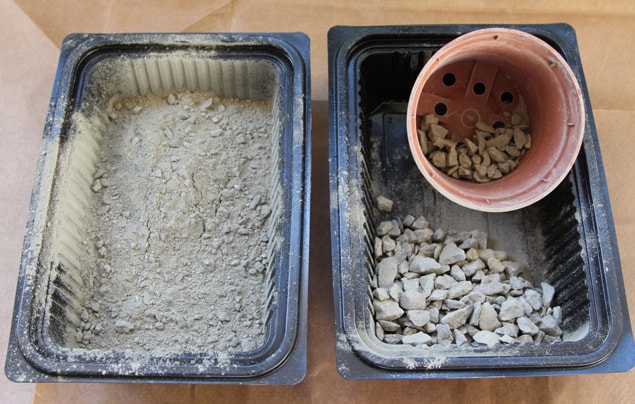
 Step 2: Sift and Mix Concrete
Screen those really big chunks of aggregates out of the Quikrete 3000lb mix- a plastic nursery pot works great, and leave some small aggregates for strength. Mix the concrete following the proportions recommended on the bag, using the screened concrete as if it is the original mix. Wear dust mask and gloves when working with concrete.
Set the molds on a very flat surface, with a large sheet of plastic underneath, which is needed in the curing process. Pour the mix into the mold till it’s level with the top of the rim. Pat gently to make each coaster as level as possible.
 Step 3: Curing Process
Let the coasters stay in the molds and cure for at least 3 days by misting them daily and wrapping them in plastic sheet. This is a very important step to ensure that the concrete hardens as much as possible so they don’t chip or break. The more moisture you can keep in the plastic wrap the better.
 You can take the coasters out of the mold after 36 hours, because it will be hardened by then. But let it cure for another couple of days.
 Step 4 : Final Touches
Clean the surface of the coasters. Brush the entire surface with Modpodge to protect them from moisture, stains, and to keep the inserts in place.
Attach 3 mini felt pads on the back side of each coaster to protect your table surface.
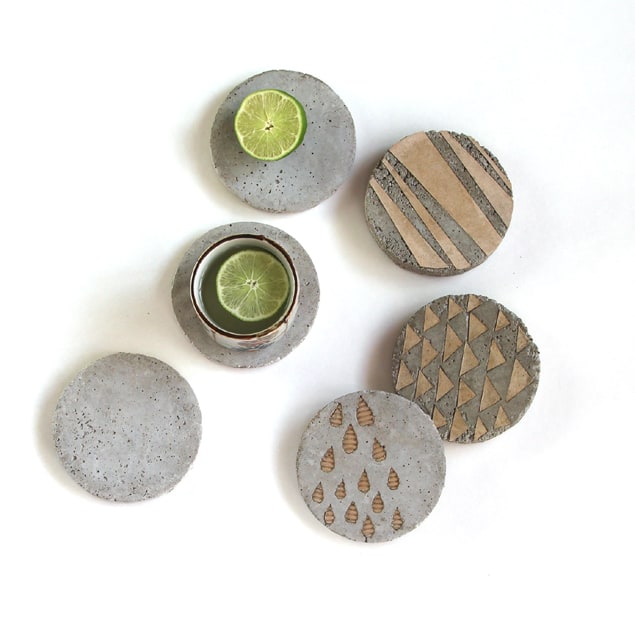 Time to invite some friends over and show off your cool coasters!
Can’t get enough concrete decor? How about some concrete geometric wall planters ?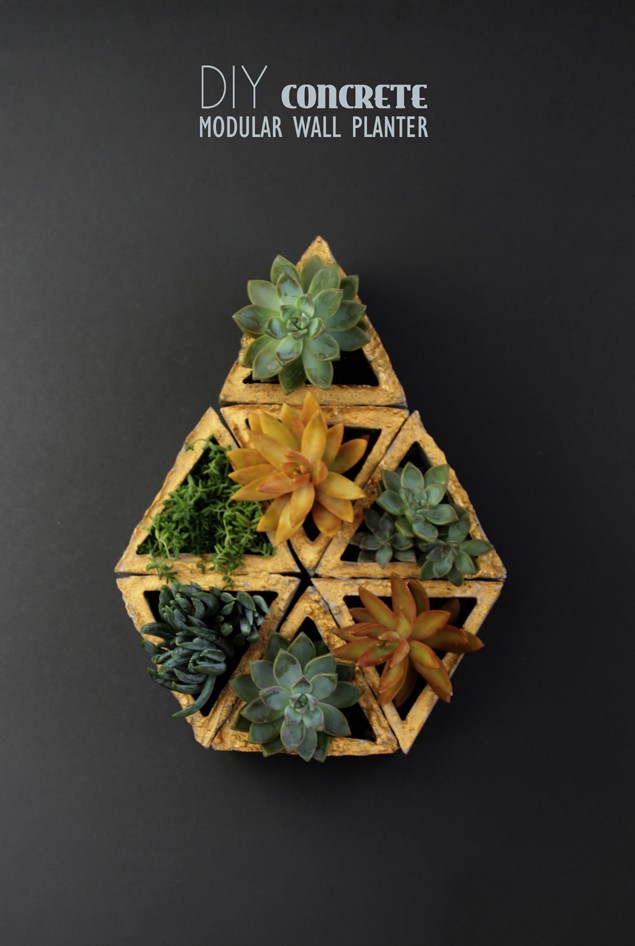 Happy creating and see you next week!
Source: apieceofrainbow.com
