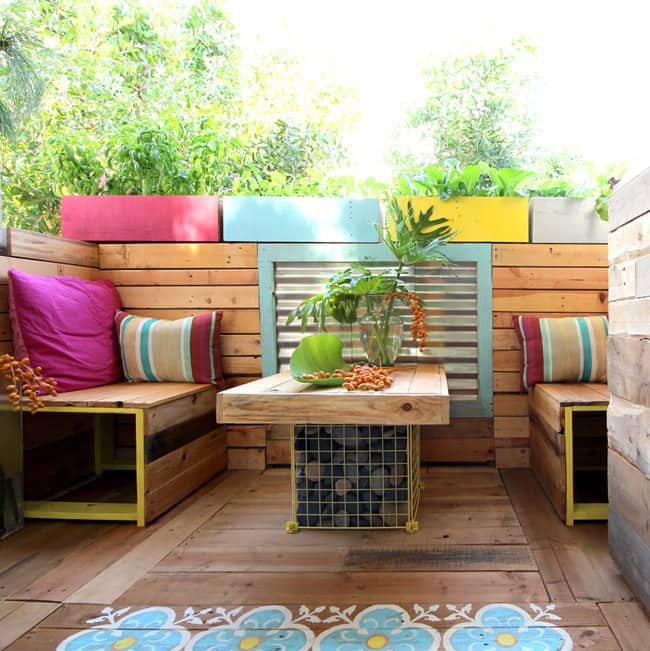
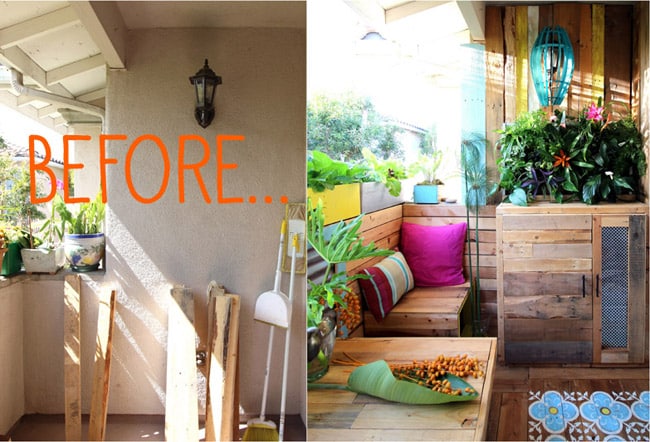
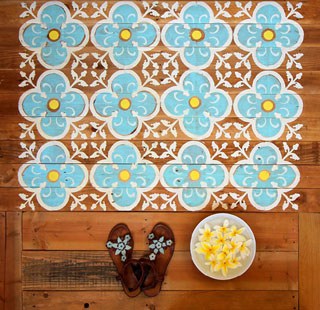
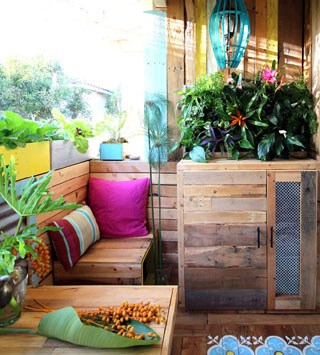
It’s such a happy moment every time our bare feet touch the stenciled pallet wood floor of our “remodeled” tropical outdoor room.
This floor is actually made up of sections that can be taken up when we move, and re-purposed into new things such as doormats!
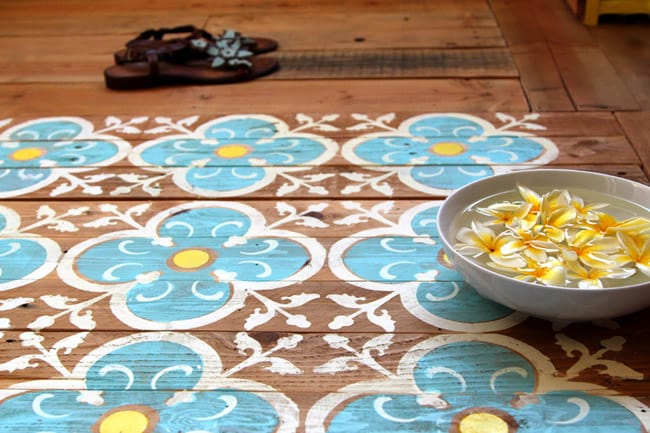
Everyone can use a pretty stenciled wood doormat, and making your own stencil is so easy and so fun! I also included free template of the stencils you see here at the end for you to download!

Besides making door mat and stencils, there are two additional tips in today’s post: 1. how we made the “walls” of our renters remodel(lots of you asked, so here it is!), and 2. a cross-cut jig to make it easy to cut pieces of the same length with a circular saw (not everyone has room for a table saw, right?)!
Tools and materials: ( Some of the helpful resources are affiliate links. Full disclosure here. )
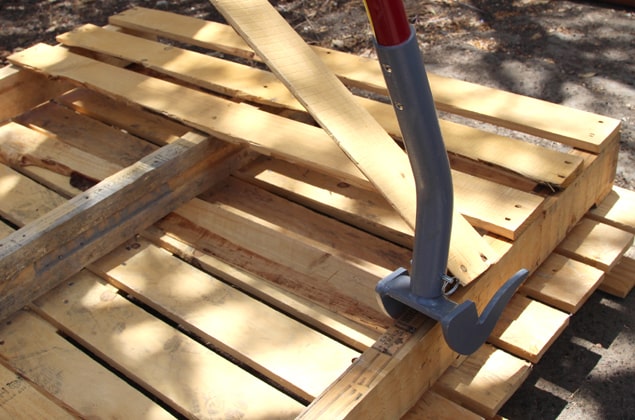
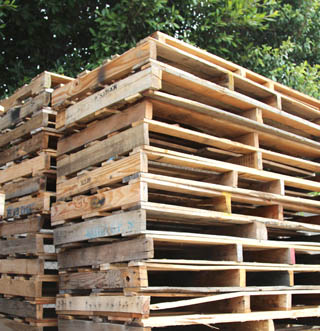
- If you are using pallets, our favorite method to take them apart is with this tool – a pallet buster / Deck Wrecker. This tool lifts those boards easily, and you can take out the nails with a hammer.
- Circular saw. We also made a cross-cut jig, see below.
- Sanding pad or power sander: especially if you love walking bare feet!
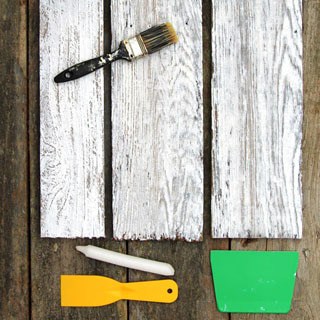
- acrylic paint or other type of water proof paint
- Grafix Clear stencil sheets to make stencils
- to cut the stencils you can use a Silhouette Portrait or Cricut- but it’s easy enough to cut with an X-acto knife
- your favorite wood finish or furniture wax – recipe here.
Here’s a diagram of the stenciled section of our wood floor. For a door mat, measure the size you need, often half this size may be enough.

This is a view from the bottom side. The green pieces are braces. If you are making this from pallet wood like we did here, make sure to select pieces that are the same thickness! Pallet wood can be irregular! If you use store bought wood, they are all 1″x 4″ here, but you can use other sizes.
Step 1: Cut, sand and assemble.
Here’s the cross cut jig that helped us make uniform length pieces easily with a circular saw!
As you can see we need a lot of pieces of the same length. This jig is made for our Makita circular saw, and cuts pieces under 1.5″ thick. It very simple to make, but there are lot of considerations from blade cutting depth, to clearances on several parts of the saw when it slide along the guide.
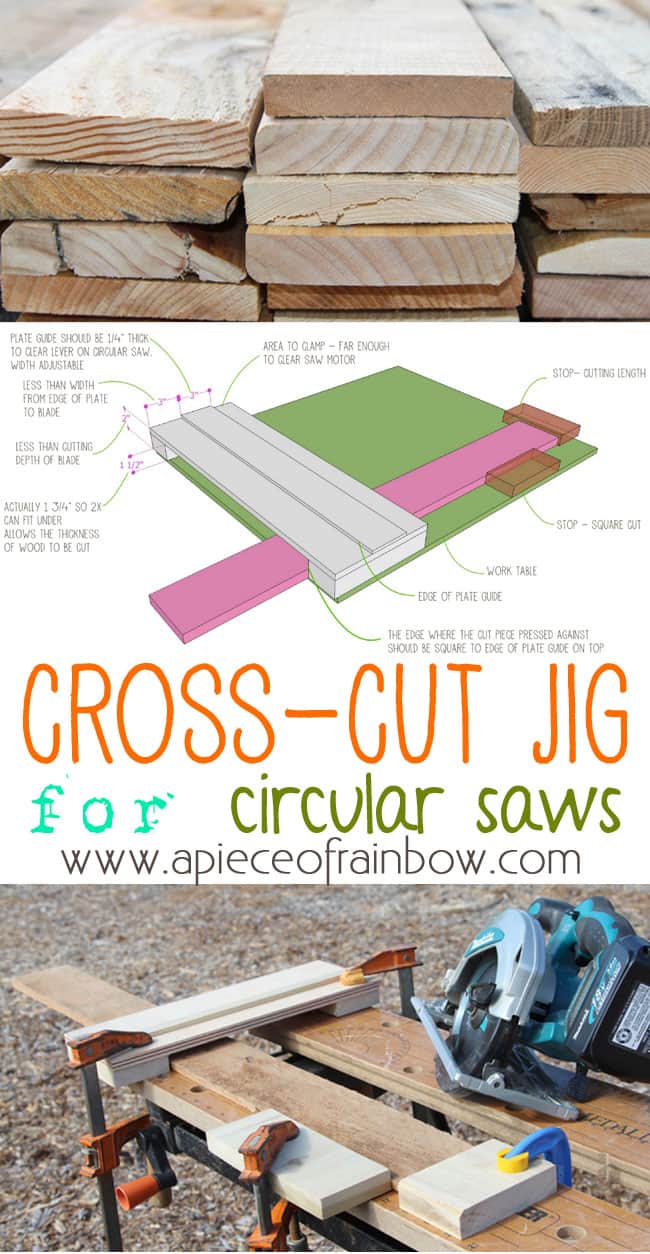
We used 1/4″ and 1/2″ plywood, and finished wood 1Xs to make the jig, after cutting the pieces using a straight edge guide which came with the circular saw, we glued the pieces together.
Please download the diagram here (right click and save if you want to print it out) which explains the design considerations for a jig that will work for your saw.
Sand each piece a little, and assemble using a nail gun, or a hammer and nails. This Ryobi Cordless Nailer is so easy and quiet!

Step 2: Stain wood.

To mimic tropical hardwood, I made my stain with diluted acrylic paint. Store bought stain will work of course, try to look for non-toxic ones, would ya? =)
Step 3: Create stencils
It is really easy and fun to create your own stencils! If you want the pattern that you see here, I have included files for you to download at the end.

Step 4: Paint it!
I used acrylic paint here, but any durable exterior paint will do!

A little smudge here and there is fine. Have a damp towel handy so you can wipe off any mistakes, or leave them for their unique beauty!

Lots of you also asked about the walls – how we made the pallet wood panels without drilling into the walls of our rental-
It works like a free-standing 3-sided box.
We created “posts”, which you can see in the photo below, the corner “posts” are joined together with pocket hole screws, and attached the pallet wood paneling to the posts. It’s further strengthened by the furniture pieces tight against the walls.

Tips to consider:
- Pallets are strong- just think about the heavy thins sitting on them! But you can increase the number of braces, if you are concerned about walking on them.
- The floor that the door mat sits on needs to be flat for this design to work.
- You can even build it on existing pallet if the height isn’t a problem, just adjust the number of boards on the top surface!
Now the free templates for you to download :
Enjoy! =)
Similar posts you may like: How to make scrap wood art with these free vintage seed packet printables!

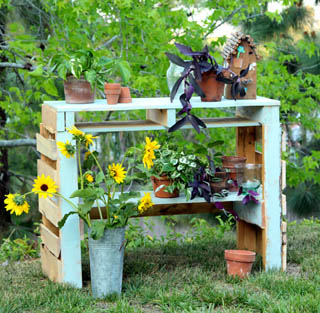
And this pallet tropical outdoor room with a list of all the tutorials!


Happy creating!
Source: apieceofrainbow.com
