Have you dreamed of building a simple wood fired outdoor pizza oven and making delicious pizzas or breads in your backyard? It is totally doable: here’s a super detailed DIY wood fired pizza oven tutorial to help get you started!
People have been building ovens for centuries in all parts of the world. You don’t need high tech pizza oven kit or any expensive materials to build an effective outdoor pizza oven.
This simple DIY wood fired outdoor pizza oven uses easy to find natural materials, and it works amazingly well ( see it in action below! ) and costs 1% of a pizza oven kit.

This type of oven is called earth oven, or cob oven. They are made with readily available and often free materials, and a proven technique that has been used for hundreds or even thousands of years. No special tools are needed, it is also great as a group project to create with friends!
In this DIY wood fired outdoor pizza oven tutorial ( with a free ebook at the end ) I will share:
Step by step process on how to build a simple and effective pizza oven
Helpful tips and resources, including a free ebook with lots more details on each step, DIY wood fired pizza oven design variations, etc.
By the way, if you are adventurous enough to be reading this, you HAVE to check out our easy and AMAZING no knead bread recipe, made with 50% whole grain, YUM!

Easy and AMAZING no knead bread recipe

Recently I attended an Earth Oven (aka Cob Oven) building class taught by one of the best teachers in this field, Kiko Denzer. ( Some of the helpful resources are affiliate links. Full disclosure here. ) Years ago, I was greatly inspired by his book : one of the best on oven building .
During the 6 hour long class, we built 2 portable earth ovens, which were auctioned the next day. I learned so much about building with earth and other readily available materials. There’s such simplicity and beauty to the process that I find deeply inspiring.
You are probably wondering –
What can you make in a simple DIY earth outdoor pizza oven? Does it really work?
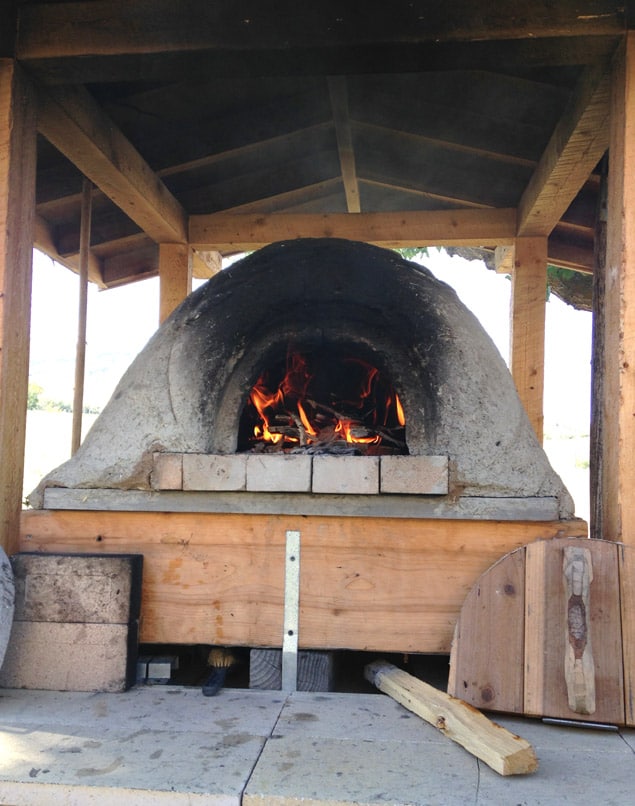
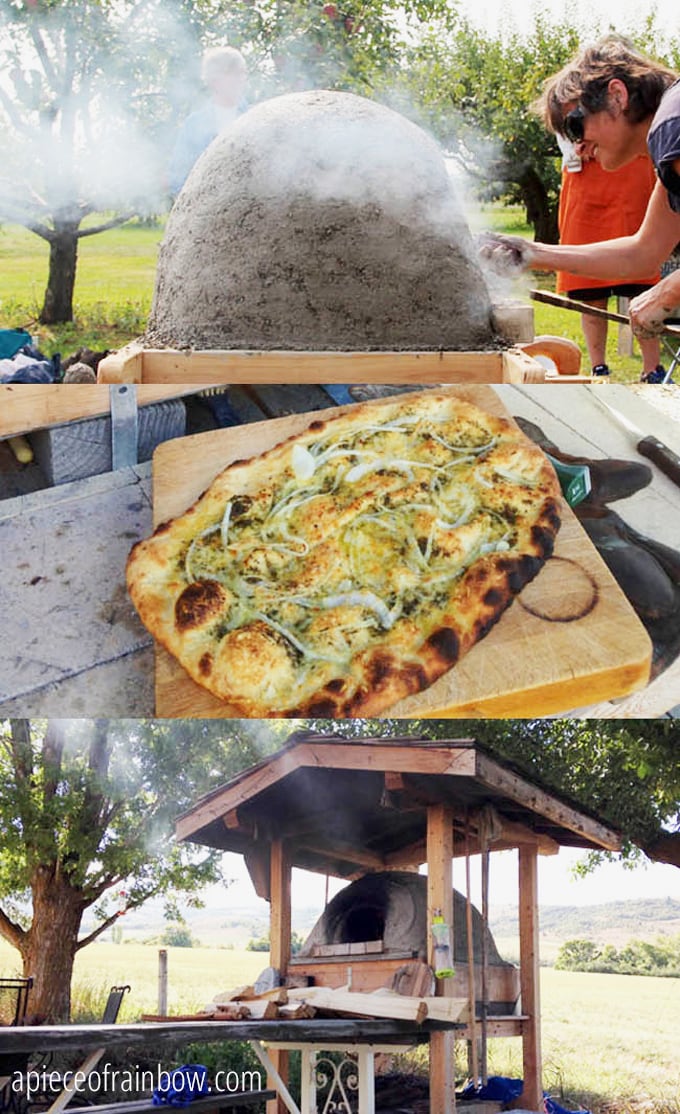
These 3 pictures are from our friend Bill, who bought the earth pizza oven made by the class last year. He loves it so much and decided to join our class this year so he can build another one!
Bill has been using his DIY wood fired pizza oven almost once a week for a year now. I asked him to share what are his favorite things to make, here’s what Bill said-
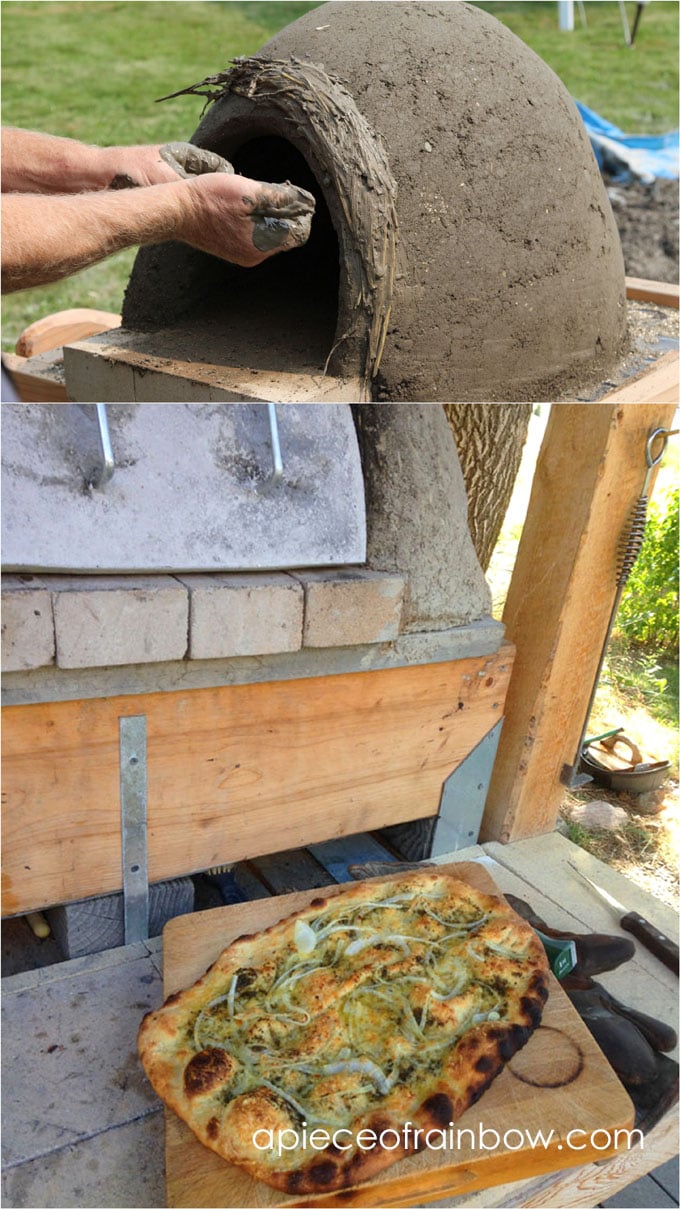
” you do get a long cooking time from each firing if you think of cooking along the temperature curve with pizza first, bread, then braises of all sorts.( pulled pork,beans, rice of all ethnic cooking styles) pies and cookies and then overnight meats like carnitas. the end temp. in the cob oven is long in the 250 f range and is great for drying fruits, toasting nut’s and great grilled cheese. those are my favorites … really it works for everything that you can imagine as long as you understand a dish’s temperature requirements.”
“Here are a few shots of a fun Sunday bake. 3.5 hr fire, coals burned out and got 900 F dropping to 600 after coals out. Baked pizza, bread at 500 F then cooled to 400 F and did the bean casserole and still the next day(24hrs) oven still at 250 F for any drying of fruit!!”
OK, is this enough temptation for you to run out there and start building yet?
Step by step tutorial on how to build a DIY wood fired outdoor pizza oven with simple materials.
Below is a summary of each step. Download the ebook at the end for more details in each step!
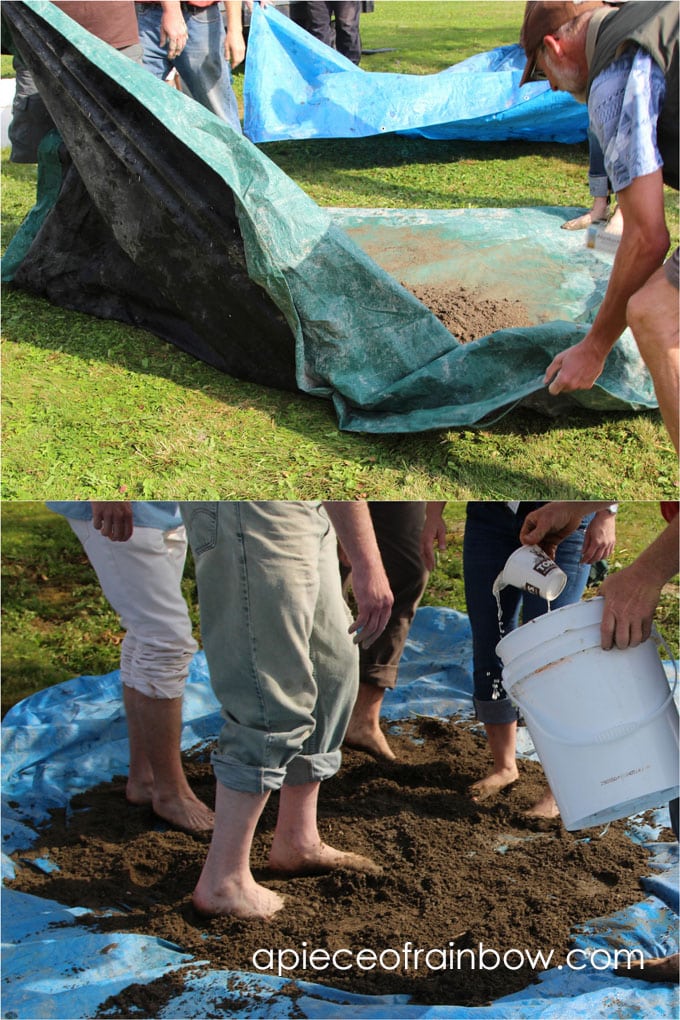
Step 1: Create sand-clay mix for the earth oven
For each part of clay soil, we mix in 2-3 part sand. More sand if using pure clay. Make sure the mix does not have any sharp rocks or debris. If unsure, wear rain boots!
Put everything on a large tarp, add some water, and start singing and dancing – which means, mixing!
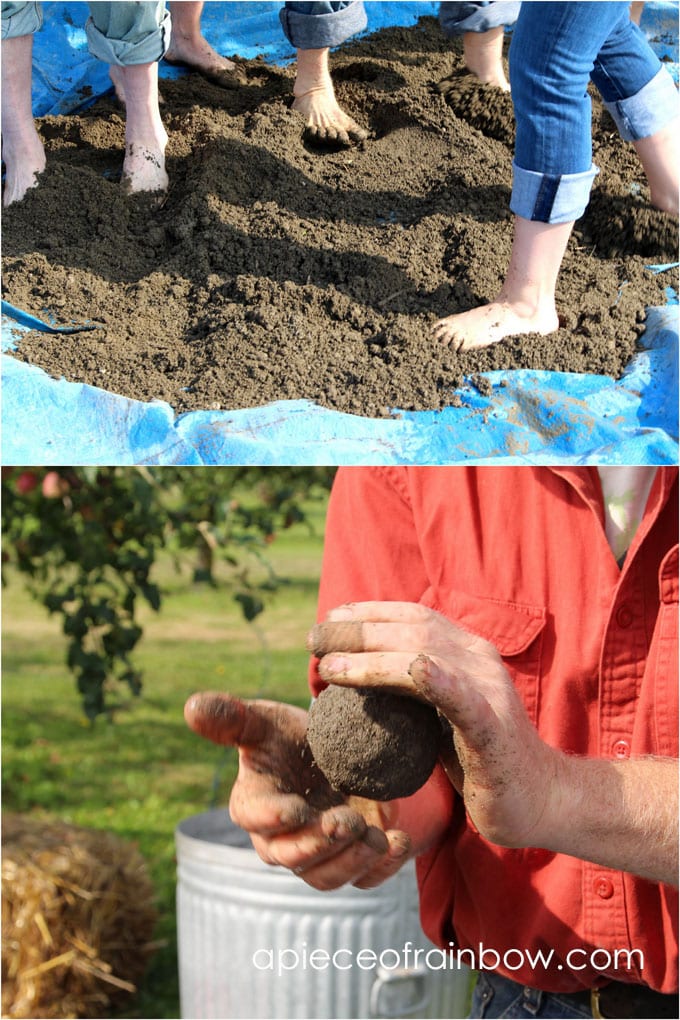
Folding the tarp is a good way to get everything mixed more thoroughly.
You will know that your mixture is a good consistency and ready to go if you can form it into a ball about 3″ diameter, drop it to the ground, and the ball holds its shape with little cracking. How fun it is that our work is to dance in the mud?

Step 2: Make a base with insulation for your outdoor pizza oven
The cob ovens we made in class had a base of sheet metal bolted onto a wood frame ( pictures below ) to be portable, then placed on a sturdy foundation at their new home.
If you are building a wood fired outdoor pizza oven directly in your backyard, then consider the following keys to a foundation: stability, height, and insulation.

1. stability: a foundation can be built out of any sturdy materials such as broken concrete, brick, masonry block, stone, rocks, old tables or even wooden pallets, as long as it can hold an oven (which can weigh 300 to 600 lbs depending on size) without sinking and shifting.
2. height: the foundation should support your oven at a height that allows you to work comfortably!
3. insulation: there should be a minimum of 4″-6″ of insulation between the fire brick oven floor and the masonry or wood foundation. The insulation will prevent the masonry from absorbing all the valuable heat we want for cooking, and protect the wood foundation from burning. The glass jars and vermiculite provide insulation. The fire brick hearth is set on top of that.
Related article: Staying at an Earthship: a unique home that produces food, cleans water, and turns trash to treasure!
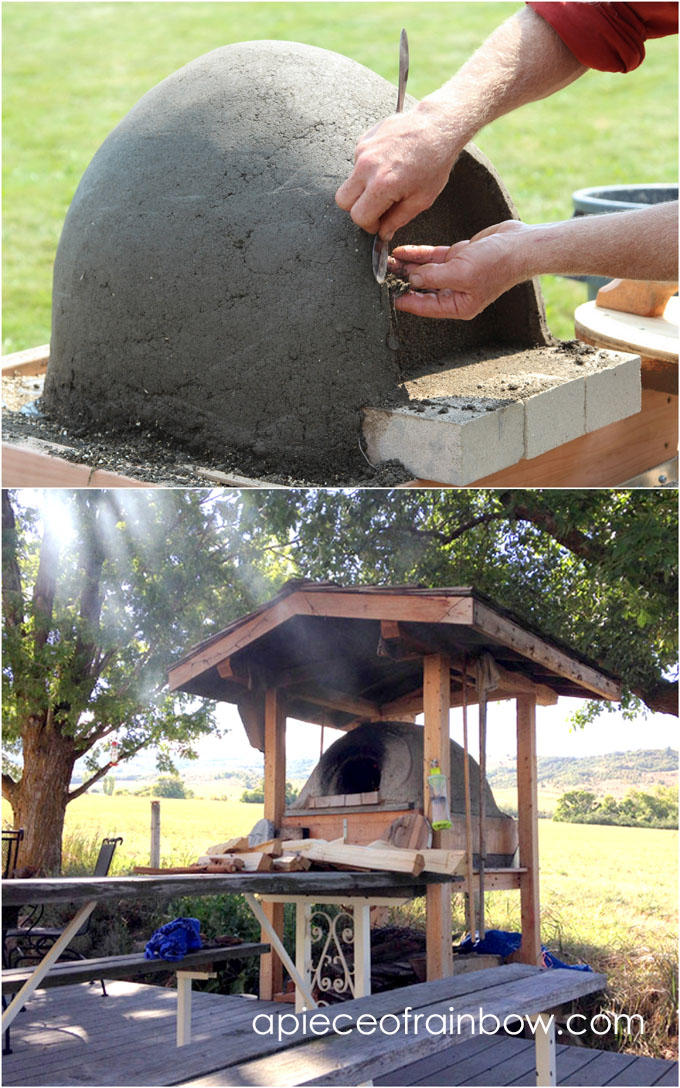
Step 3: Build a sand form size of the cob oven interior
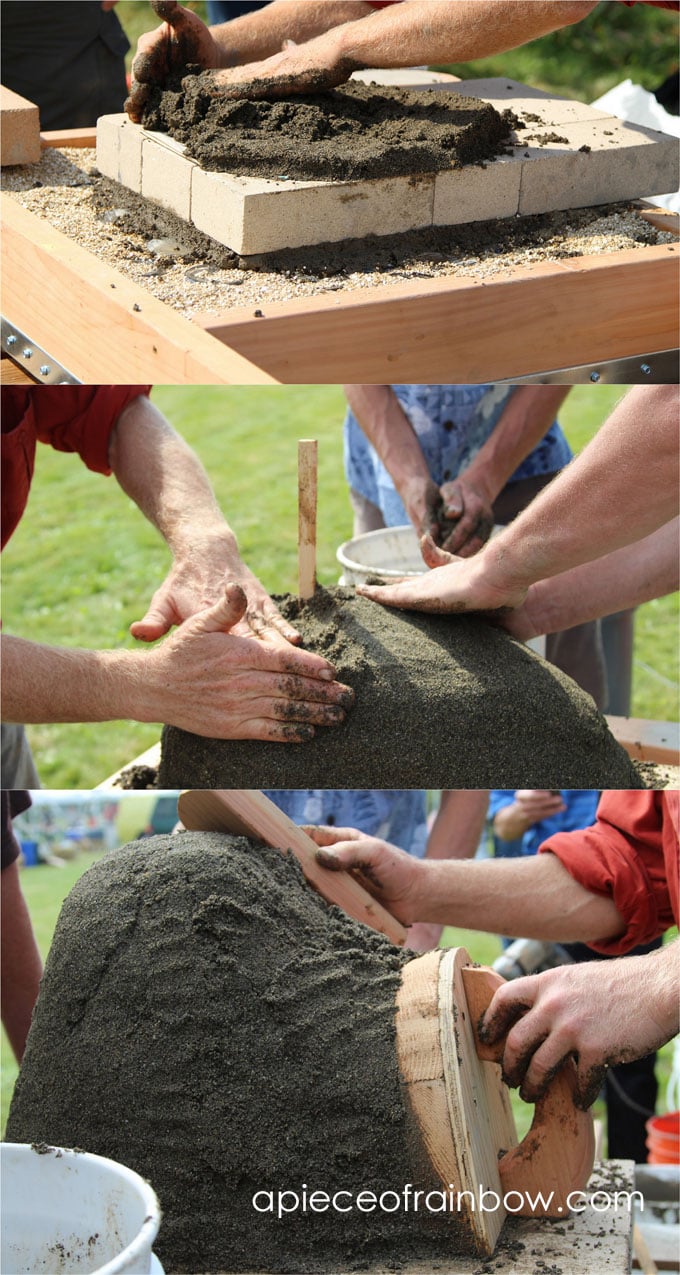
Just like building a sand castle! The sand is scooped out after the next 2 layers are built.
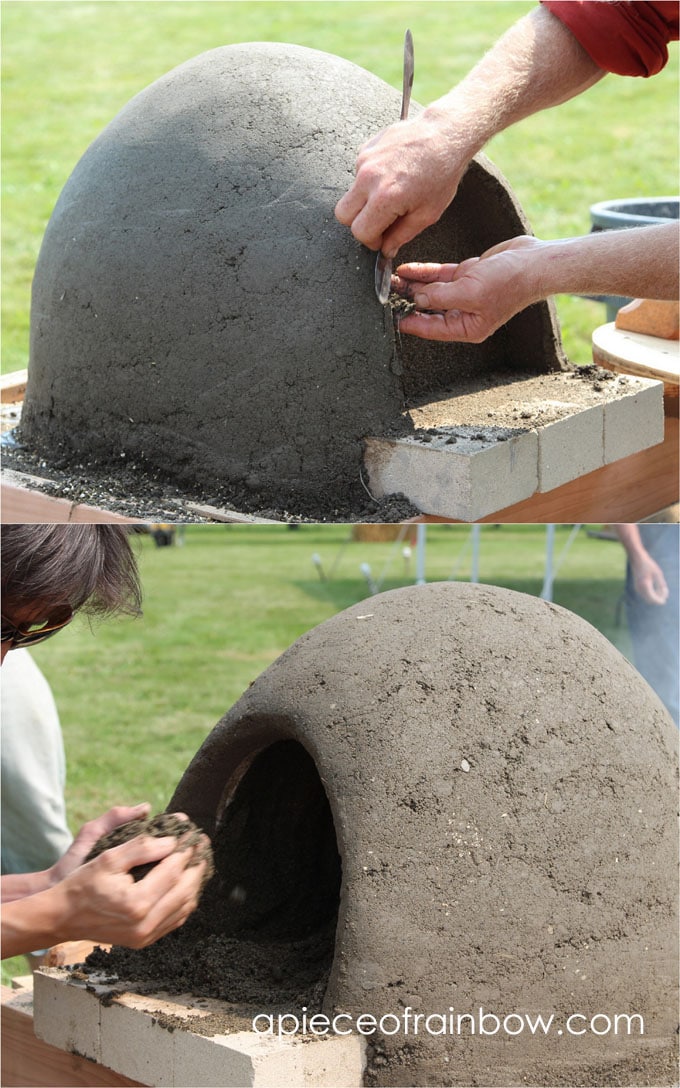
Step 4: Build the thermal layer for an effective wood fired outdoor pizza oven
The purpose of the thermal layer is to hold heat in its dense mass. Use the clay-sand mix we made earlier, take one handful at a time, and press it down to form a 2″-3″ shell outside the sand form. Be careful not to press into the sand form, which would cause the form to shift.
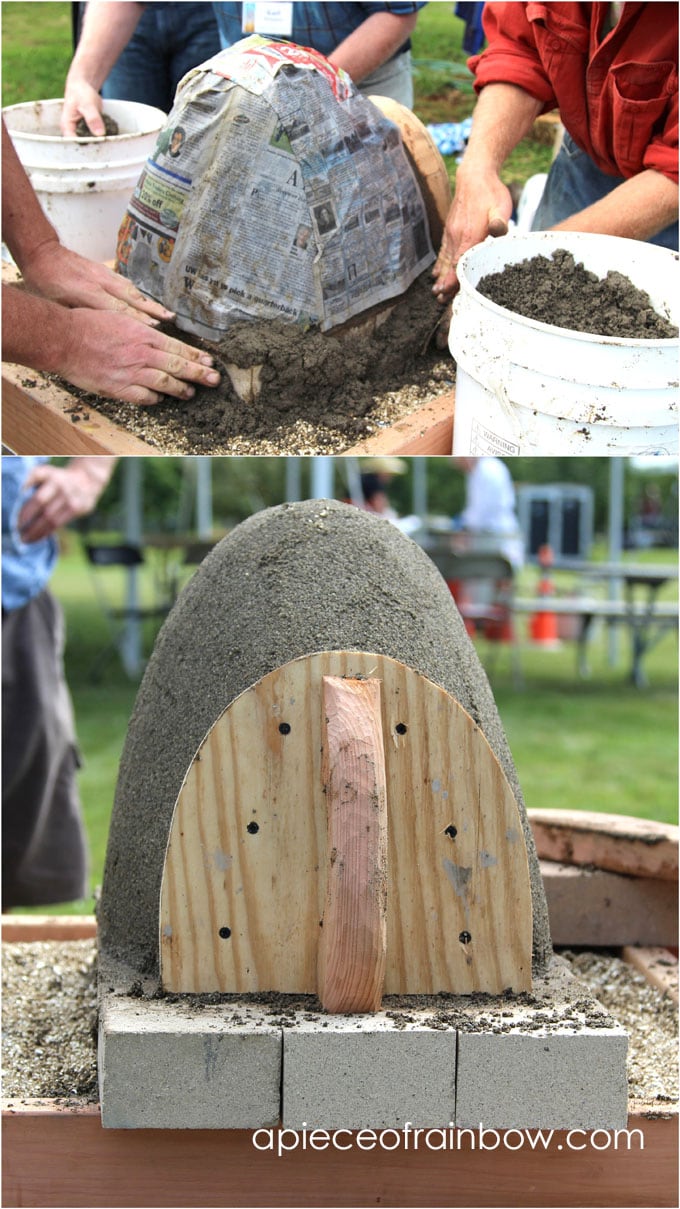
We also made a “molding” around the earth oven door opening using strands of straw dipped in clay, and formed it around the door opening to give it a more finished look and as a starting place for the next layer.
The final steps are adding insulation and finish layers.
Step 5: Insulation layer for the earth / cob oven.
The difference between this layer and the thermal layer is that the mixture here has more air, which is great for preventing heat loss of the thermal layer!
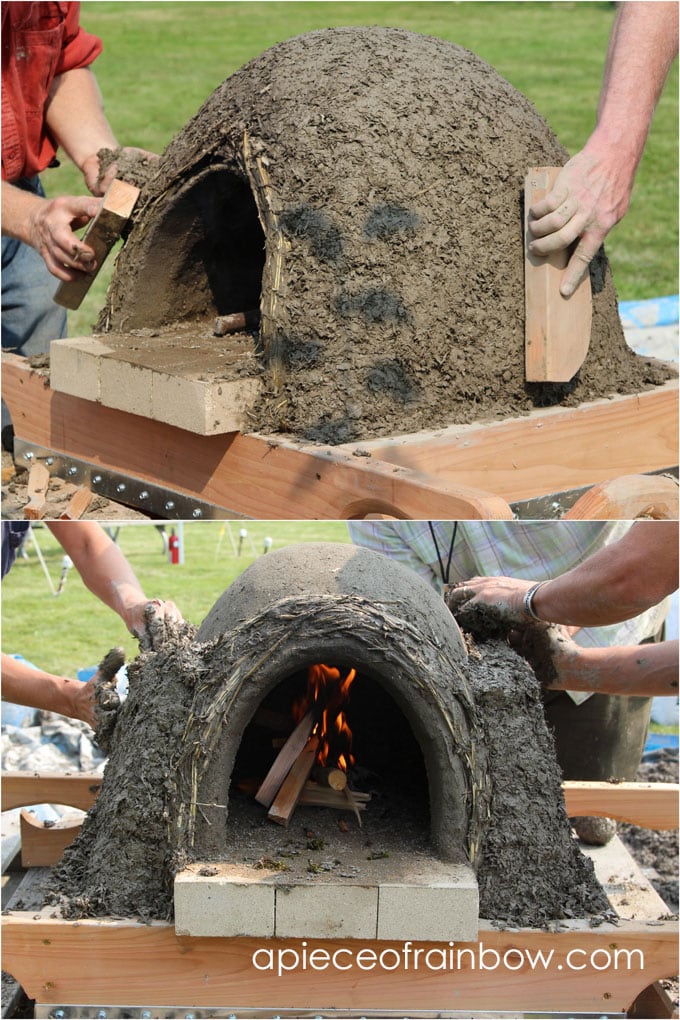
When coarse saw dust or wood shavings are mixed with just enough clay to hold the shape, and when they are exposed to the high temperature from the thermal layer, a new material- clay foam – is created. It’s sort of a light weight charcoal-clay which is airy, thus conducts heat slowly.
And of course, don’t forget to take a nice break and show off your muddy hands!
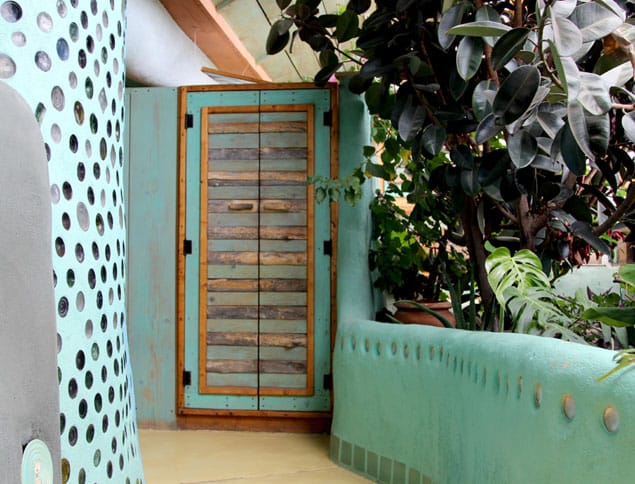
Finally step: the finish layer for your wood fired outdoor pizza oven!
An earthen plaster is applied to the final layer to give the cob oven a smooth finish and decorative sculptural details!

Here’s a beautiful book Using Natural Finishes: Lime and Earth Based Plasters, Renders & Paints with ideas and recipes from many cultures
Helpful resources on building a wood fired pizza oven !
- Here is one of the best books on oven building by our teacher Kiko Denzer, Building Your Own Earth Oven. It offers lots of valuable information from planning, site considerations, to foundations and roof options, as well as many variations on materials and designs. And Kiko’s website, where you can find great articles on building with earth, as well as his future workshops. You will not only appreciate his knowledge, but also his wisdom on how to live life more simply and more fully.
- another of my favorite books on earth building: The Hand-Sculpted House by the great pioneers Ianto Evans(Kiko’s teacher) and Michael Smith. I took a week long class from Michael and built a cob / straw bale room at a Waldorf School – one of the best weeks ever! Michael’s website, lots of great natural building methods, and workshops!
- if you love natural finishing, here’s a beautiful book Using Natural Finishes: Lime and Earth Based Plasters, Renders & Paints with ideas and recipes from many cultures
- The Bread Ovens of Quebec is an exquisite book. It’s out of print, but available as a free ebook via the Canadian Museum of History. It’s possible that it might be back in print soon.
First, you can download the free Ebook with lots more details here:

Once you get your hands DIRT-Y, you will fall in love with earth building. It’s a magical way of building that connects us with our essence, with the elements of earth, fire, water and air, with makers across centuries and continents, and, with one another.
Now you can bake this easy and AMAZING no knead bread recipe!

Easy and AMAZING no knead bread recipe
Download the free Ebook with TONS of more details and photos:
Happy building!
Source: apieceofrainbow.com
