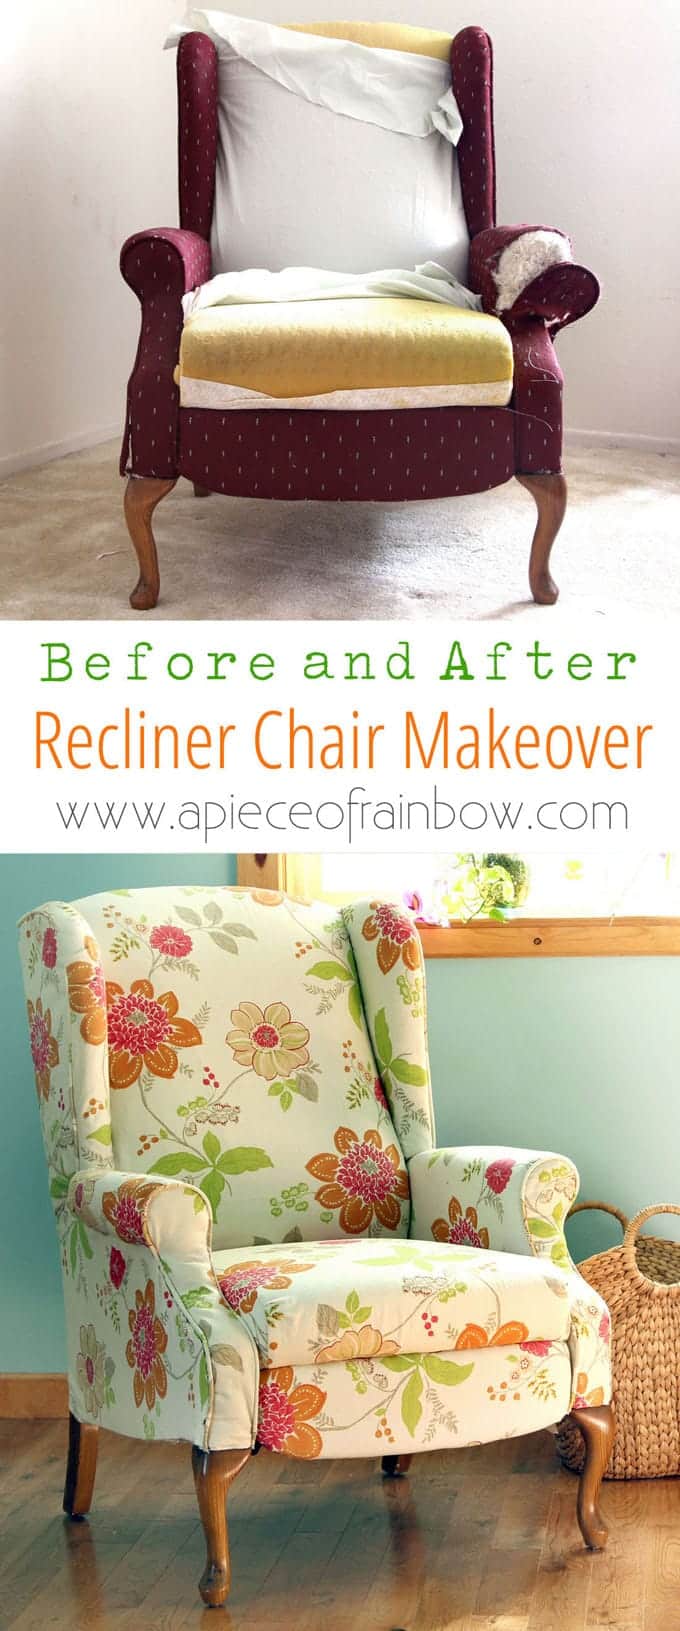
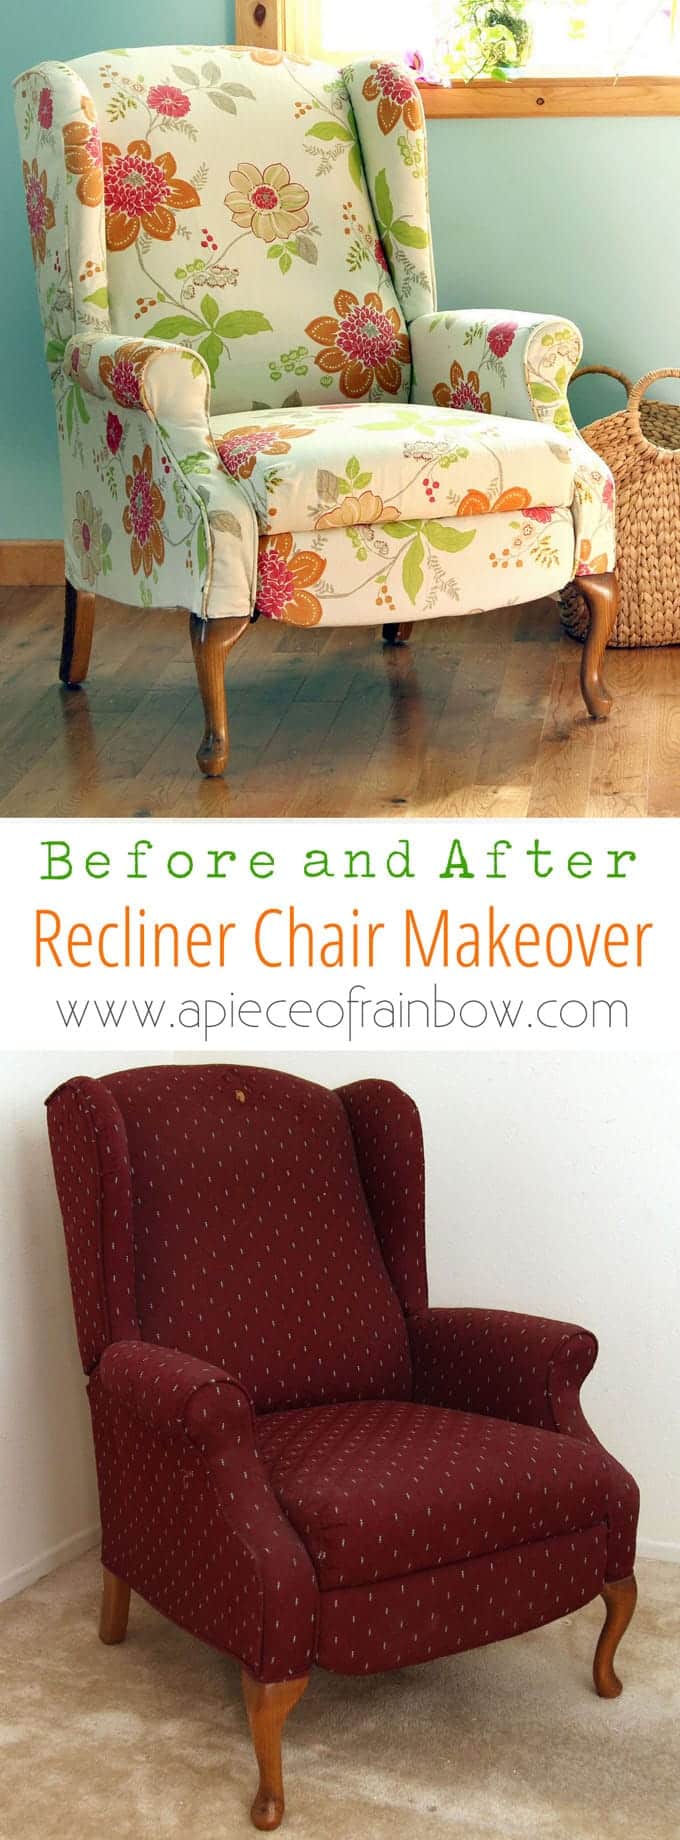
This before after is my very first attempt at a fabric chair makeover.
OK, it’s not just a fabric chair, it’s a wing-back recliner! Oh my, what did I get myself into?
To be honest, I had to face my doubts and fears before jumping into my first ( and not-so-beginners’ ) re-upholstery project.
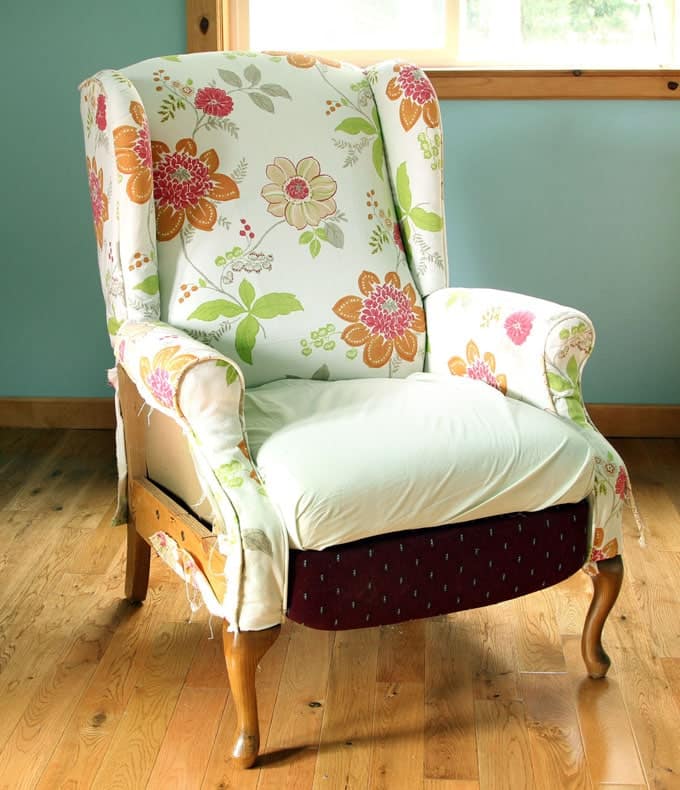
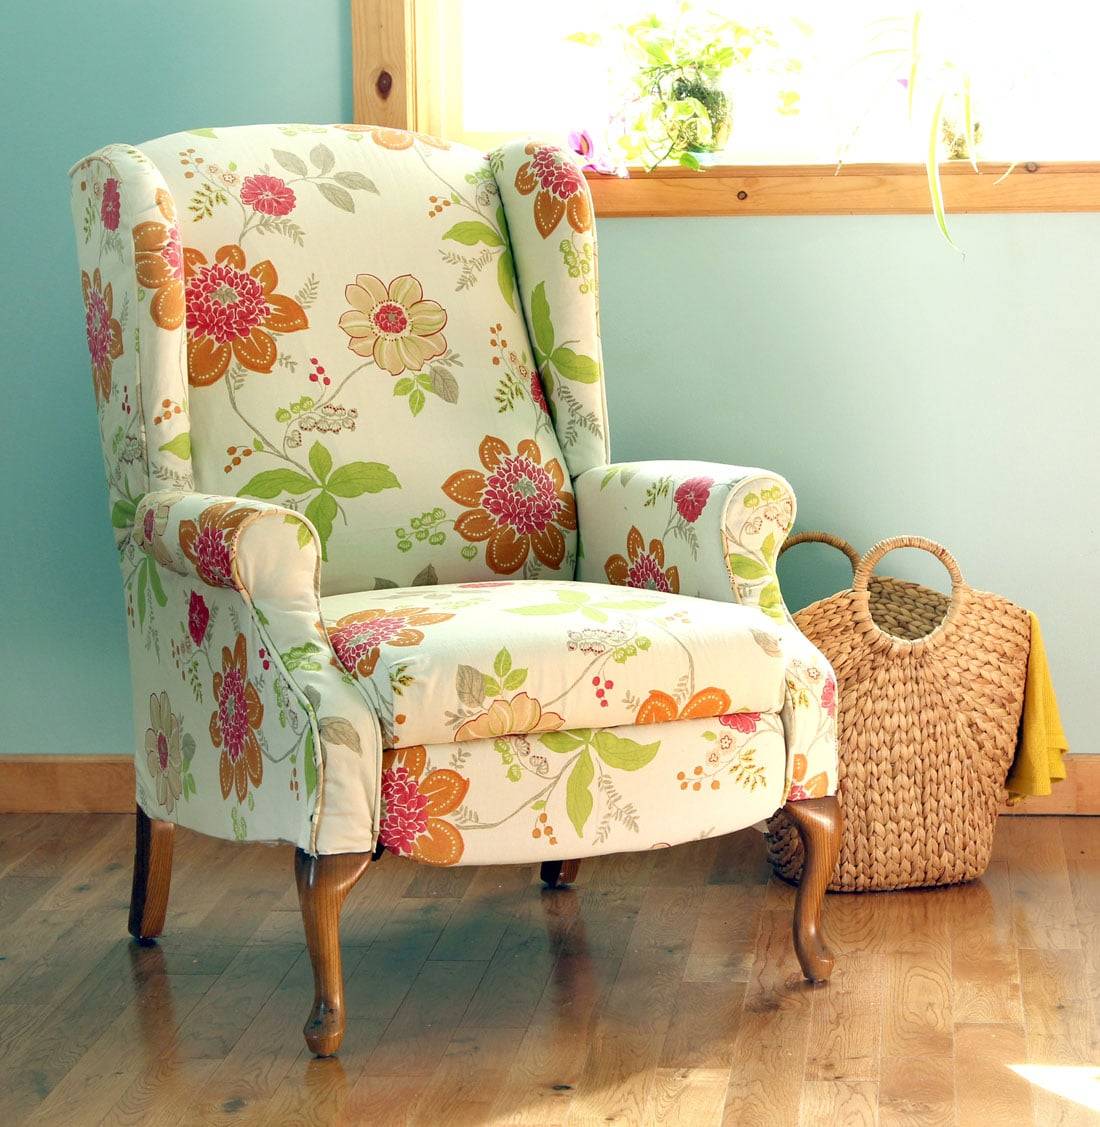
Totally worth it: we love the fresh new look of this makeover, and it was quite a fun learning process!
In this step by step tutorial , I will share with you an overview of everything I have learned about how to makeover an upholstered recliner chair, and lots of helpful tips for beginners . If I can do it, so can anyone!
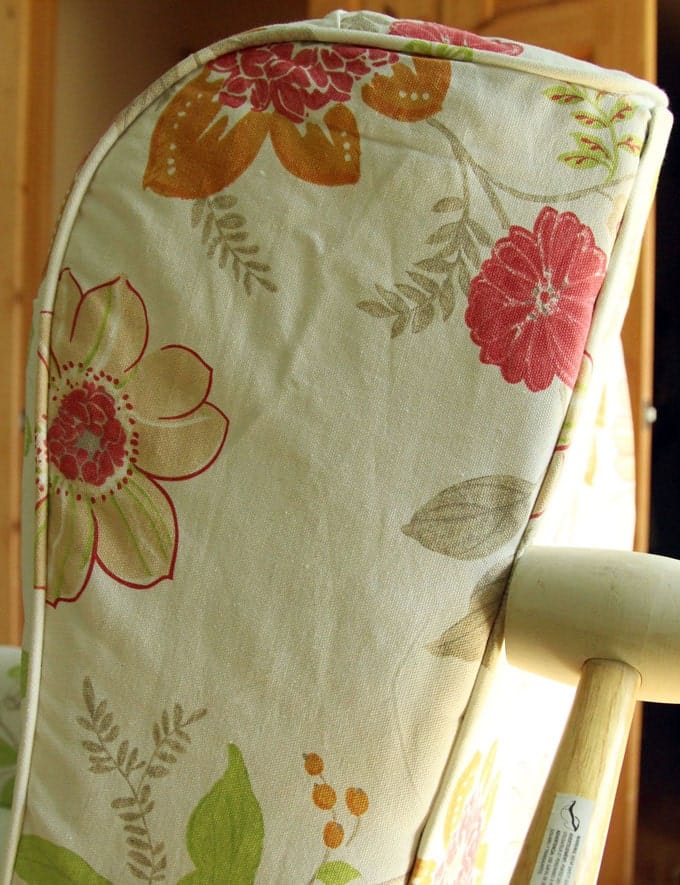
The beginnings: this wing-back recliner chair was a Craigslist find. Although it is a well-made chair, I never liked the fabric.
It sat in our guest bedroom until we started our epic decluttering a few months ago. The rule for us was: only keep things we truly love, and let go of the rest. ( More on that in another post!)

So a decision has to be made: should we donate it, or transform it into a chair that spark joy every time we see it?
You know I can’t resist a potentially fun before after DIY project. When my dear mom happened to send me some beautiful floral home decor fabric, I took a deep breath, and dived in.
Note: please check out a list of very helpful tips at the end before you start – tips such as : take photos of each step when you remove the fabrics, so you can reverse the steps when putting new fabrics on!
IMPORTANT: follow basic safety rules when working with tools and sharp objects! Learn to use each tool properly. Use caution and work safely. Wear good quality working gloves and safety eye goggles when needed.
The essential tools needed for removing old fabric: ( Some of the helpful resources are affiliate links. Full disclosure here. ) a flat screw driver to remove strip tacks, an upholstery staple remover , and safety eye goggles to protect yourself from potential flying staples!
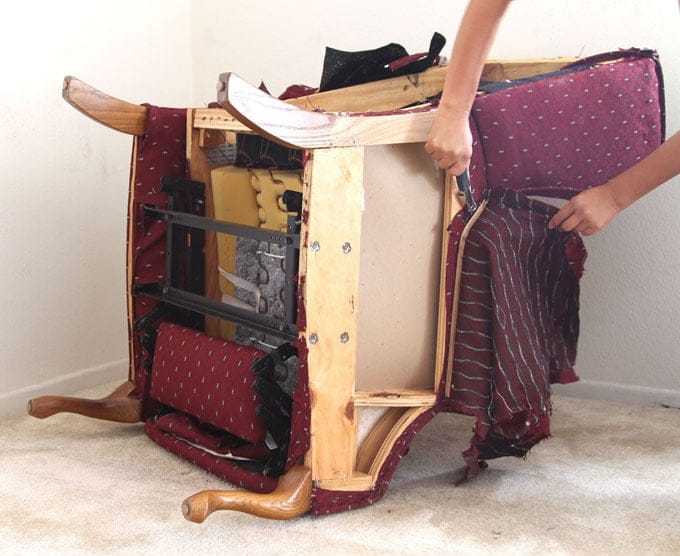
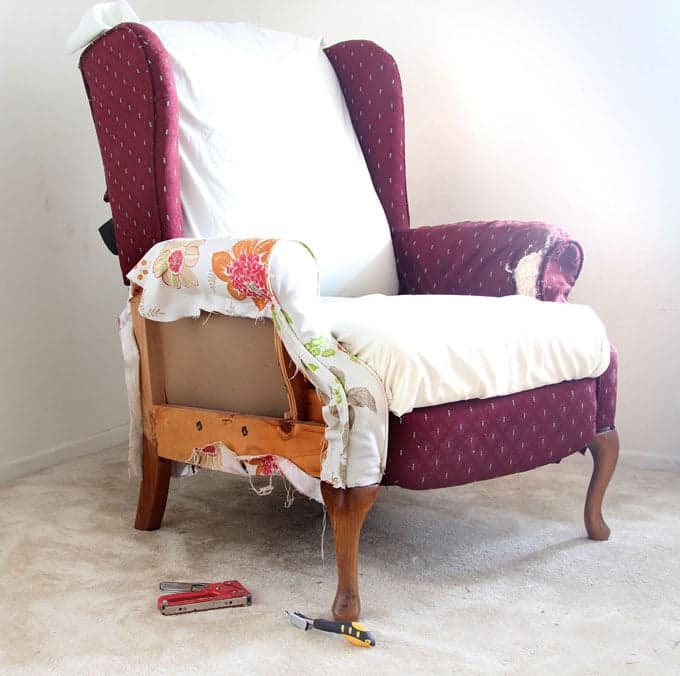
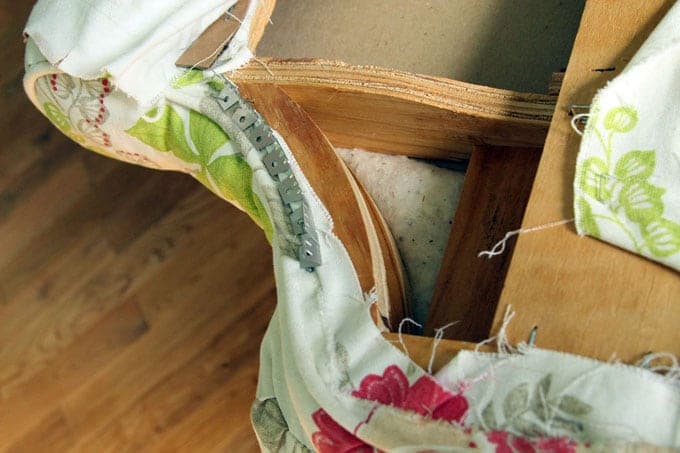
Step 1: start from the back
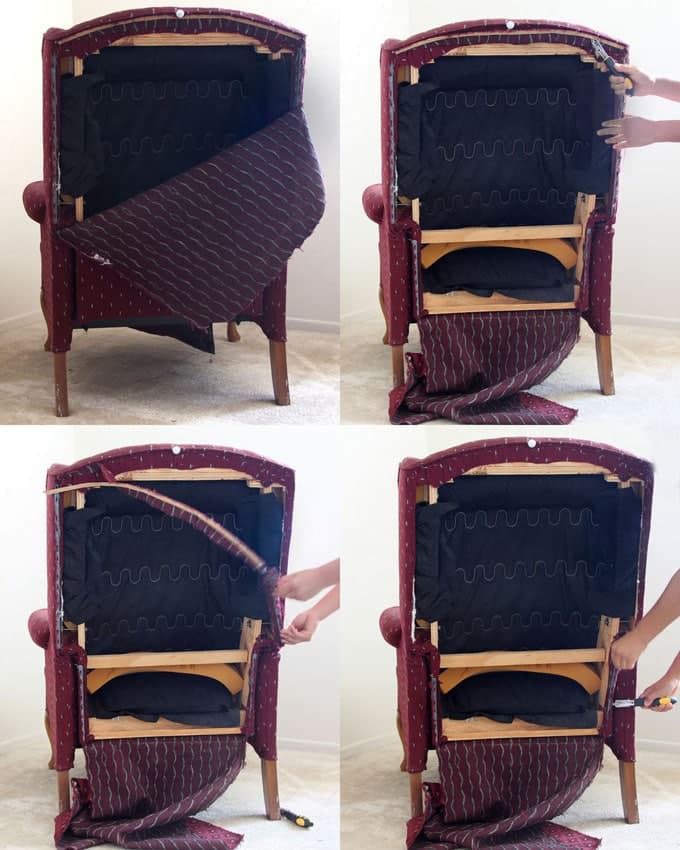
The back piece is held in place by cardboard strips and upholstery tack strips. Once we remove the back fabric, we get a clear view of how the other pieces are held together so we can begin to remove them.
The upholstery staple remover is such a great little tool that makes the job so much easier. All the staples come up pretty easily with the help of this tool!
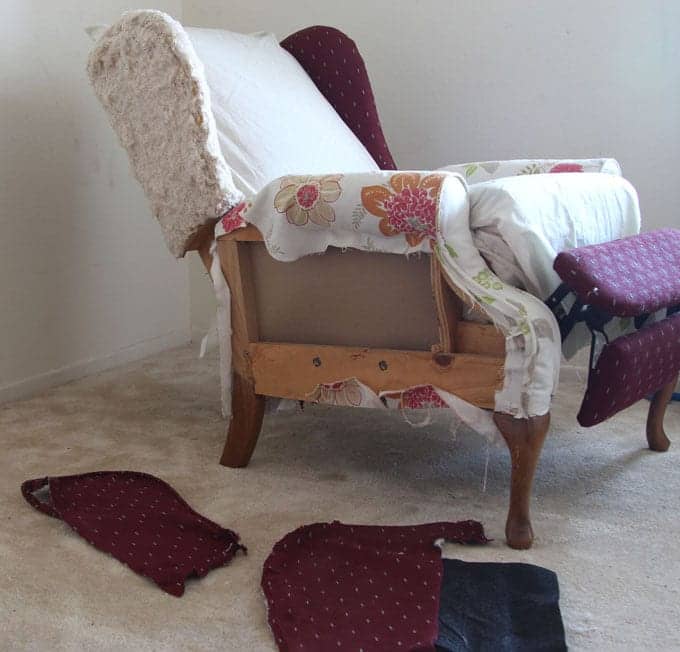
Step 2: remove front fabrics
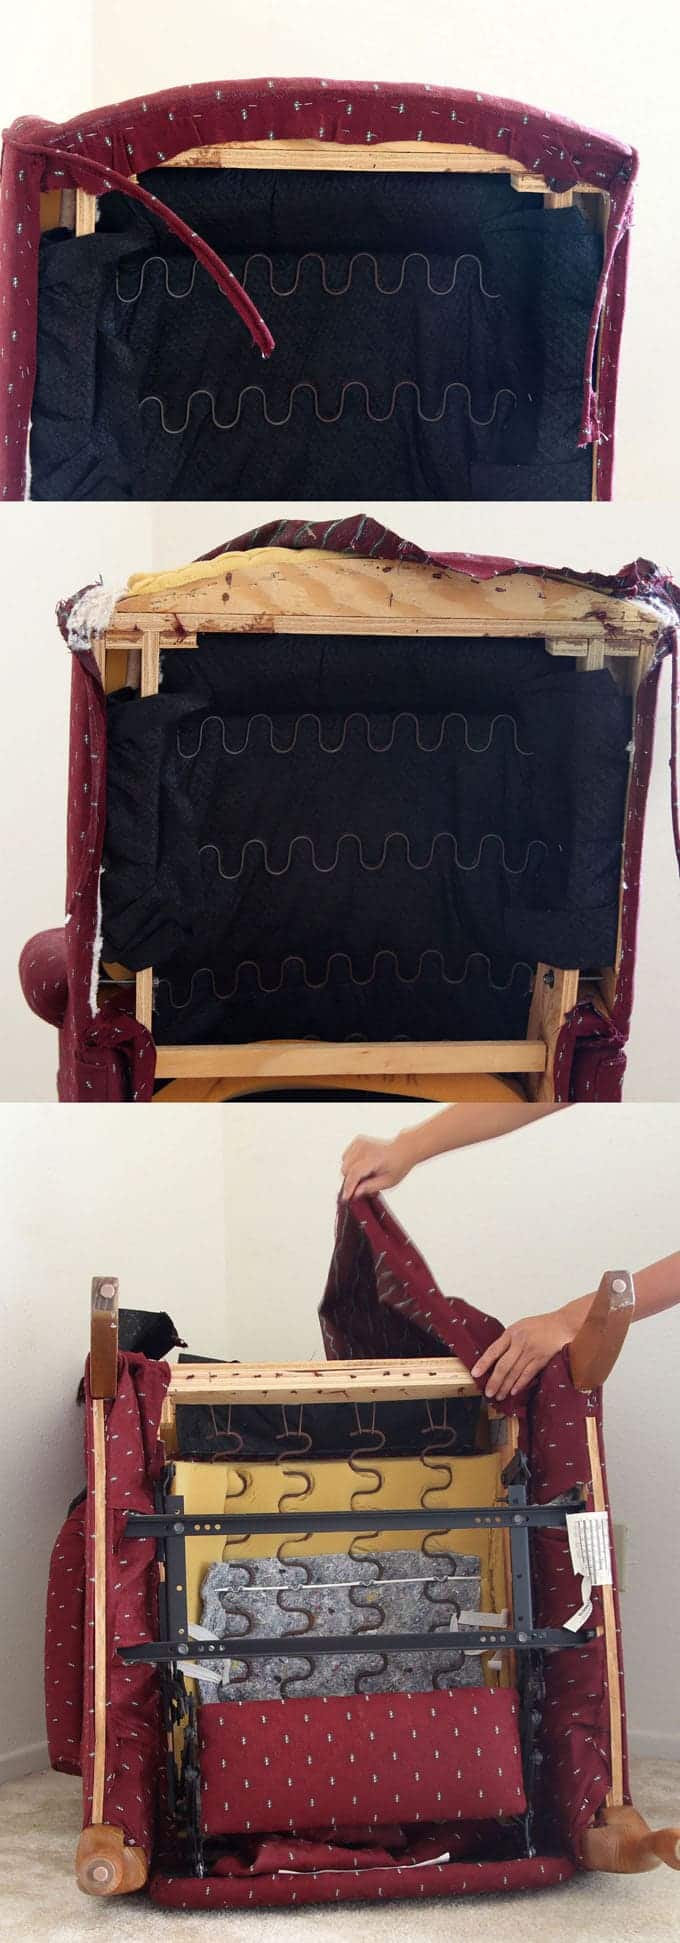
Don’t strain yourself. Turn the recliner chair over when working on the bottom side.
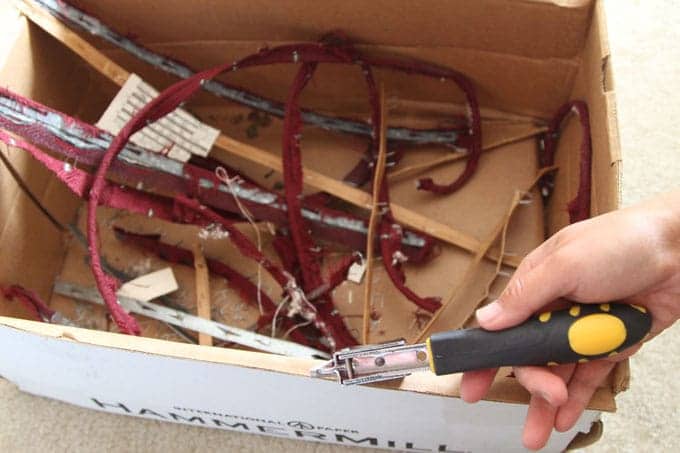
IMPORTANT: put all the loose staples and tack strips in a box so no one steps on these sharp debris!
You can save the piping cords and cover them with new fabrics later.
Related article: How we “remodeled” an outdoor patio using pallets, as renters!

Step 3: remove side panel fabrics
Pay close attention to how the side panel fabrics are attached to the recliner chair frame. Take LOTS of photos for later reference!
I found this area to be the most challenging part of the whole project.
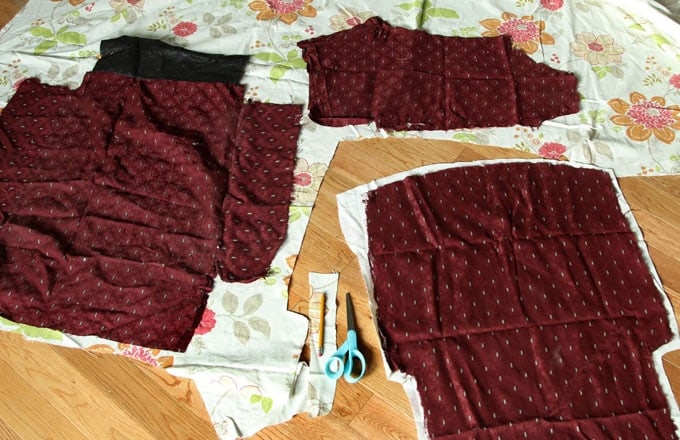
Tip: use the removed fabrics as patterns. Trace them onto your new fabric using a water erasable fabric marking pen or a pencil.
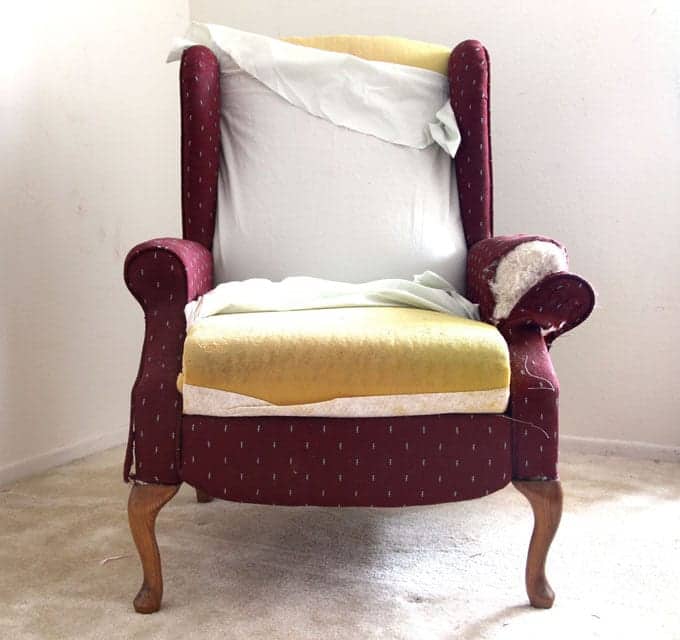
I had planned to remove all the old fabric, then start adding new fabric. But something unexpected made me change my plans.
When I started removing fabrics from the arms and side wings, I discovered cotton lining!
I don’t know if this is the pro way, but I decided to remove the fabrics carefully, keep the cotton padding materials in place, and cover them up with the new fabric right away.
I also added extra pieces of lining fabric to give extra protection to the foam cushion on the seat and back.
Tools needed for putting new fabric on the recliner chair:
- fabrics, water erasable fabric marking pen, and scissors
- an upholstery stapler: I used a staple gun which I already have, but an upholstery stapler would work better in this case.
- sewing machine, piping cords (I reused the old ones )
- upholstery tack strip, flexible upholstery tack strip, ( these may look intimidating, but they are not that hard to use!) a rubber mallet for hammering, and a pair of good quality working gloves when working with tack strips.
Step 4: cover side arms and wings with new fabric
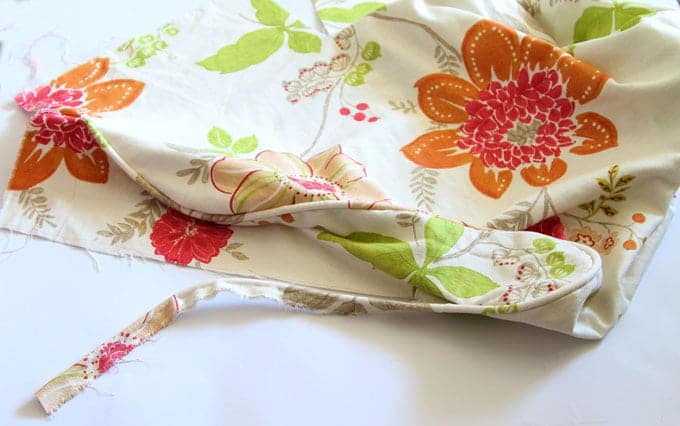
The sewing went quite smoothly even for a beginner like me, it really helped a lot to use the old fabric pieces as templates and reuse the piping cords.
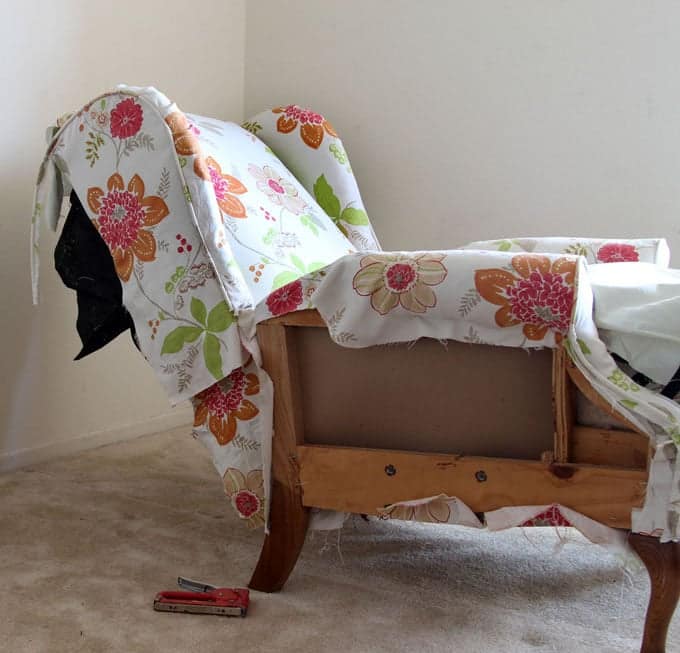
I used a staple gun which I already have, but an upholstery stapler would make the work a lot easier! Be careful when working with staplers or staple guns. Wear safety goggles and learn to use the tools correctly.
Step 5: cover front and back with new fabric
In these final two steps of the makeover, we will need to use some scary looking upholstery tack strips and flexible upholstery tack strip.
They are actually easier to use than you think. Wear good quality working gloves and follow basic safety rules. These tack strips can flap around when you try to break them. Use caution and work safely.
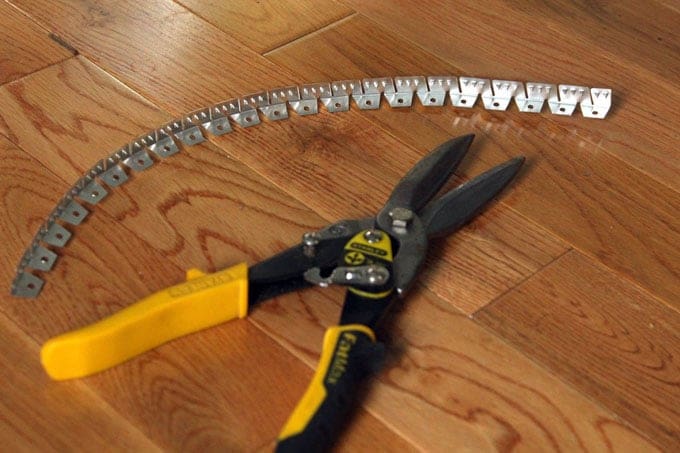
I find it easier to break the tack strip into the correct length using pliers. After bending it back and forth a couple of times, it breaks easily.


Use a rubber mallet for hammering, it’s much gentler on the fabrics than a metal hammer. Below is a great video tutorial on how to use upholstery tack strips.
Step 6: finish side panels, etc.
The side panels are the most challenging part of the process. The flexible upholstery tack strip is a lot easier to cut than the straight ones.
The video below shows how to work with flexible tack strips.
By setting the chair into a reclining position, we can cover the foot rest easily. Can you believe we are at the end of the before after makeover project?
Now a recap of some helpful and important tips of this recliner chair makeover project:
- Take photos of each step when you remove the fabrics, so you can reverse the steps when putting new fabrics on!
- Follow basic safety rules when working with tools and sharp objects! Learn to use each tool properly. Use caution and work safely. Wear good quality working gloves and safety eye goggles when needed.
- When removing old fabrics, put all the loose staples and tack strips in a box so no one steps on these sharp debris!
- You can use the old fabric pieces as templates and reuse the piping cords.
You may also love: 12 Easy DIY pallet sofas and coffee tables

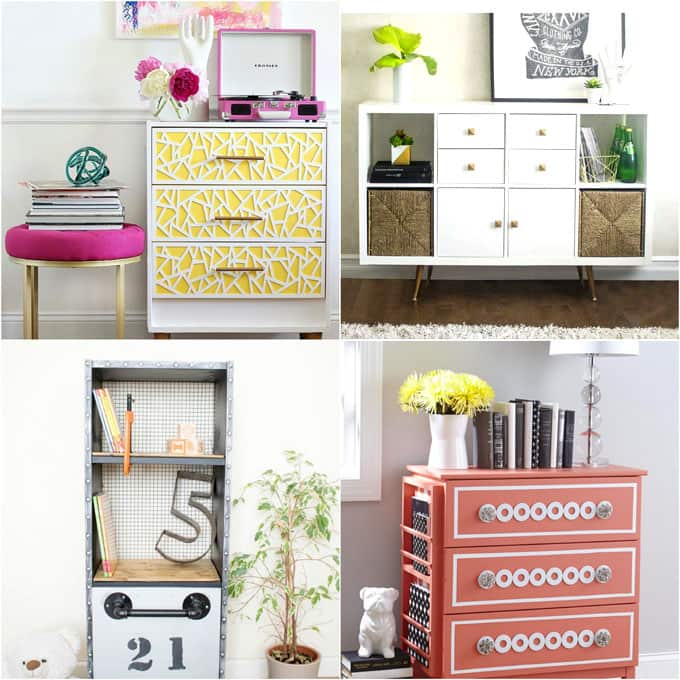
Easy custom furniture with 18 beautiful IKEA hacks.
Happy creating! See you next week!
Source: apieceofrainbow.com
