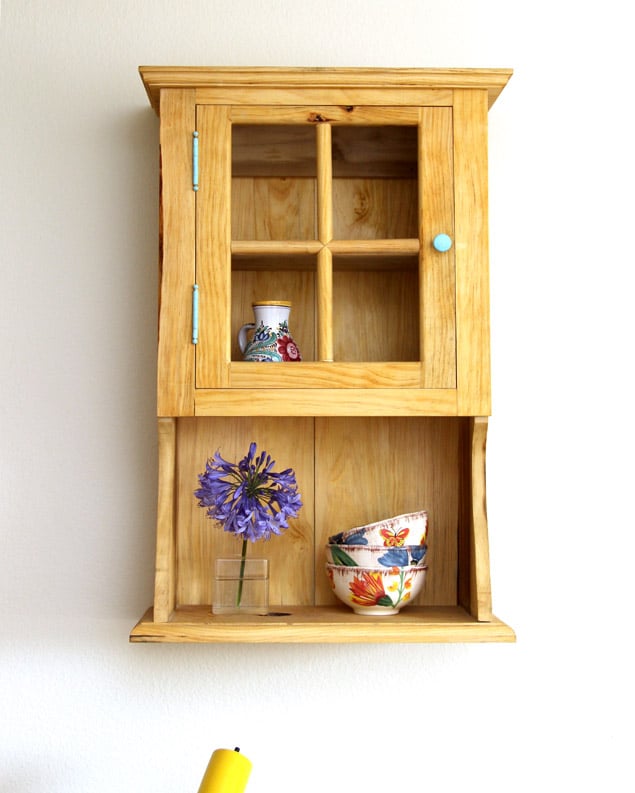
 Confession: I was a big power tool phobia who never even used a drill, until about 6 months ago!
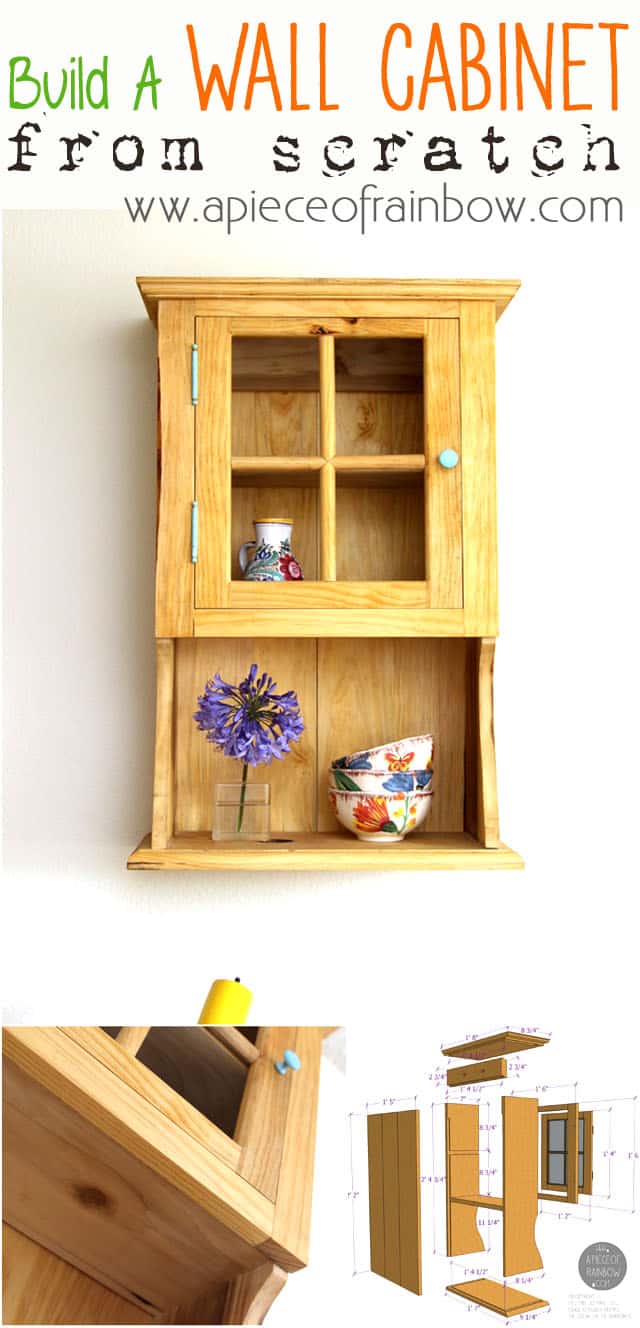
I have always wished to design and make furniture pieces that are uniquely meaningful and beautiful for our home. Finally my wish became irresistible, so I took a deep breath, jumped into a 16 week woodworking class at our local college which happened to have one of the best programs in the country, and made this cabinet which I designed from scratch.
I understand most of us don’t have all those fancy shop tools. I just want to share with you what the class was like, and the detailed plan here for those of you who would like to make it. It can totally be done with a few tools most people have, such as a table saw and a jig saw. 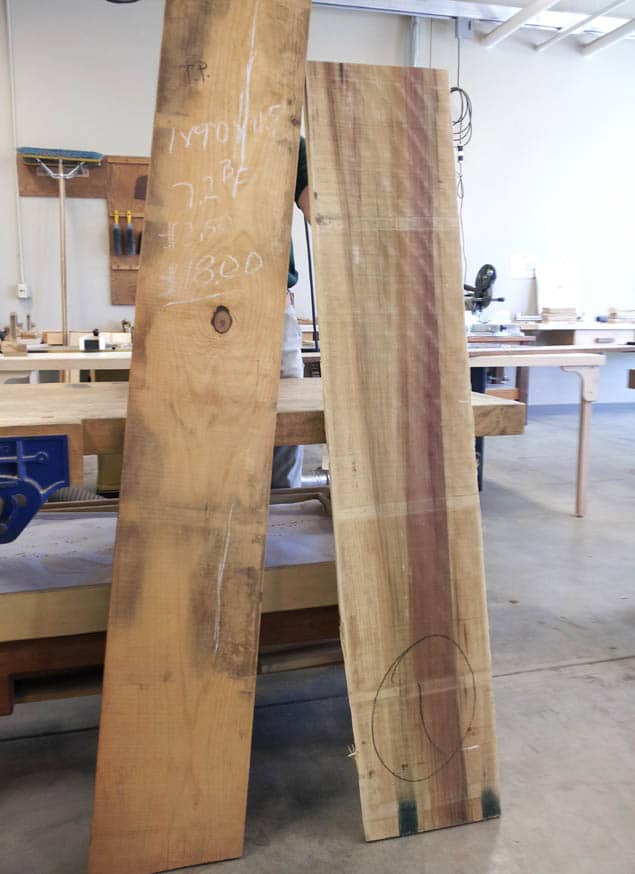 This is what I started with! A little background story – the college has an amazing Urban Forestry Program where they save those felled tree from going to landfill, and use them in our woodworking classes!
So our cabinet is made of our local Torrey Pine: “the rarest pine species in the United States, an endangered species growing only in San Diego County and on one of the Channel Islands”-Wikipedia. It has special meaning to us because Jeff and I love hiking at the Torrey Pine State Reserve! And the purple one is poplar, which I used on the sides.


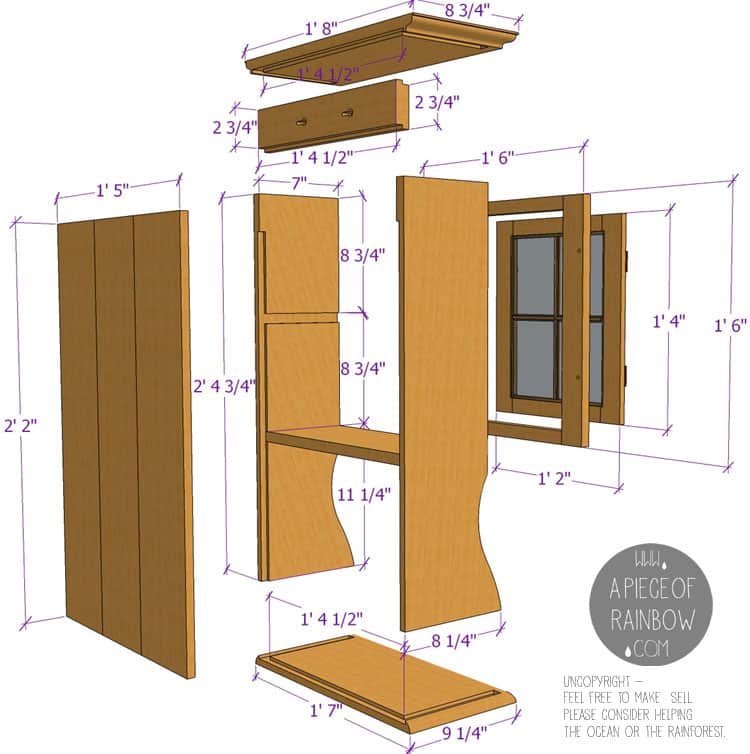
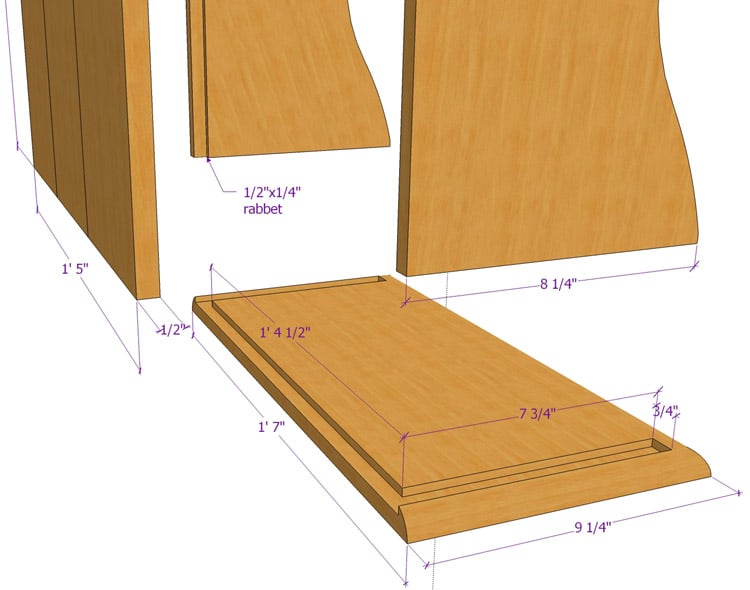
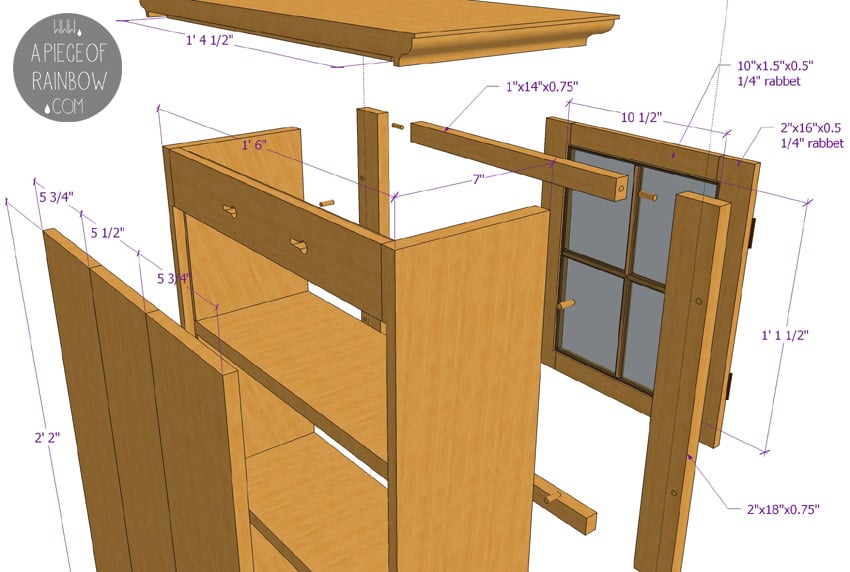 The design is inspired by early American jelly cupboards and shaker cabinets. We wanted an open cabinet with shelves so we can see and appreciate those pretty bowls and potteries we love. We also love the charming country style of those primitive furniture pieces.
First step is planning out all the piece, roughly cutting them into shorter length, and getting the wood all nicely smoothed and squared ( I learned to use a lot of machines in this step, which I will skip because most of us can get finished wood at Homedepot, etc!) The each piece is cut, joinery added with a router, and dry-fitted to make sure they all fit. 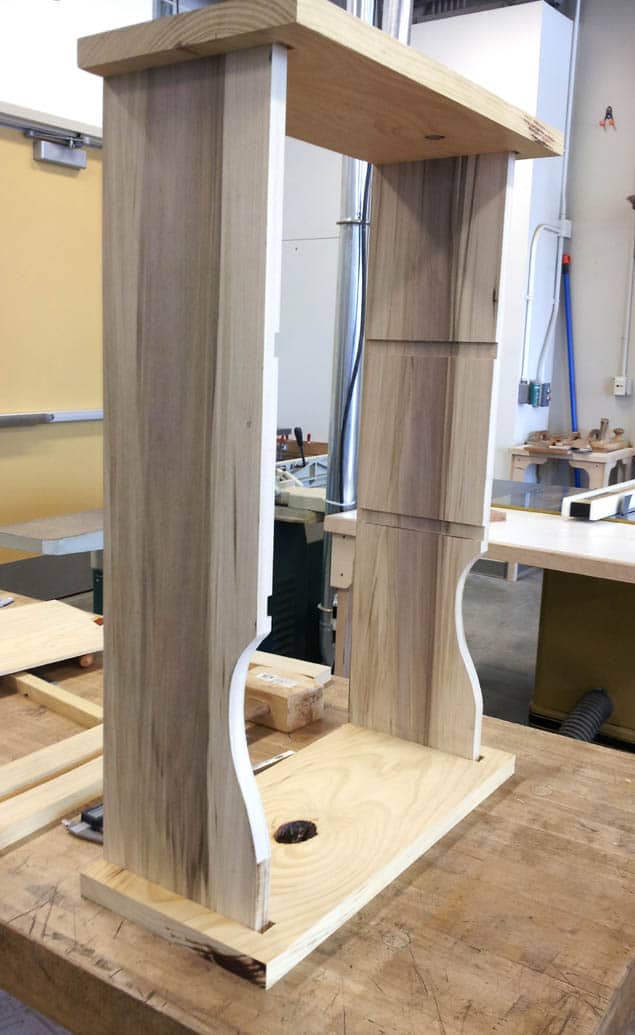
 It’s a good practice to use the plan as a guide but use actual measurements as you start building to make sure all pieces fit tightly.
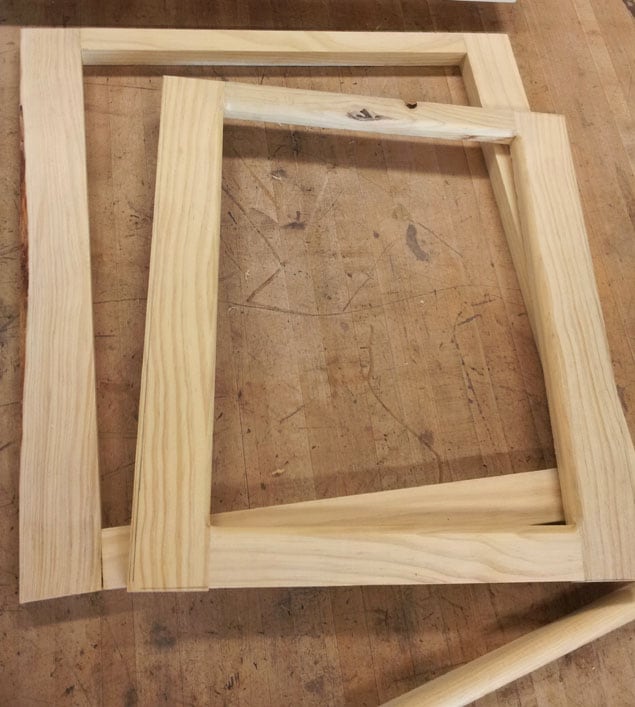 The face frame is made slightly larger than needed. Put it on top of the dry fit cabinet, trace with a sharp pencil the sides, and sand the face frame on a belt sander to match the pencil line.
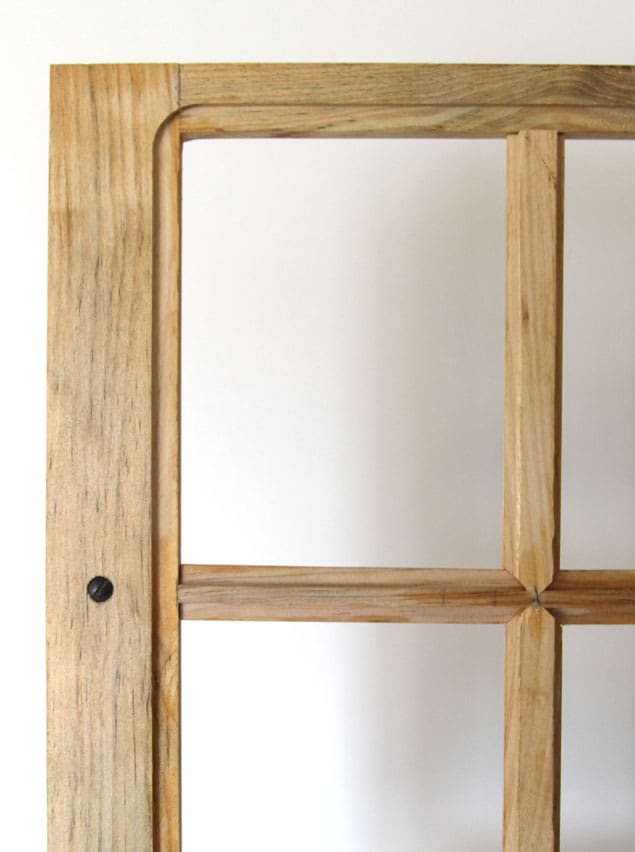 The grid pieces for the door glass was cut on the router table, but you can also get ready made trim / molding pieces for that! Mark the hinges on the flush inset door and face frame, and cut out the thickness of the plates with a chisel. Attach hinges to door and face frame with screws.
I decided to paint the hinges and door knob blue for a bit of color. Attach the door knob, drill a hole on the shelf where the screw of the knob is and glue a magnet inside to hold the door closed.
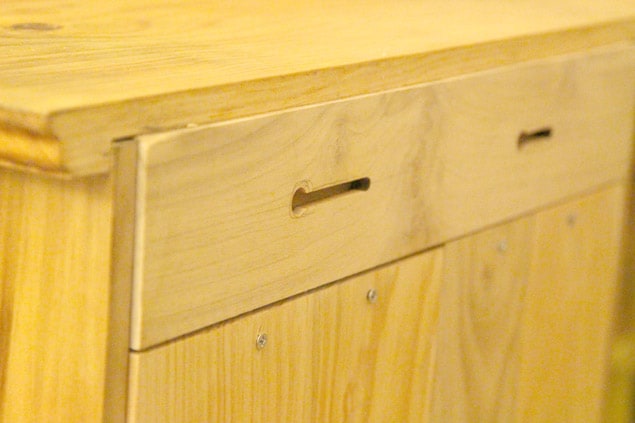 The back panel is the only place where small screws are used to allow wood movement – 1/8″ every 8″ across the face grain.
The entire piece was sanded with the slurry method : sand with 220 -400 grit sand paper and create a oil + fine saw
dust slurry mixture, which fill in the pores of the wood and create a marble like finish after doing it daily for 7 days. Honestly I did 3 coats and was happy with it already!
 I learned a lot from this class. I met some great people, and went from a phobia to a lover of power tools! I also gained a much deeper appreciation for the fine craft of woodworking. There is so much to learn!
If you are thinking about taking a woodworking class, go for it! You will feel a door just opened to many new creative possibilities, and, no worries – you won’t be the only girl in the class! =)
xo
Source: apieceofrainbow.com
