Sprouts are among the freshest and most nutritious of all vegetables.
I have tried to grow sprouts using the traditional jar method with mixed results. Sometimes the sprouts would spoil if I forget to rinse them frequently.
Then I tried the “soil sprouted greens” method, which is a combination of growing micro-greens, sprouts and baby greens. It is SO much easier and the results are so much better!
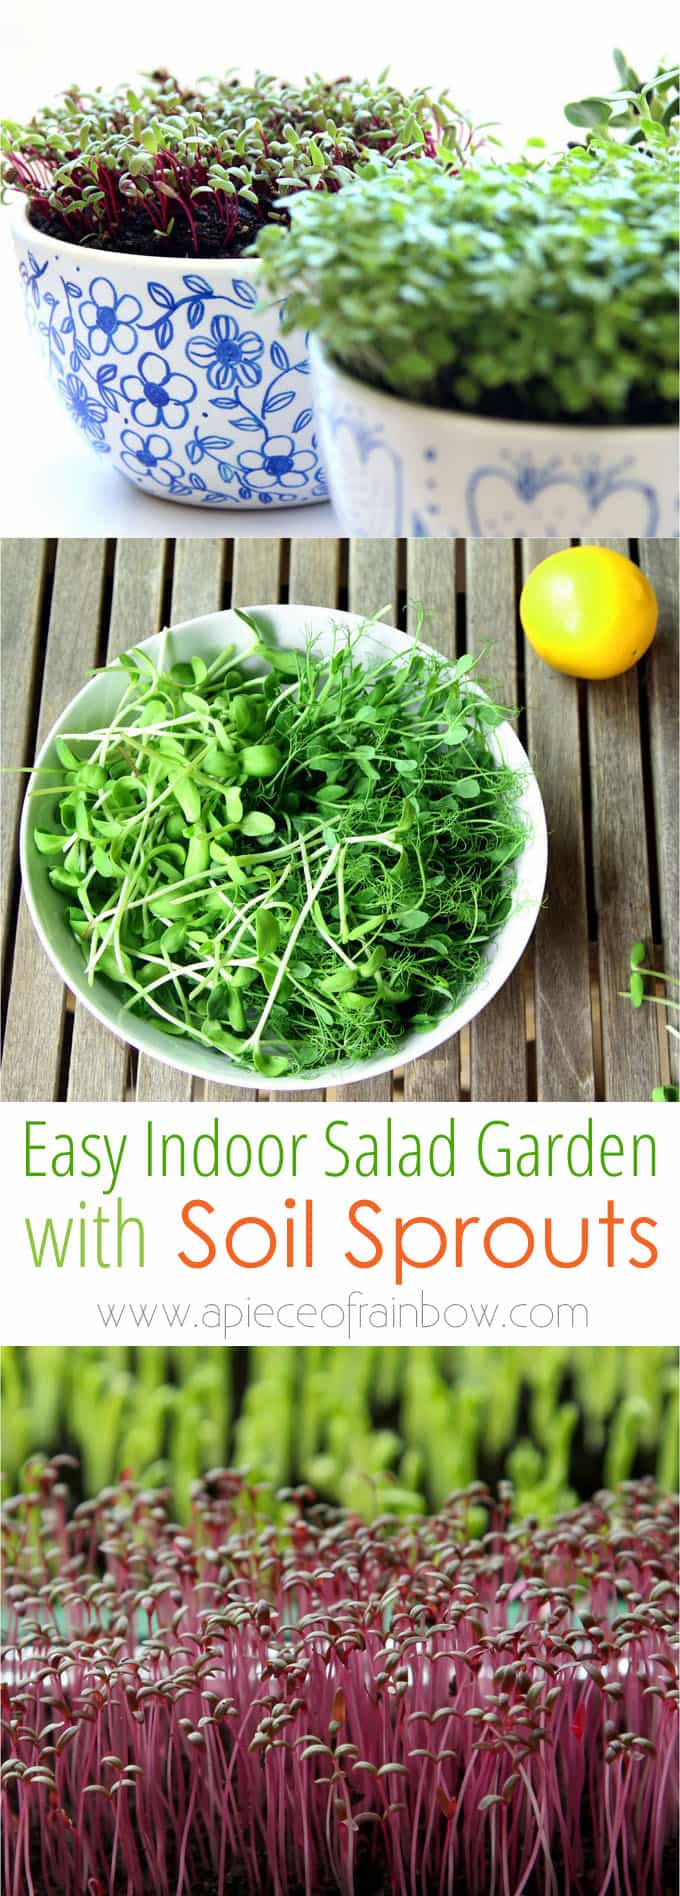
This method allows anyone to grow juicy sprouts and baby greens in less than 2 weeks indoors or outdoors, without a greenhouse or fancy equipment.
I am thrilled to share with you everything I have learned, especially now in the midst of winter, when we all crave fresh and nutrient-packed greens!
I learned this wonderful method from a great book: Year Round Indoor Salad Gardening by Peter Burke.
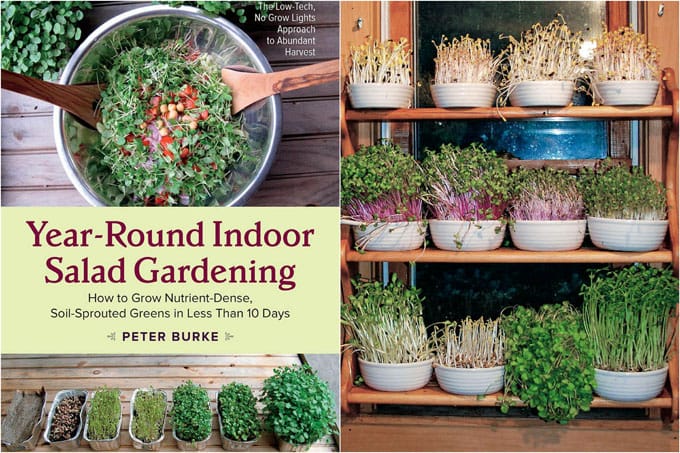
You can see he has containers of sprouts growing in stages for a continuous harvest.
The materials and tools needed to grow soil sprouts are really simple, and most can be found around the home. ( Some of the helpful resources are affiliate links. Full disclosure here. )
Containers: unlike most planters, the containers we use to grow soil sprouts do not need drainage holes. The ideal depth is 2″ to 3″. A lid is not required, but great to have. More on that later.
Containers I have tried and liked: cereal bowls, aluminum loaf pans , I used these which came with lids, and a plastic grow tray with dome.
The ideal temperature is between 60 F and 75 F, like most indoor environments.
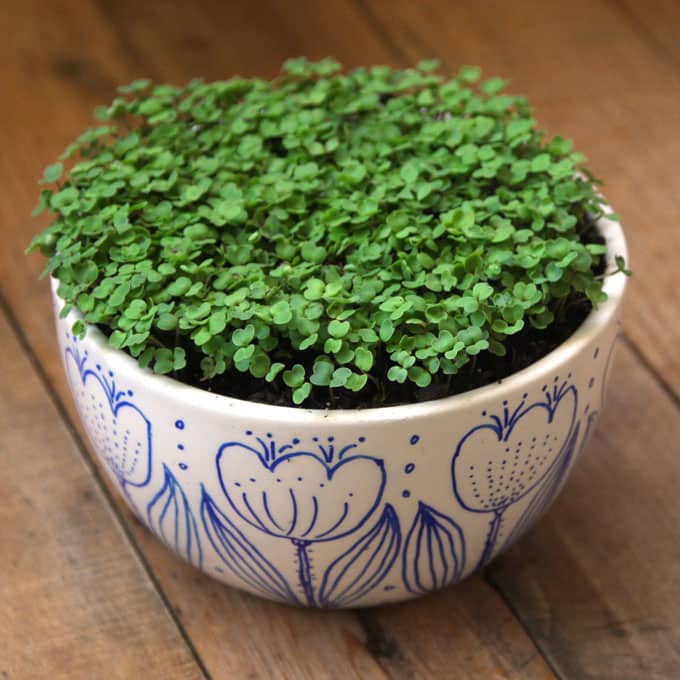
By the way, if you are wondering where to get these cute cereal bowls, they are actually white bowls with DIY Sharpie art, see how to make yours here –

Step One: Start with good seeds.
Old seeds or improperly stored seeds will not germinate well. Here’s more information on how to test your seeds and also a super fast way to start your veggie garden-

My favorites for growing soil sprouts are speckled or green pea seeds, black oil sunflower seeds – yes, they are often sold as bird seeds, and larger type radish seeds such as Daikon.
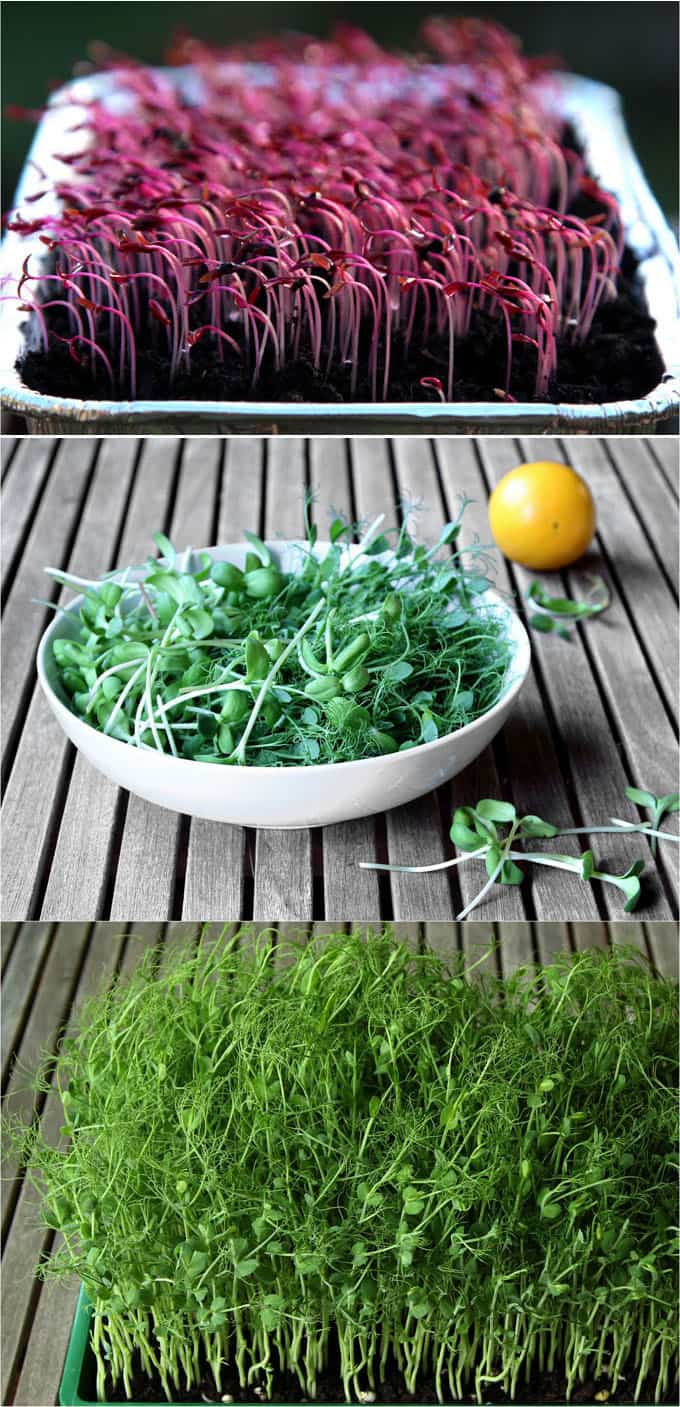
Other popular choices and easy to grow seeds are Broccoli, Amaranth ( the gorgeous red sprouts you see here is Garnet Amaranth ), and Buckwheat seeds.
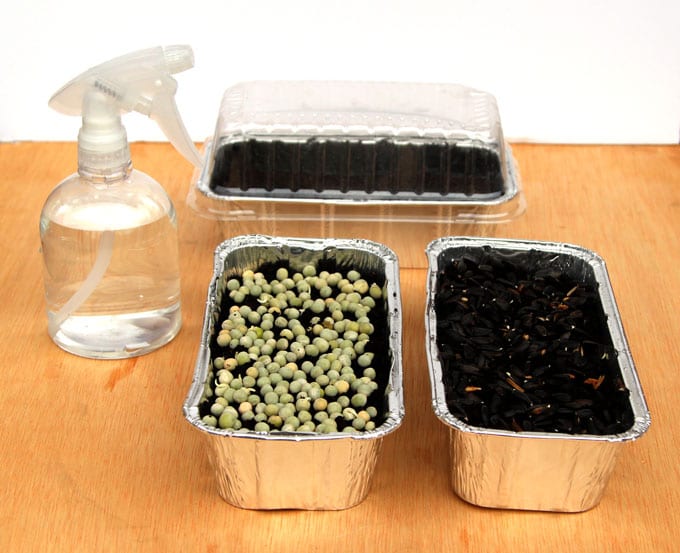
Larger seeds such as peas and sunflower seeds can be soaked in clean, cool water for 8-24 hours to speed up the process. You will need about 2 cups pea seeds or 1.25 cup sunflower seeds for a 10″×20″ size tray.

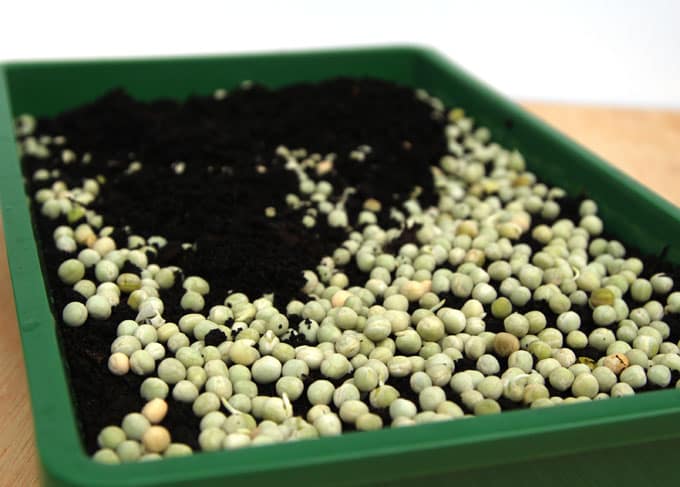
Mix some good quality potting soil in a large tub with water until the soil is moist but not soggy.
Spread a 2 inch layer on the bottom of each growing tray.
Scatter the seeds evenly in one layer. Seeds should cover the entire tray.
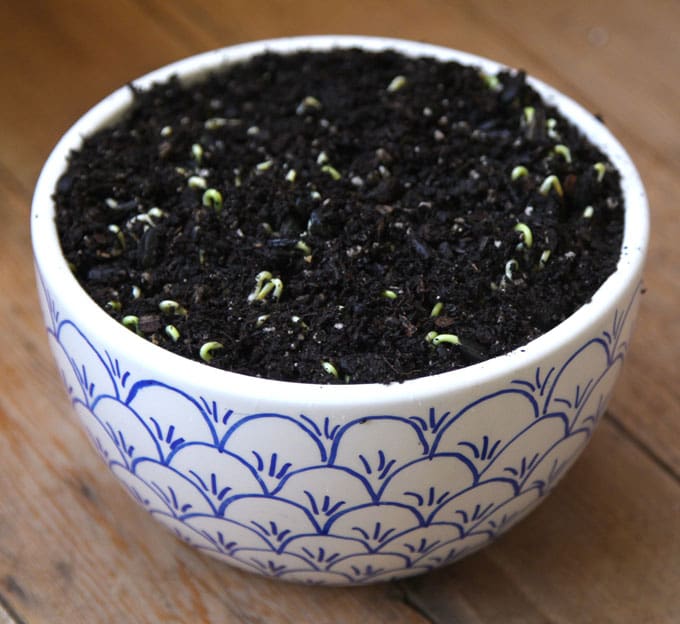
Add a thin layer of soil, and put the lid on. That’s all the work you need to do at this stage!
The lid will keep the seeds and soil moist until the seeds sprout. If your container does not come with a lid, you can use plastic wrap or bags to help retain humidity.
At this stage the tray can be stored in the dark or in a bright location. Avoid too much direct sun which may cause the soil to overheat. Just wait for the tiny sprouts to come up in 1-3 days.
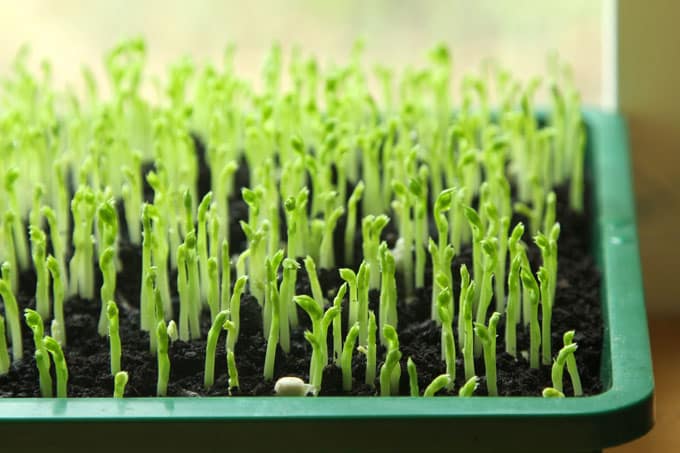
Step Two: move sprouting seeds to a bright place
Once the seeds start sprouting, you should keep them in a bright location. Direct sun is ok.
The lids can be removed at anytime as soon as the sprouts start to grow.
The sprouts need to be watered once every 2-3 days, depending on the temperature and humidity of the environment.
Gently touch beneath the soil surface to see if it is dry. You can also train yourself to become aware of how heavy/light the tray is. If the tray feels light when you lift it, it means the soil is getting dry.
In the photo below, you can see the beautiful red Garnet Amaranth is leaning towards the light. Rotate the tray to help them grow more evenly.
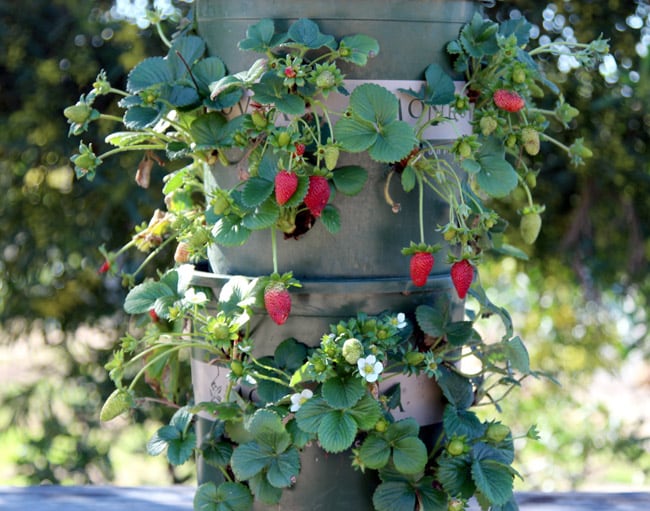
Related: Make a strawberry tower with built-in reservoir!
Step Three: When to harvest soil sprouts.
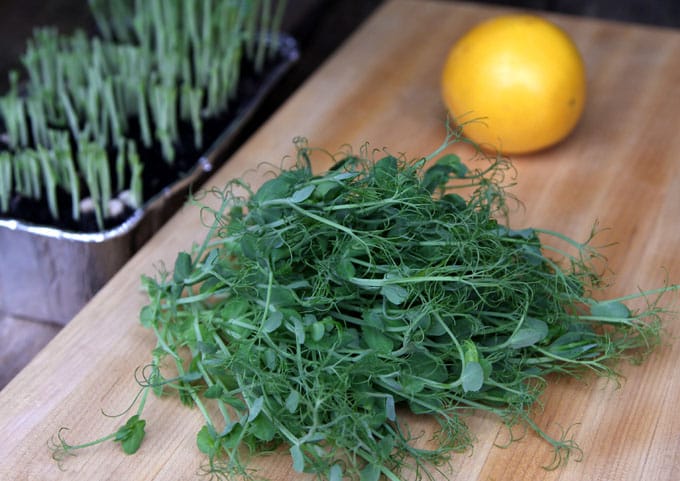
Pea shoots can be harvested in about 2 weeks when they reach 6″ above the soil.
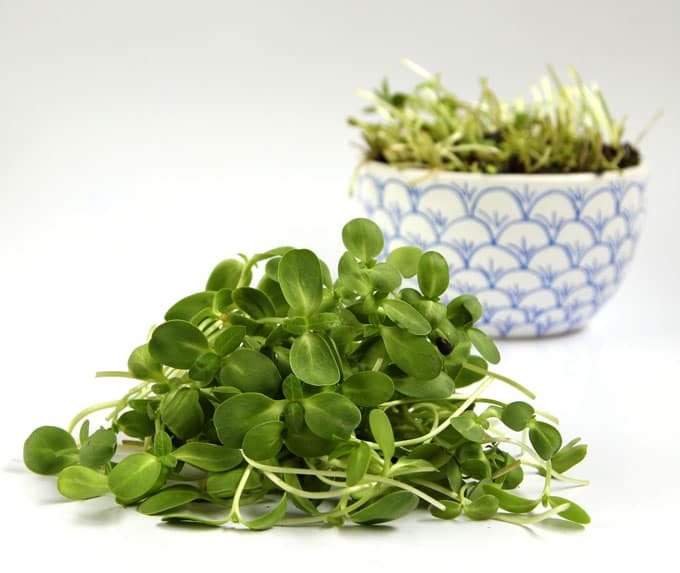
Sunflower sprouts are ready for harvest in 1-2 weeks when the first set of true leaves appear. See image below.
Smaller sprouts such as broccoli, amaranth, and radish are ready when they reach 3″ tall.
Cut everything above the soil. Use them in salads, soups, sandwiches, stir-fries, etc. Yum!
Don’t eat the roots or seeds in the soil! They can be composted in a larger container or compost bin.

A few helpful tips on growing soil sprouts-
- Seeds need consistent humidity before they sprout, they need water and light after they sprout. Give them the brightest location you can find, such as a south facing windowsill.
- Take notes of how much water they need in the growing stage so you can create a watering schedule specific for your growing conditions.
- Starting a small batch of sprouts every few days instead of a huge tray all at once will give you a continuing supply of fresh greens. The aluminum loaf pans are the perfect size for this reason!
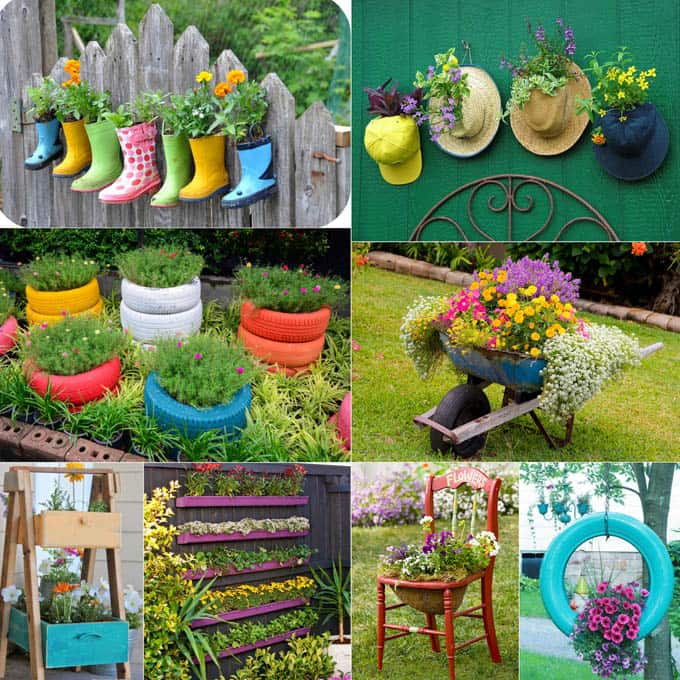
Winter is a great time to grow indoors and dream about next year’s garden. Here are 32 creative planters to DIY when spring arrives!
One of our favorite gardening methods is the raised bed. Check out these 20 inspiring DIY raised bed gardens!

Wish you all a very happy holiday season! See you in 2017! =)
Source: apieceofrainbow.com
