Easy & beautiful watercolor flowers colorful bouquet in 15 minutes: how to paint simple loose floral in watercolour, a detailed step by step tutorial for beginners!
Have you always wanted to paint watercolor flowers? Today I want to share with you how to make a watercolor flower painting in just 15 minutes! We keep adding watercolor and art tutorials, click to see them all here!

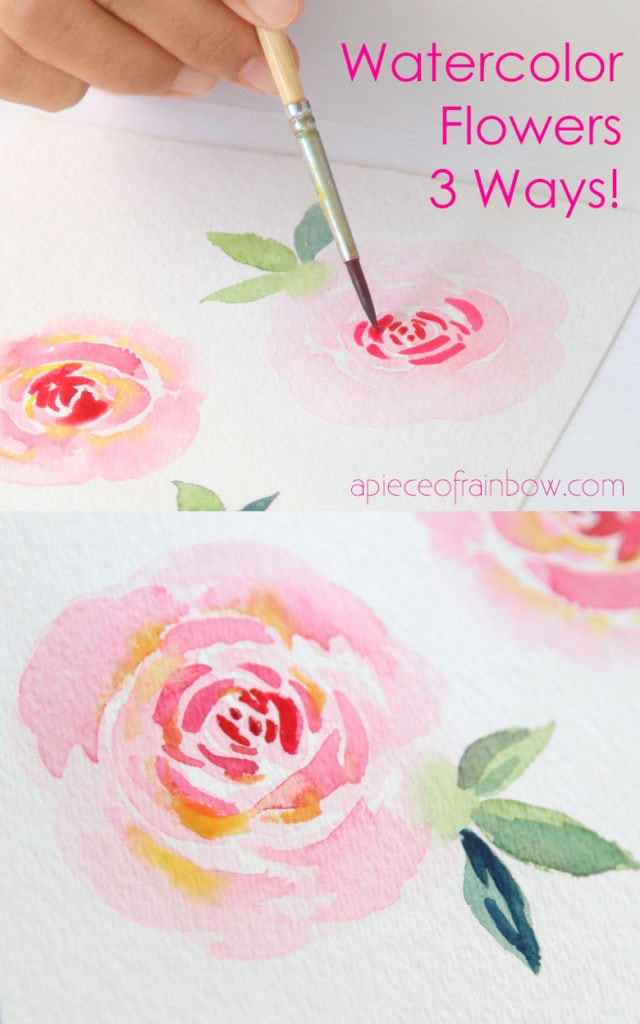
UPDATE: I made a new watercolor tutorial to show how to paint a simple rose in 3 ways using 3 essential beginners techniques including wet on wet, and wet on dry! Check it out here: Paint a watercolor rose in 3 ways!
Once you go through a few simple steps and tips on painting watercolor flowers and leaves, you will be able to improvise on your own, and paint all kinds of loose watercolor floral in no time!
Materials and tools to paint watercolor flowers
( Some of the helpful resources are affiliate links. Full disclosure here. )
- paper : (UPDATE- I now only use better quality watercolor paper that doesn’t buckle!) I really like this Strathmore and this Canson watercolor paper.
- brushes: I like using soft watercolor brushes with a nice pointed tip like these , and this set. They are great for watercolor washes, and for finer details.
- watercolor paints: this is a good basic set, and this is a fabulous artist grade set which I LOVE, and a palette that can be used to mix colors. This palette with lid is a great choice too.
- a jar of water for wetting and rinsing brushes
If you need to learn a few essential beginners watercolor techniques including wet on wet, and wet on dry, check out this tutorial first: Paint a watercolor rose in 3 ways!
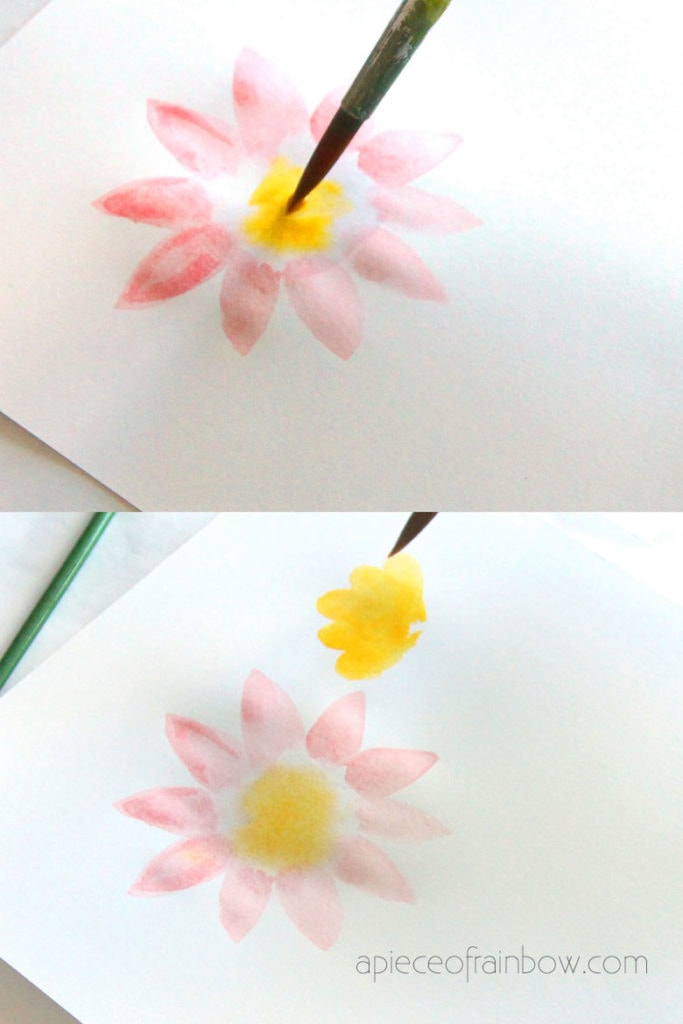
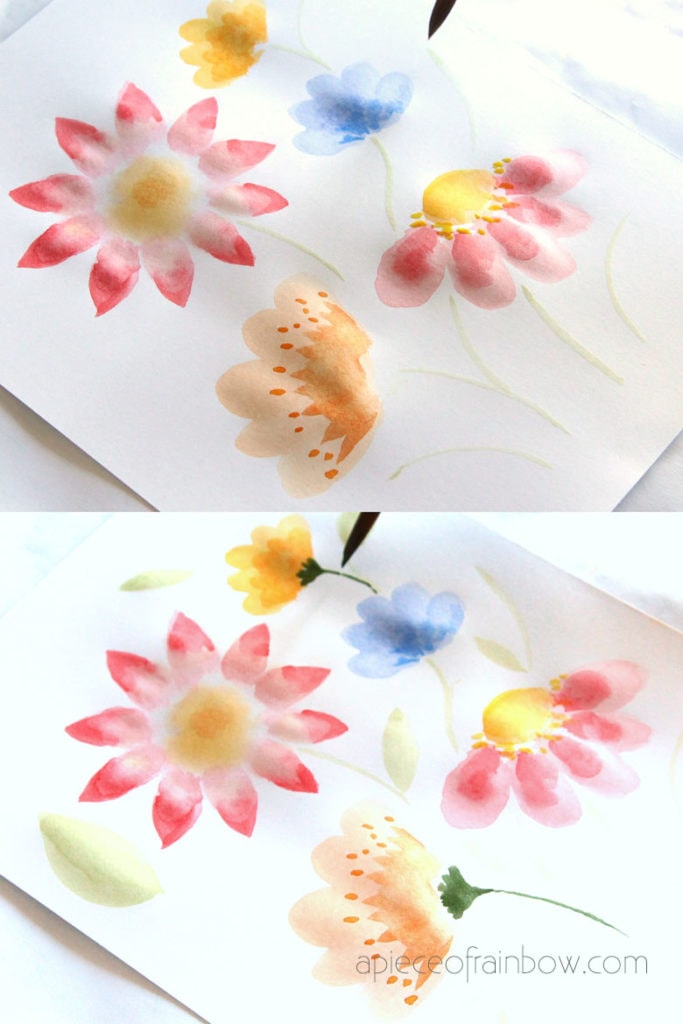
Step 1: Start with flowers in the bouquet.
When I paint watercolor flowers in a bouquet, I like to start with flowers, and paint the watercolor leaves later.
Start with a lighter wash, because it’s easier to go deeper in color later. In watercolor there isn’t really a pink color, it’s basically red diluted with lots of water.

Next we will add the flower center. Dip one of the clean brushes in water, and moisten the paper a bit, then dip another brush in yellow to paint the center. This way the center has a softer edge.
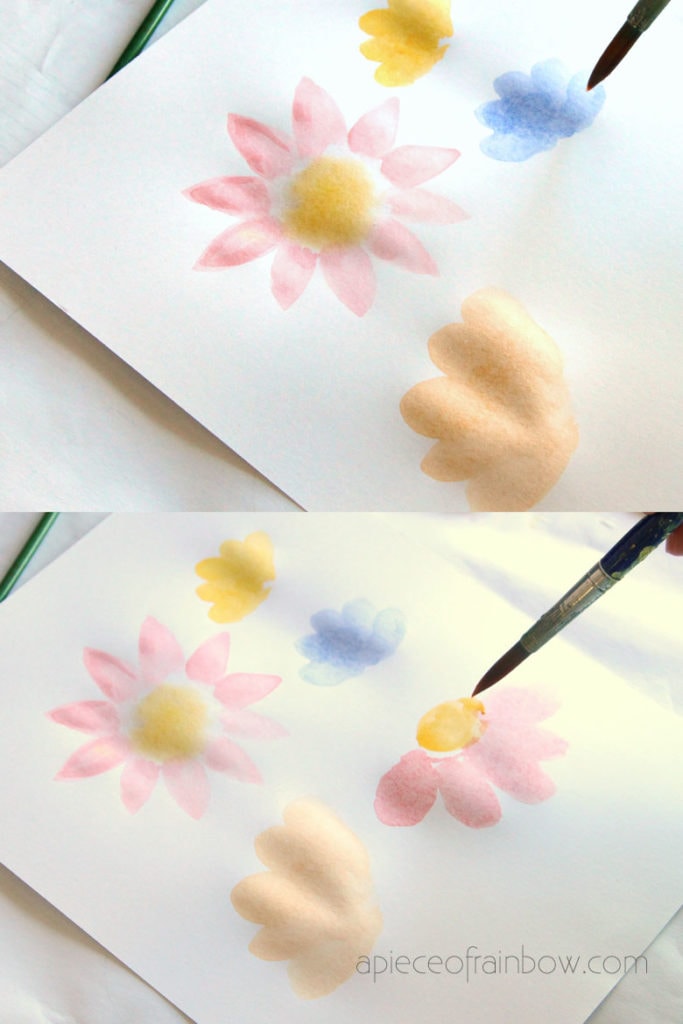
Keep adding more watercolor flowers with different shapes. Oranges and yellows look nice with pinks and reds, and a blue flower for some contrast!
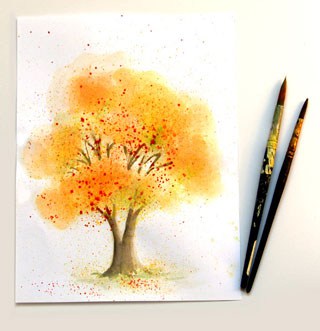
Related Article: How to paint watercolor spring trees with a simple secret! ( Video tutorial!)

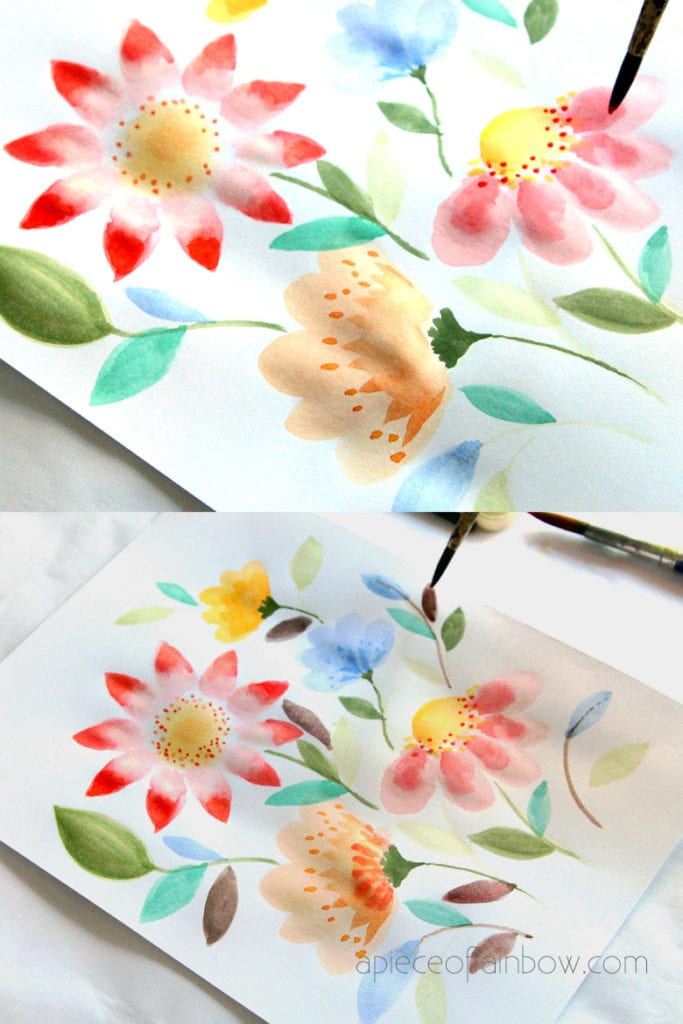
Step 2: add details & accents to the watercolor flowers
As you can see the deeper red tips of the petals, the deeper orange at the base of another flower, some color dots, all these add depth and richer details to the flowers.
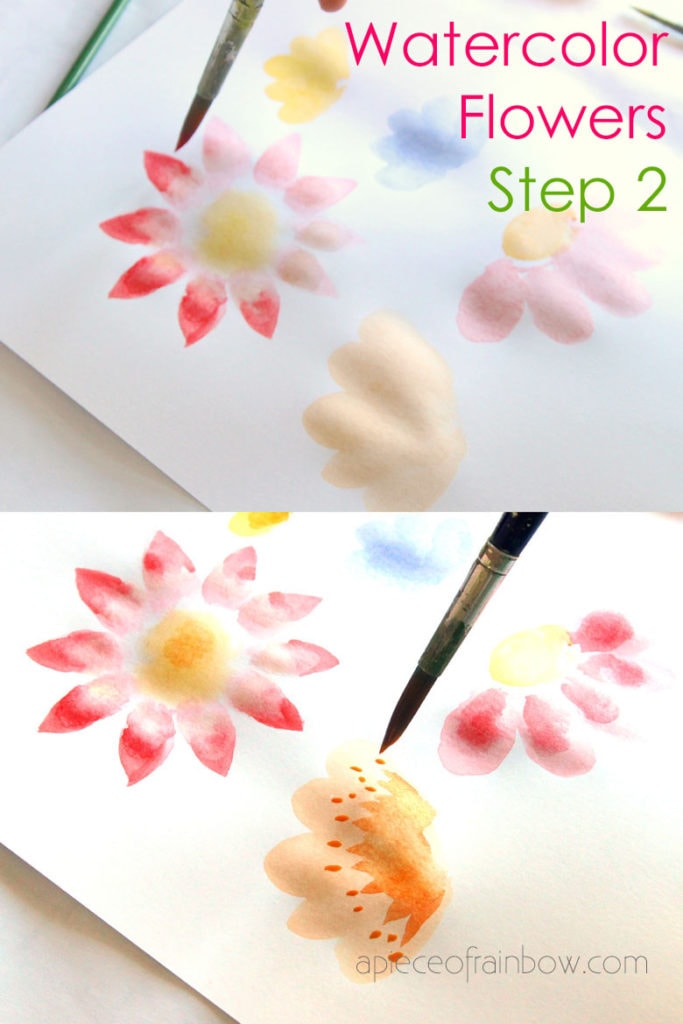
We can always come back and add more details later. Next we paint the stems of these flowers with a pale green, as well as a couple of leaves. I like making the leaves different sizes here.
Step 3: paint watercolor leaves and stems
Then with a deep olive green ( for tips on how to mix a nice olive green, check out the watercolor tree tutorial! ) paint the base of the side view flowers, and a few more leaves in this deep green.
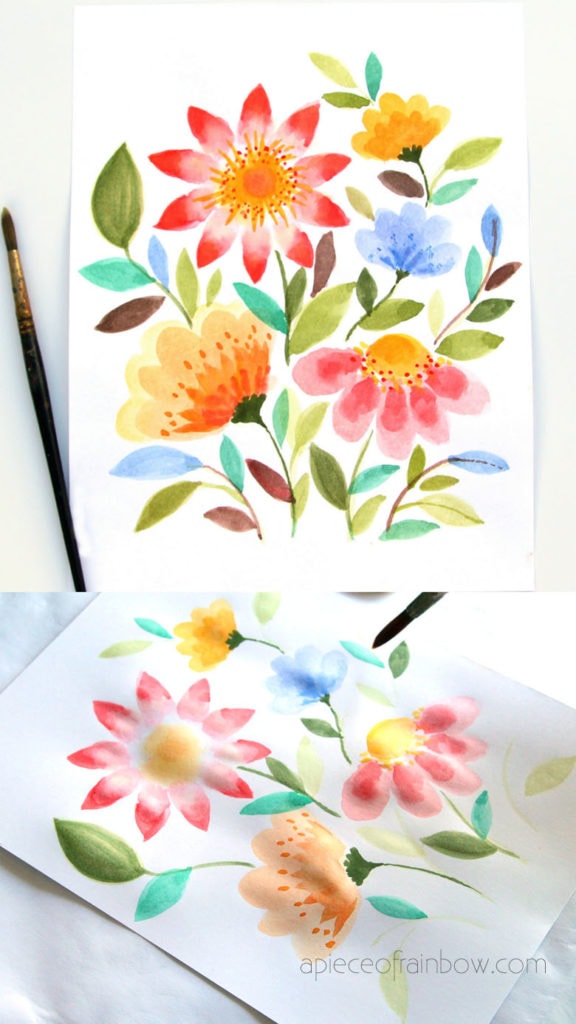
In nature we see all shades of foliage, such as yellow green, blue green, and even browns.
Here we will be adding some watercolor leaves in blue-green, blue and brown, and making some of the stems darker as we paint the darker leaves.
You can omit some of the colors if you prefer the leaves being all green. Just have fun!
At the end, look at the whole painting and add a few final touches, such as adding some dots at the center of the flowers.

Finished! Not too hard right? After about 30 minutes when the painting is dry, put it under a stack of large books, the weight will help the paper look nice and flat by tomorrow!
Now a little gift / craft project- make your own sets flower greeting cards with these free printable cards!
You may also love: Bubble paint Hydrangea flowers tutorial and a tutorial on how to paint a fall watercolor tree in 10 minutes, with a tooth brush!


Happy painting! See you next week!
Source: apieceofrainbow.com
