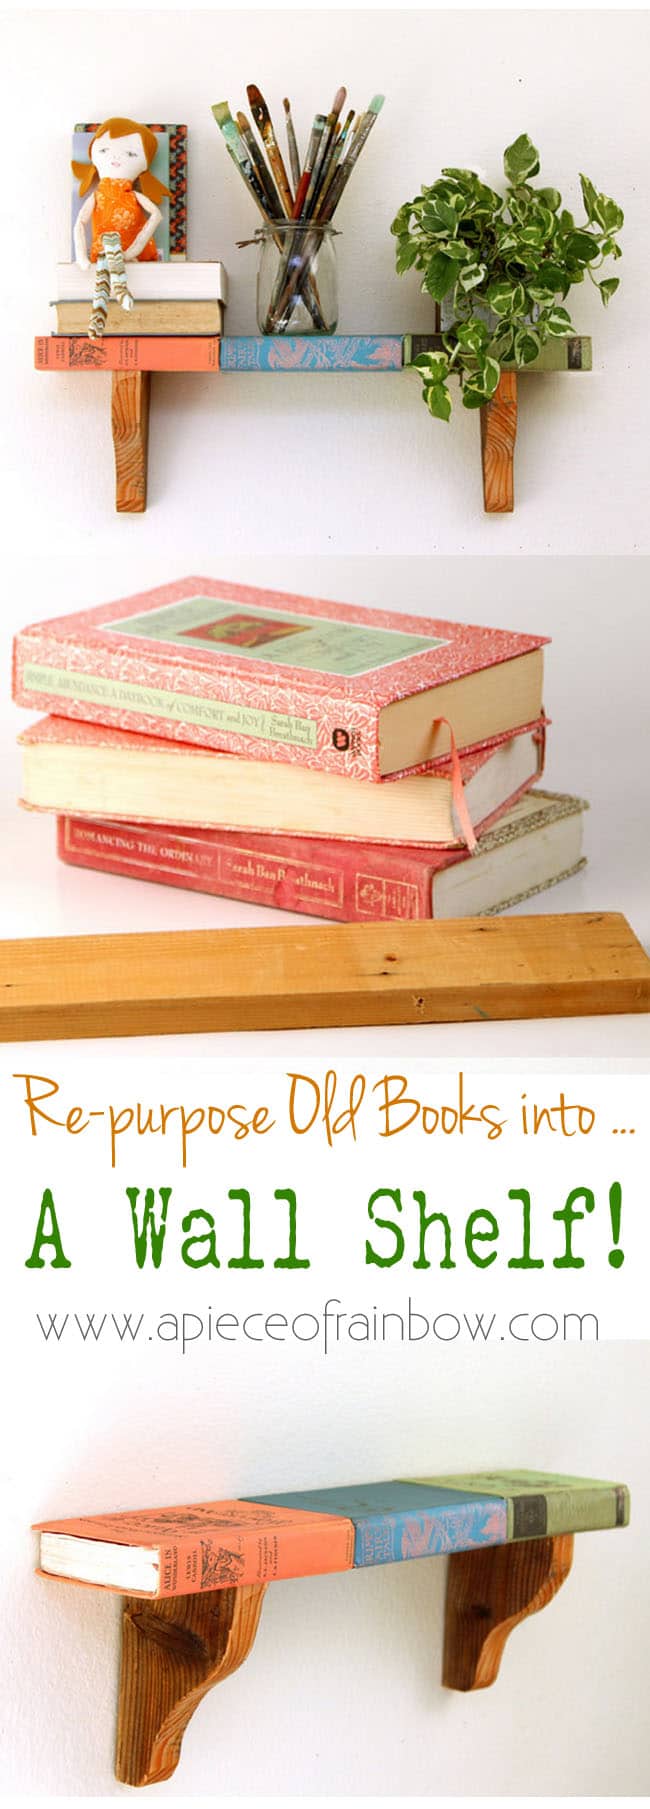
Happy Thursday everyone! Today’s fun DIY is for all vintage book lovers: we are going to make a unique piece of furniture, a wall shelf from 3 old books! Bonus: we are not going to harm your treasured vintage books …
Believe it or not, it is super hard to find vintage books that are the same widths and same thickness. Not to mention cutting them, can’t do it!
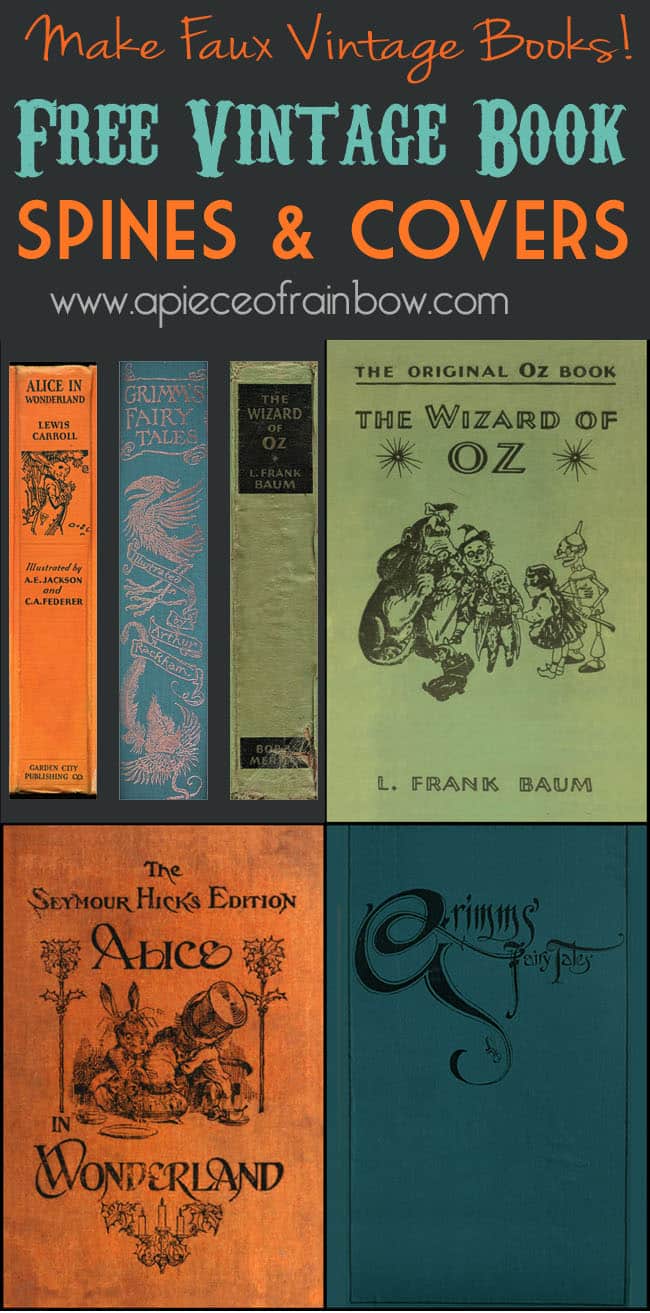
Here’s the secret: we will print out vintage book covers and glue them onto any books.
I will include these vintage book covers and spines at the end for you to download!
And a special treat – some of my blogger friends are here to share their fab DIY projects at the end also!
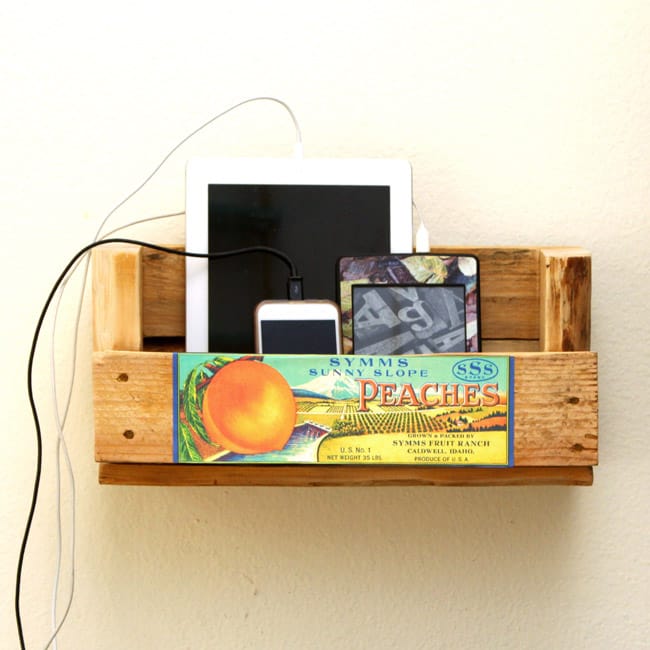
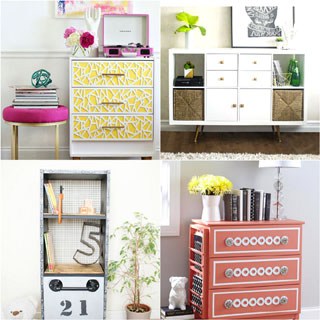
Talking about vintage printables, I love how they can be incorporated into home decor and furniture pieces, like this pallet charging station with vintage crate labels.
Let’s start with materials and tools for our wall shelf :
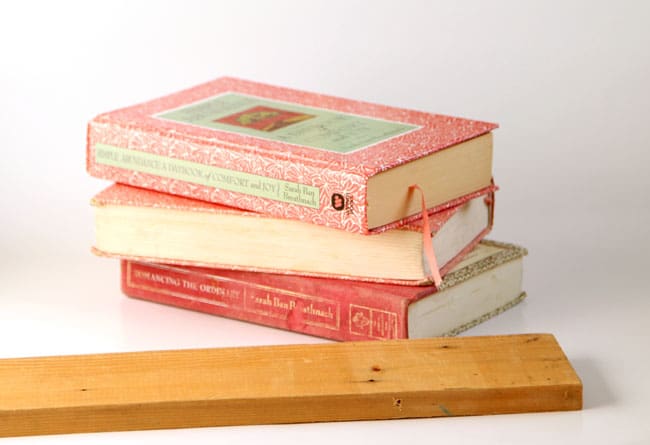
- 3 old books of the same widths and same thickness (check out your local library’s book sales!), the easiest way is to get the same books, and your favorite vintage book cover photos, or download the ones I used (see end of article)
- an Xacto craft knife or a box cutter to cut the book
- a piece of 1″x4″ about 24″ long for the insert, and a piece of 2″x8″ for the corbels, or ready made corbels or shelf brackets
- template for these corbels (download at the end), and a jig saw to cut the corbels
- paper or card stock to print the book covers, and glue or mod podge
- a drill, a few wood screws, and keyhole hangers to hang the shelf
Step 1:
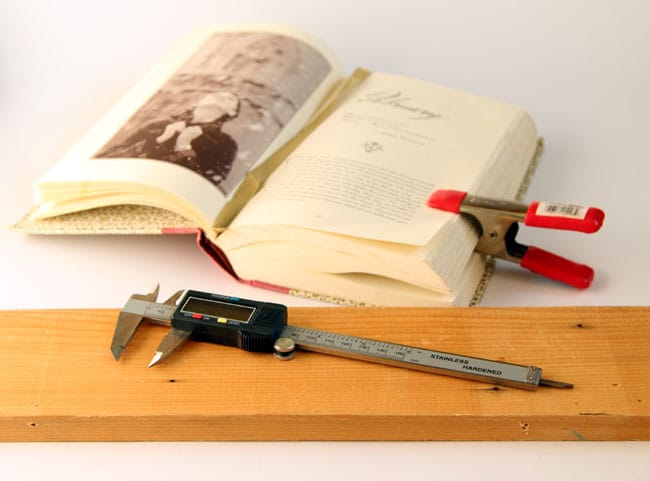
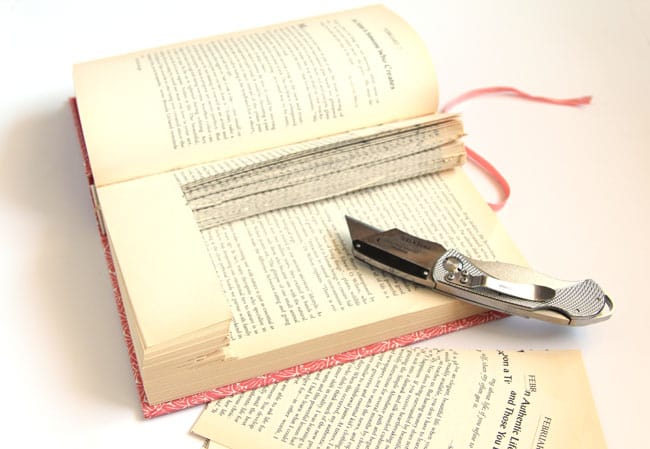
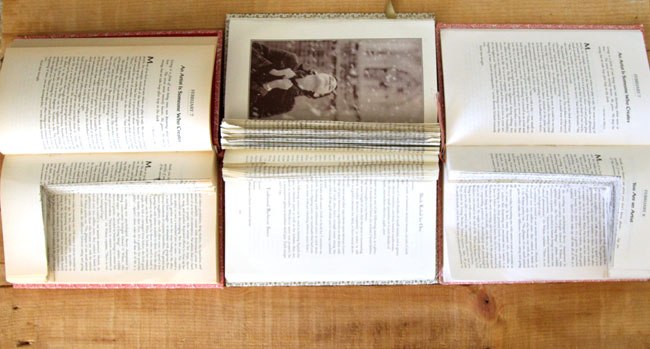
Use a caliper or a ruler to measure the thickness of the 1″x4″, it will most likely be 0.75″, and measure out the same thickness in a section of the book. Any section will work as long as it lines up in all 3 books.
Step 2:
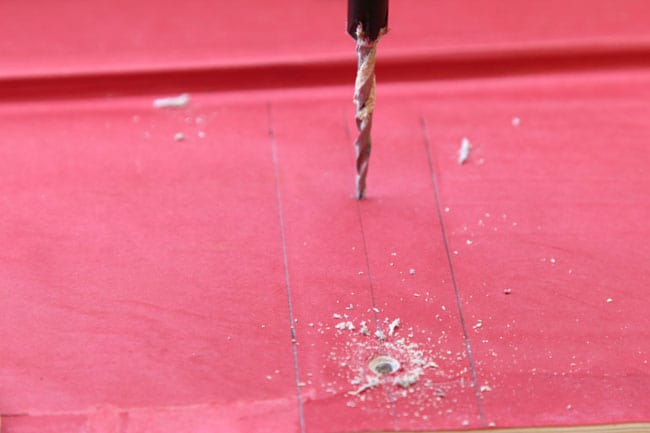
Mark the 3 books using the piece of 1″x4″, cut the pages with a box cutter or Xacto knife so the wood fits inside the cavity.
Step 3:
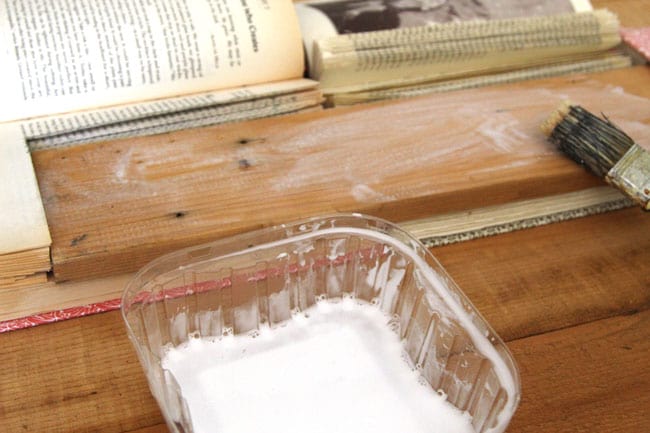
Brush the wood with glue or modpodge, on both sides. Close the books carefully, but leave the front covers open. You will see why in the final step!
Clamp the books, then brush more glue on the edges of the book pages. Let the glue soak in and dry.

Step 4:
After the glue dries, we can pretty up our books with some printable vintage covers: Wizard of OZ, Alice in Wonderland, and Grimms Fairy Tales, my 3 favorites!
Isn’t it great we don’t have to cut up real vintage books from our treasure finds?
Print and cut the spines and covers to size, a little larger than the actual books so there’s room to fold over along the edges. Glue the spine covers first, then the back and front covers
Step 5:
Print out or create your own corbel template, trace 2 piece onto the 2″x8″ wood.
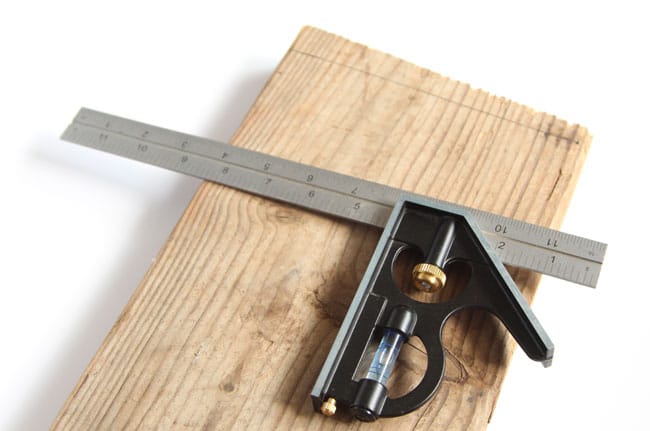
It’s crucial to have the top and back side of each corbel be as square as possible so our shelf will sit at 90 degrees. Use a combination square, super useful tool by the way , or something you have that is square to double check.
Cut the corbels and sand them smooth.

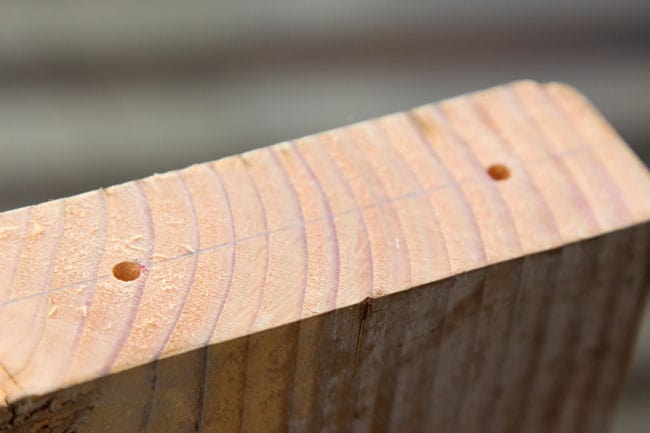
Last step: pre-drill 2 holes on each corbel. Measure and mark corresponding spots on the books and drill through.
Use a long screw for each hole, attach the books to the corbels.
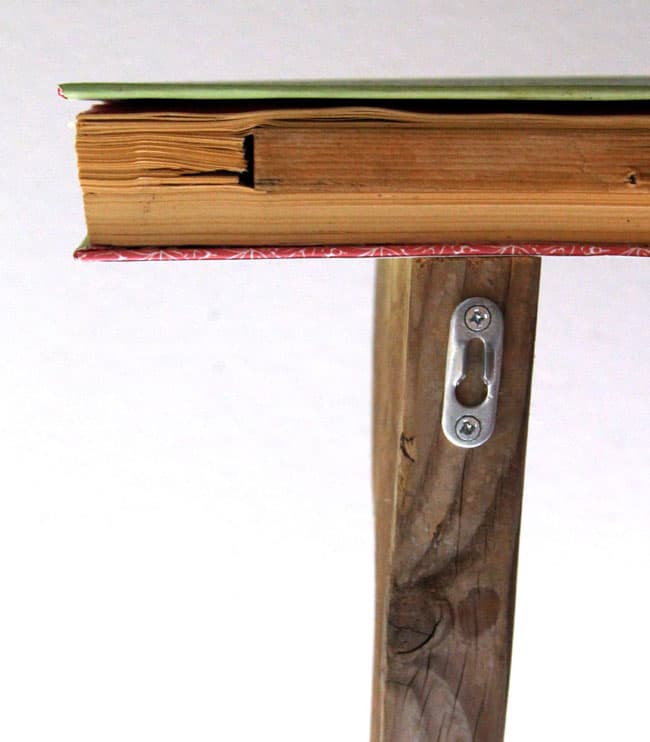
Here’s why we leave the front covers open – no signs of screws when we close the covers!

And don’t forget to attach key-hole hangers on the back of each corbel!
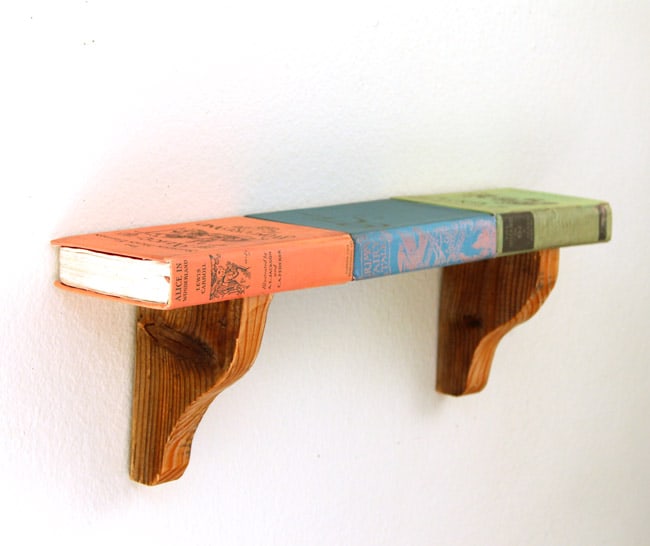
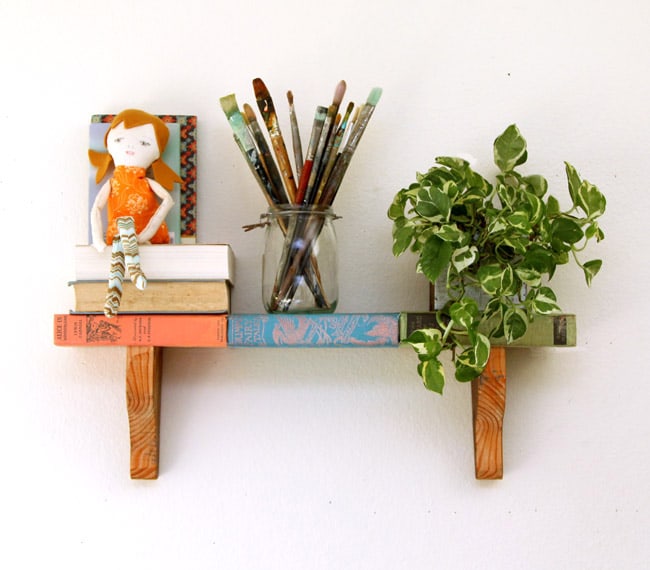
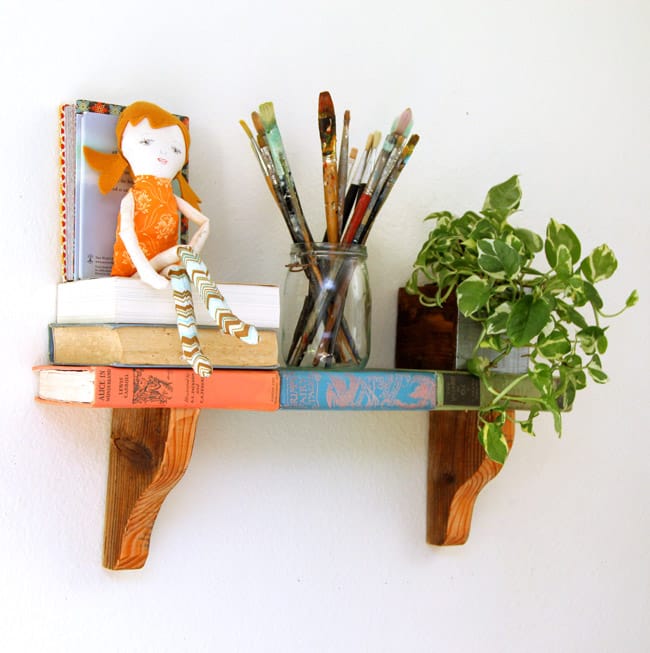
Now we have a “vintage book” wall shelf! It’s also very sturdy and can hold quite a bit of stuff!
Here are the downloads for book covers and spines:
And corbel template. (Use Stuffit to unzip. If you have trouble, please send post link to friends so they can download and email the files to you!)
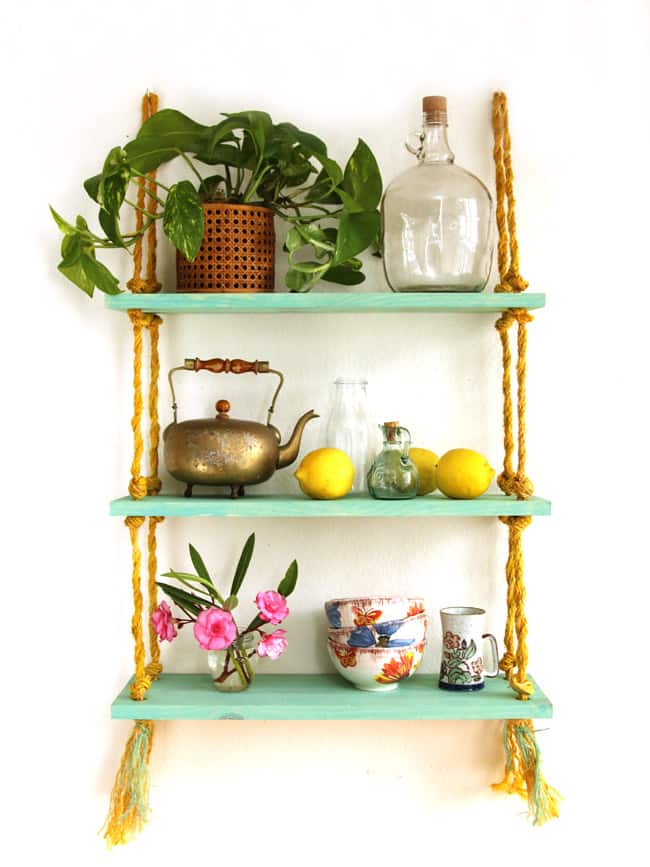
Here’s another super easy hanging rope shelf you can make with just a drill!
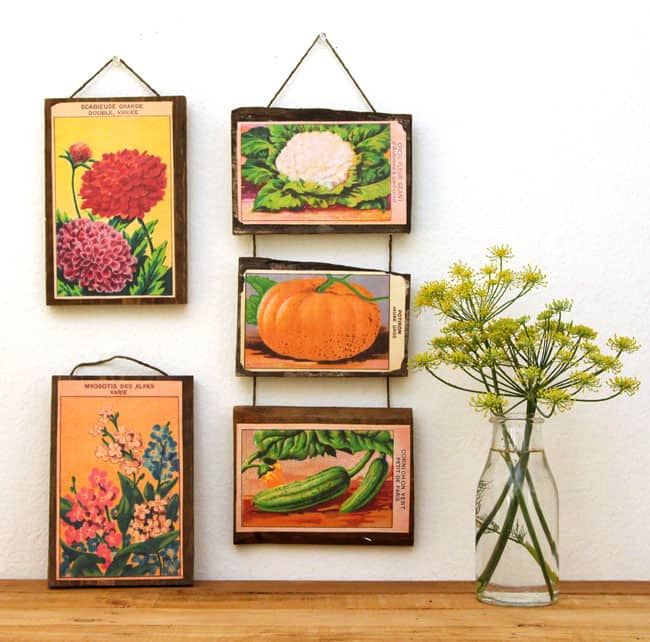
And some free vintage French seed packets to print out for these scrap wood wall art!


Source: apieceofrainbow.com
