Turn an oyster shell into beautiful trinket dish, paper clip holder, catch all tray, jewelry dish & ring holder. Great handmade gift for mom, and anyone who loves unique home decor and crafts!
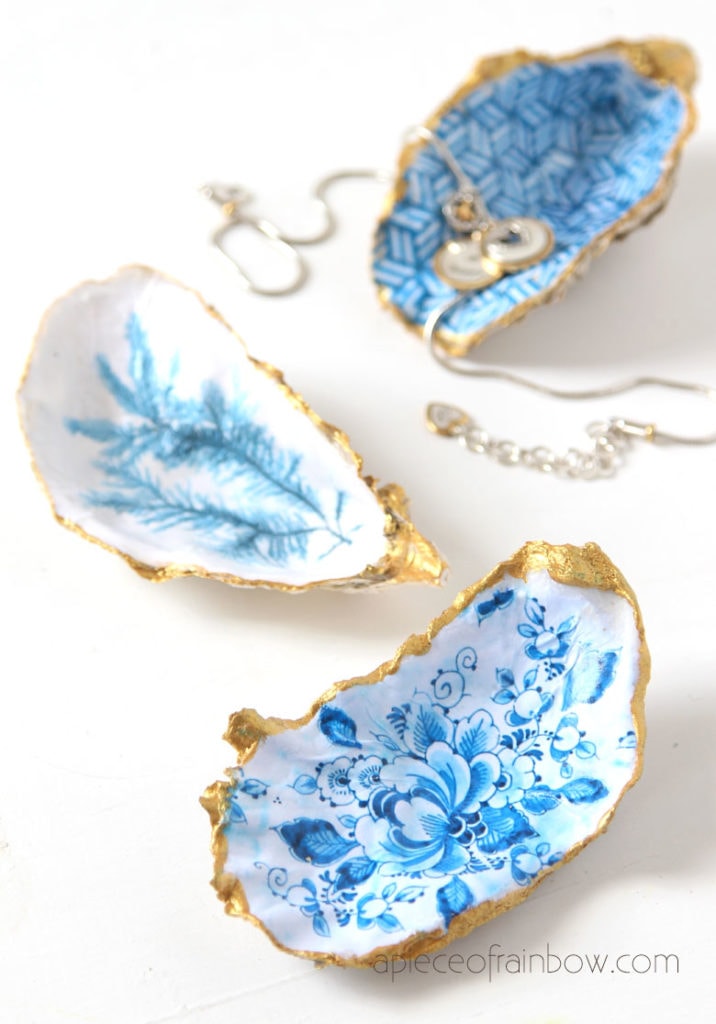
These oyster shell jewelry and trinket dishes are so Anthropologie in style! You know those gorgeous dishes with unique hand painted designs and metallic gold details?
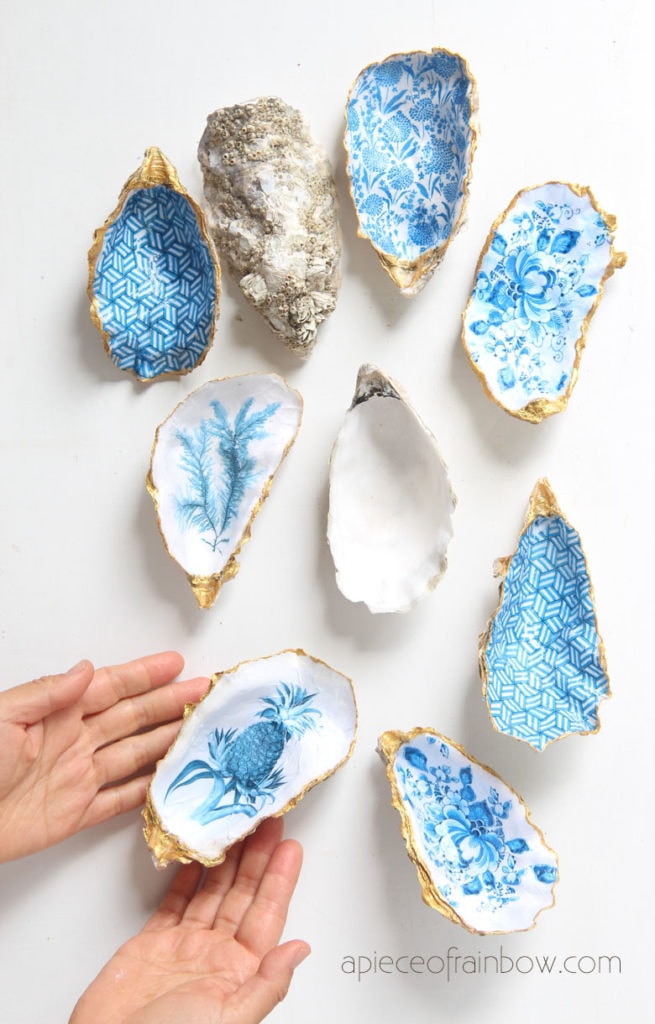
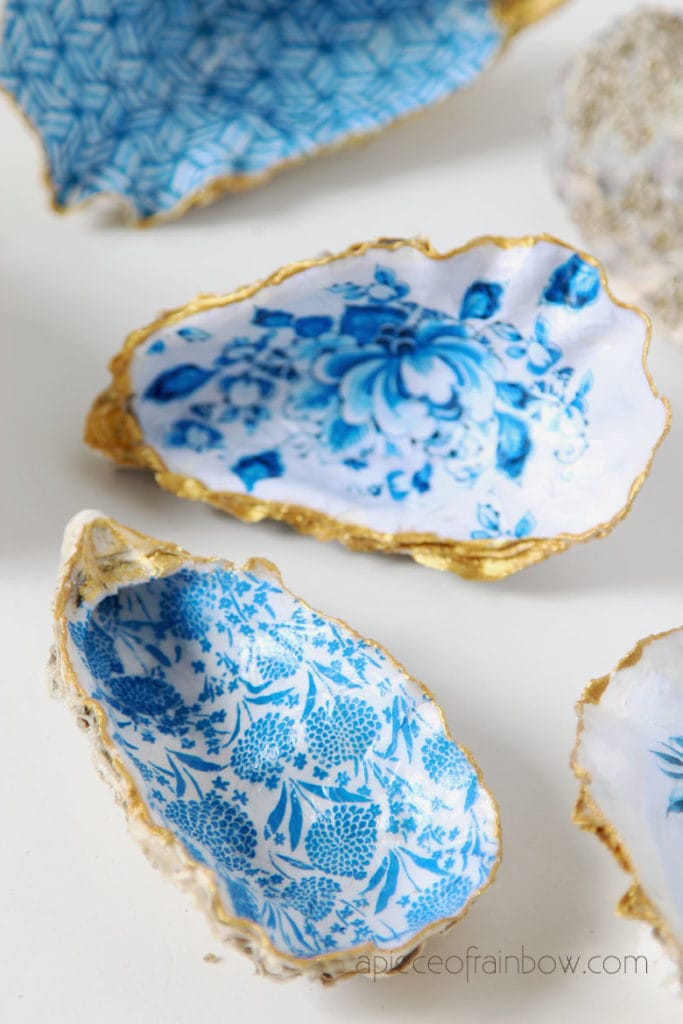
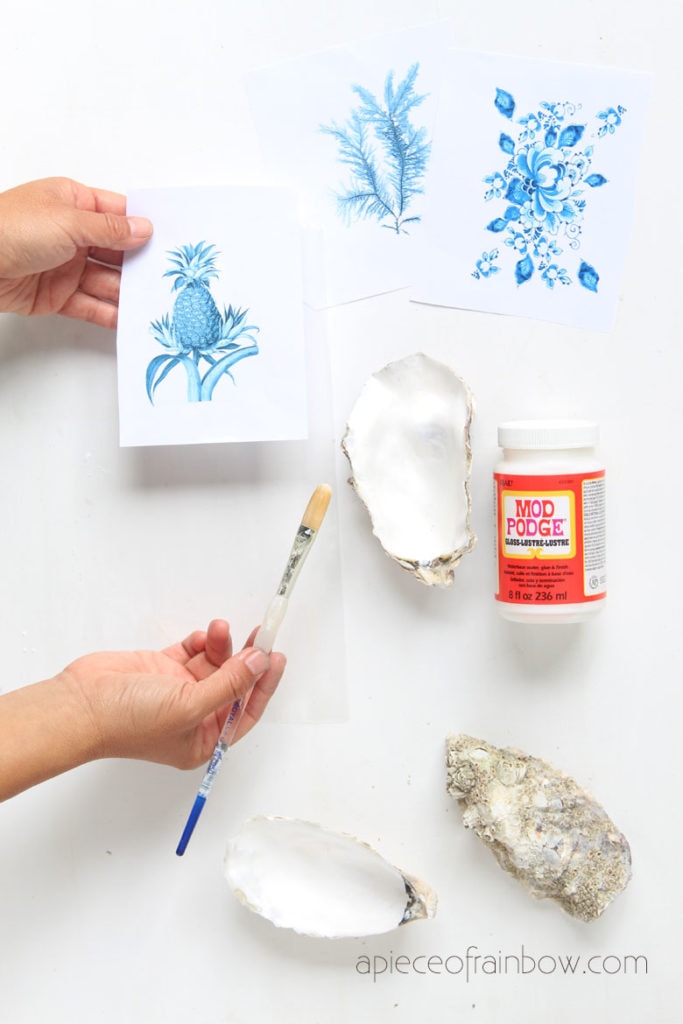
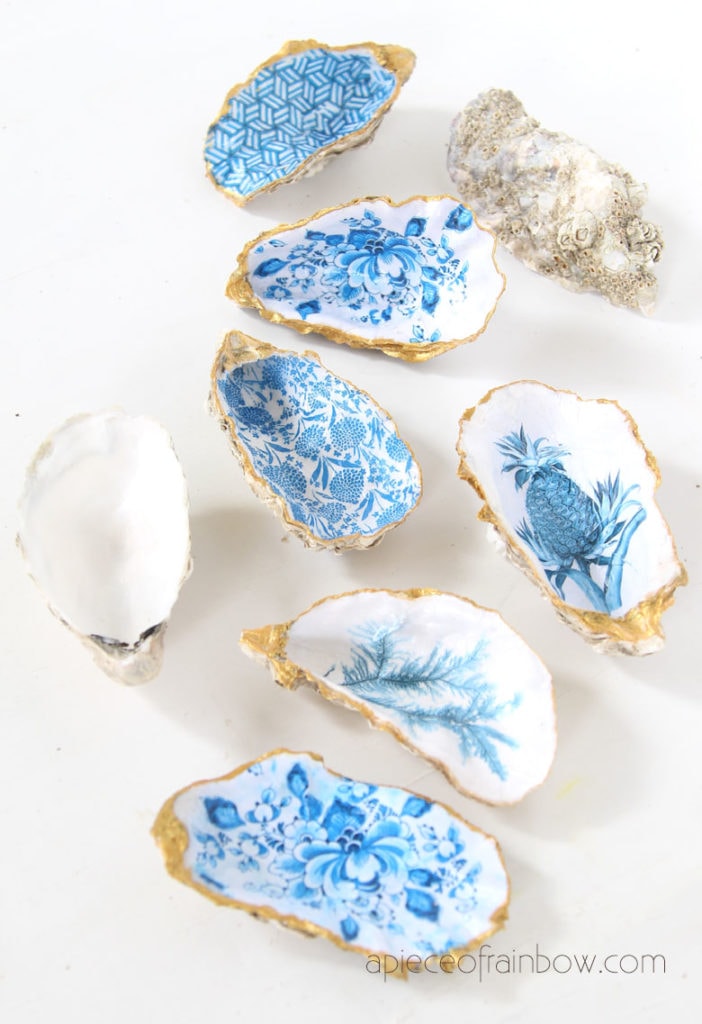
I chose some of my favorite timeless designs for these oyster shell jewelry dishes: Delft pottery, romantic chinoiserie, and vintage illustrations. I will share them as free downloads at the end!
These trinket dishes / ring holders would look so pretty as coastal home decor in a beach house. They would also be such a beautiful gift for people who love vintage, Anthropologie, and bohemian style decorations!

Materials and tools to make trinket dish from oyster shell
( Some of the helpful resources are affiliate links. Full disclosure here. )
- “Where can I get oyster shells?” You can get large oyster shells on Amazon , Craigslist, and from seafood markets & restaurants.
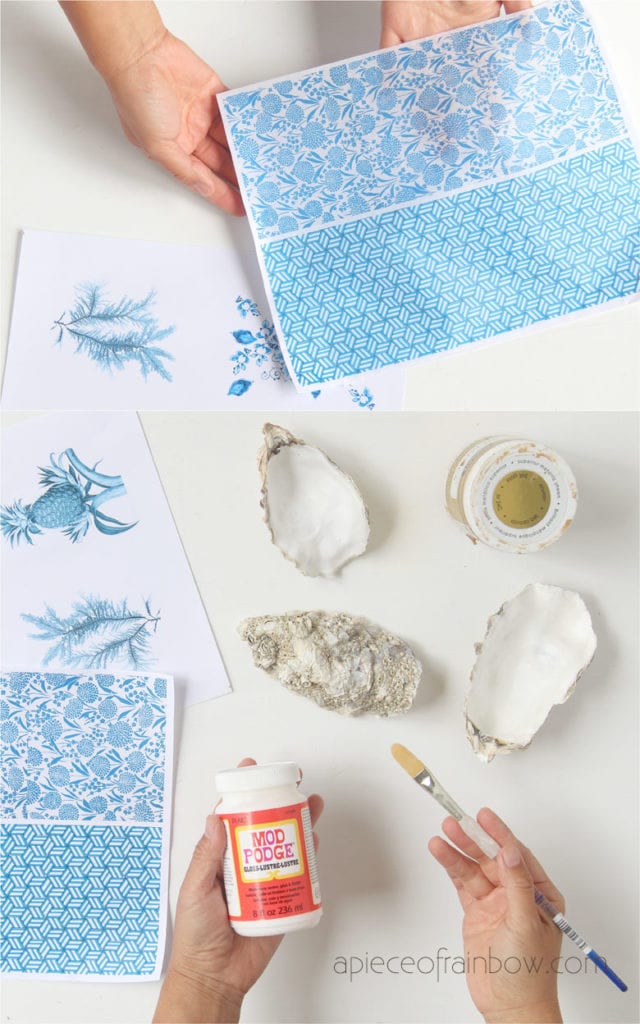
- gloss Mod Podge (or any clear decoupage glue) and a soft brush
- printed napkins, tissue or regular copy paper to print your favorite designs ( You can download our free designs at the end!) See Step 1 for pros and cons of each option
- optional: gold acrylic paint to paint the edges, white acrylic paint to cover darker spots in shells
One important thing about oyster shells: oyster shell is the best, most natural material used to rebuild oyster reefs. We can use a small amount for crafts, and bring extra shells to local oyster shell recycling where they reuse this ecologically important byproduct and keep them out of landfills. 🙂
Check out the video tutorial or skip to written tutorial below!
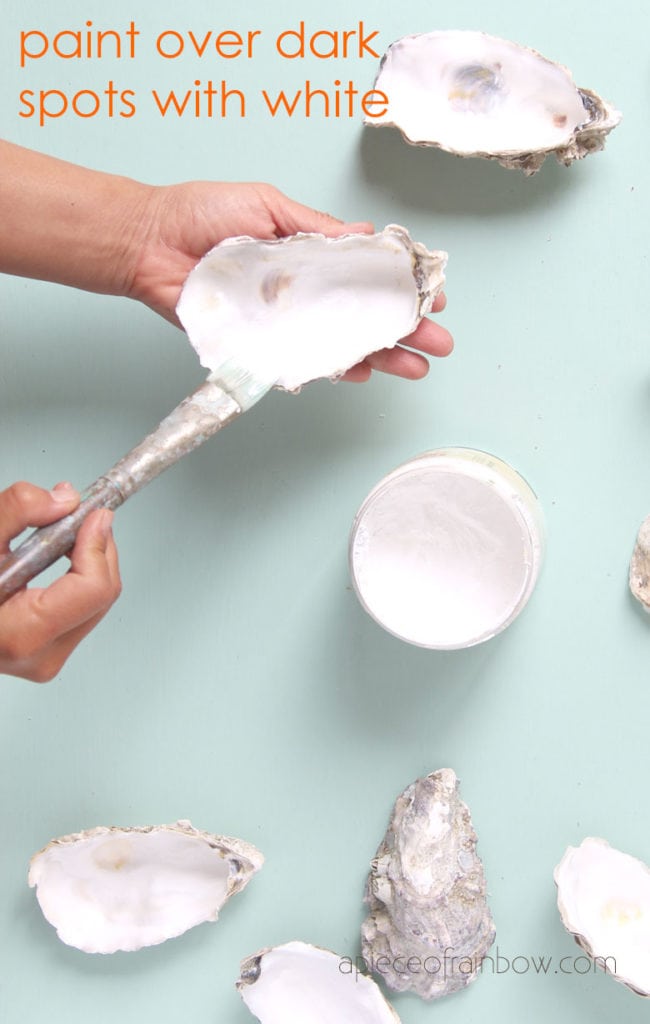
Step 1: prepare oyster shells and designs for trinket dish

Make sure your oyster shells are clean. If your shells have darker spots on the interior surface, it is helpful to give them a coat of white acrylic paint, especially if you are using napkins or tissue paper later. Let the paint dry before the next step.
If you are using printed napkins, they are usually double layered. Peel off the back layer which does not have the designs.
If
you are printing your own designs or our free designs here, it is
important to know the pros and cons of using tissue paper vs regular
copy paper.
It is much easier to print on regular paper. The paper is also more durable and less likely to tear in the process. The small downside here is that when we decoupage a flat piece of paper onto a curved surface, the creases we get are a bit more visible than using tissue paper or napkins.
Printing on tissue paper can be challenging. You must fold the edges over and tape them to a piece of regular paper. I still find it causing printer jam half of the time. So my preferences are either to use office printing paper to print designs, or buy already printed tissue or napkins.
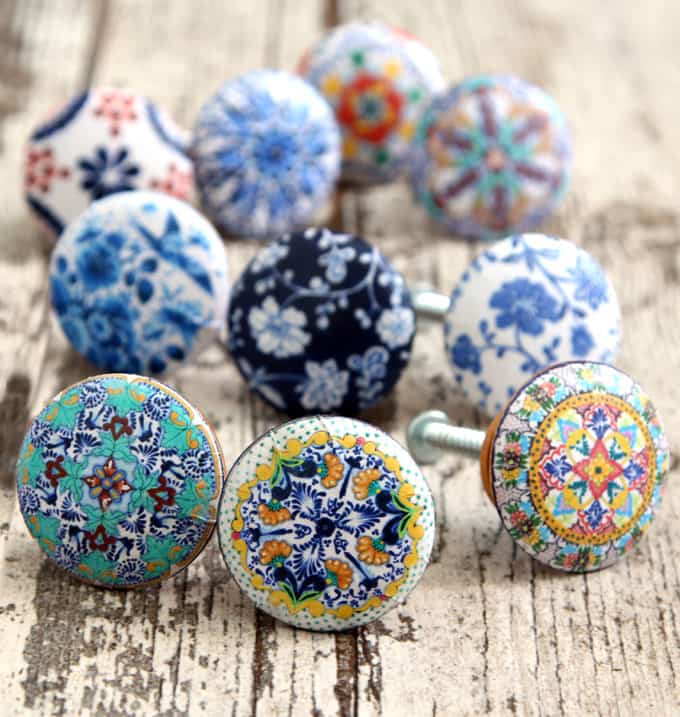
You may also love: DIY Anthropologie style knobs in 5 minutes for $1!
Step 2: decoupage the oyster shell trinket dish
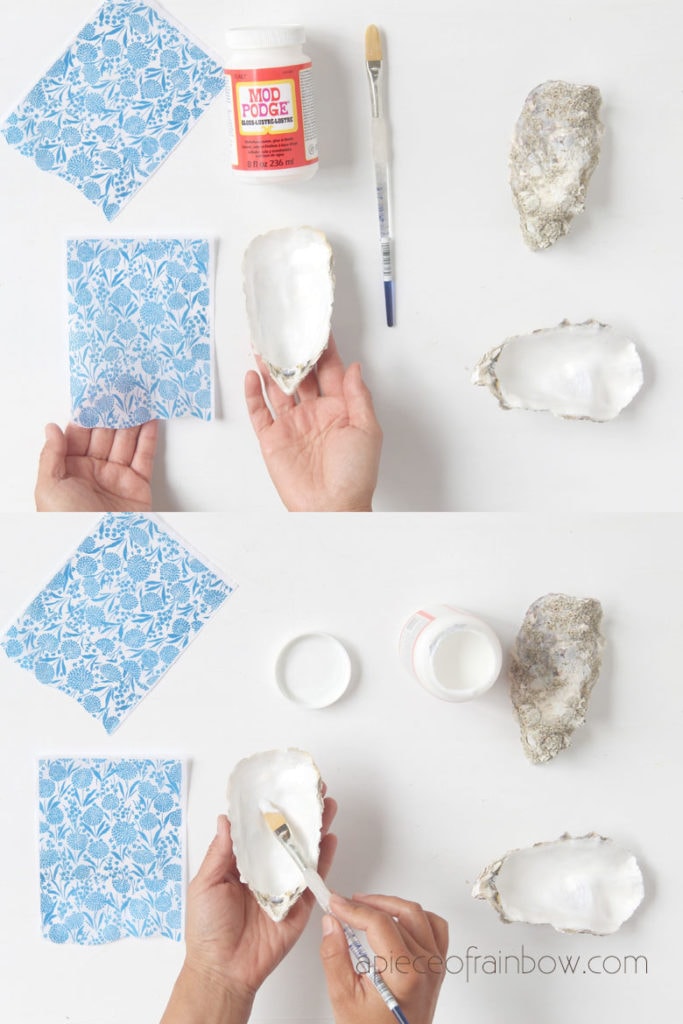
Cut your piece of design on paper a bit larger than the oyster shell.
If you are using copy paper, brush the back side with Mod Podge to soften the paper a little. Skip this if you are using tissue or napkin.
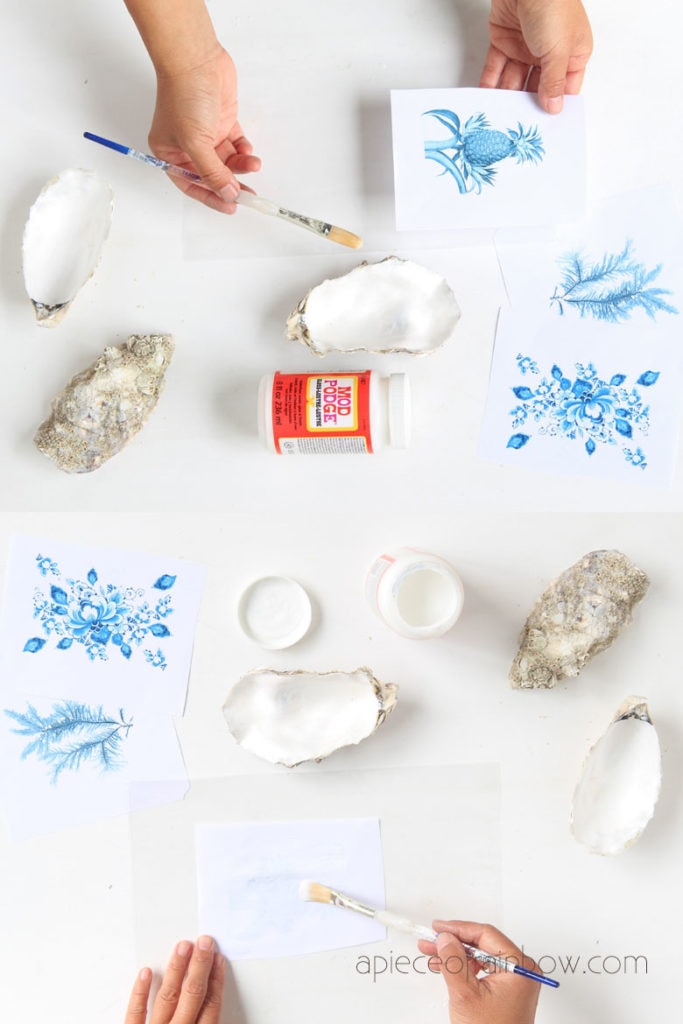
Brush a coat of Mod Podge on the inside surface of an oyster shell. Now starting from one spot on the inside shell surface , lay the paper or napkin on the spot, and gently press the paper down little by little until it covers the entire surface.
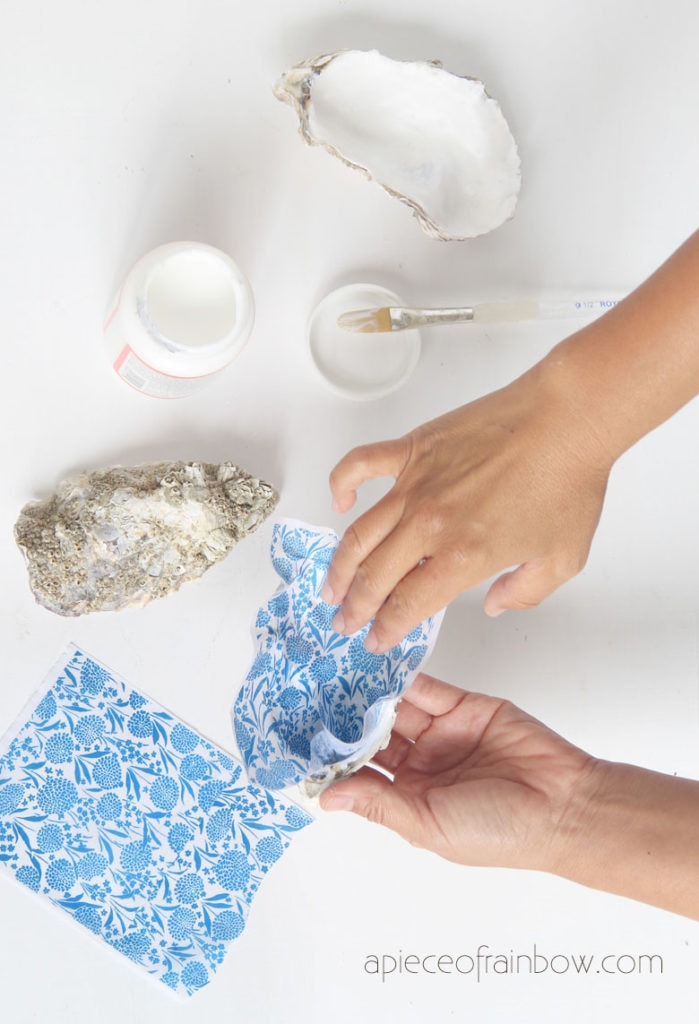
I found that a gentle tapping motion works really well and minimizes paper tearing. See video tutorial for more clarification.
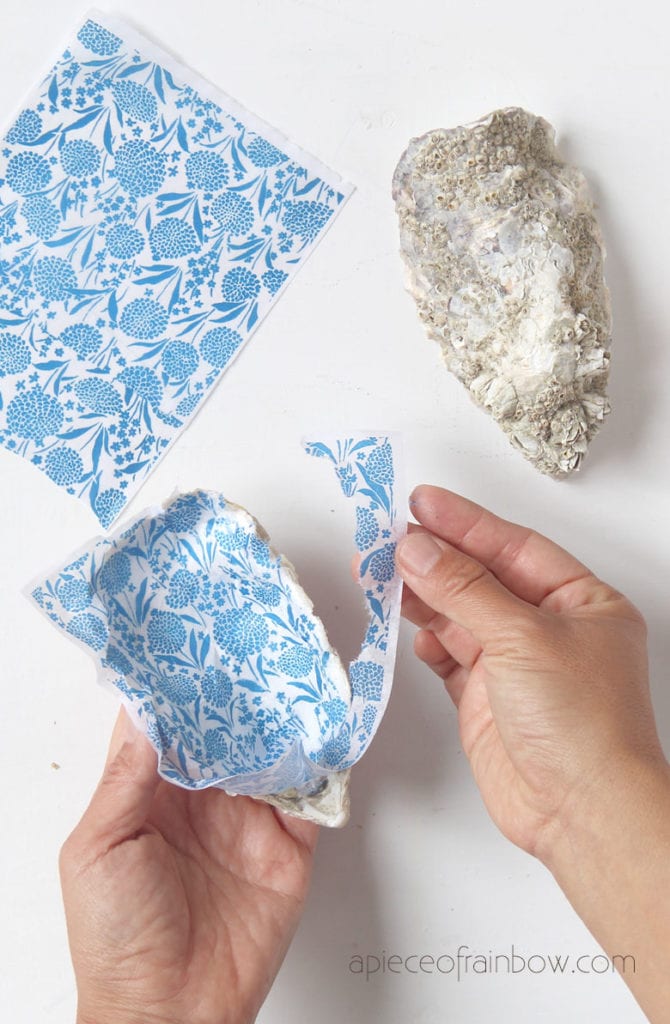
While the paper is still wet, carefully tear off the excess paper around the edges.
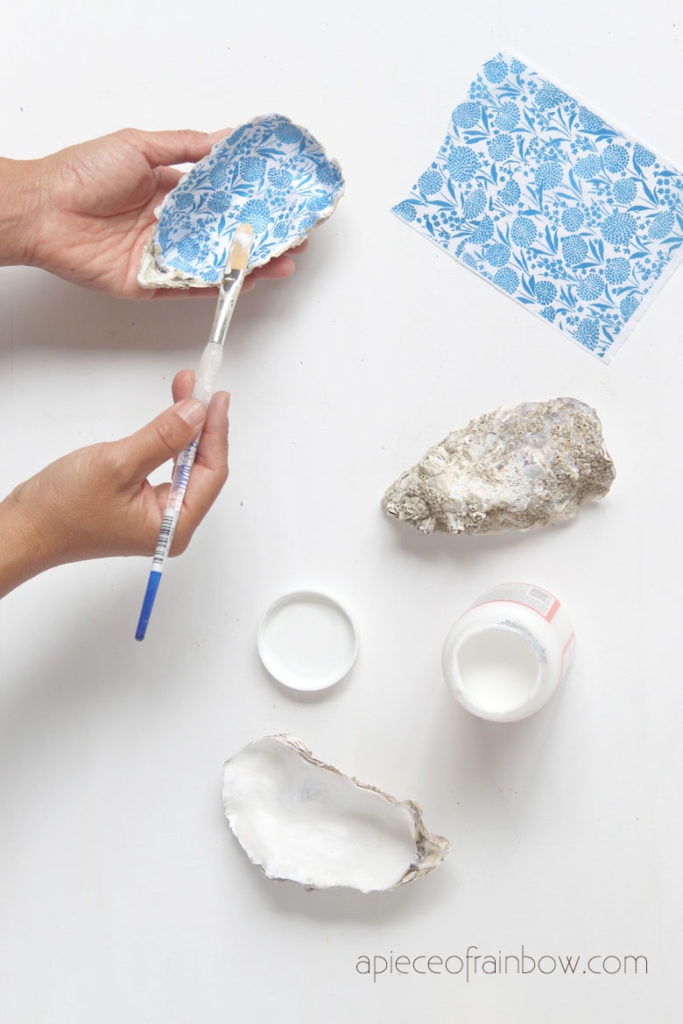
Brush a generous coat of Mod Podge over the entire decoupaged surface. This will create a water resistant surface and make the trinket dish more durable.
You may also love: Easy DIY wall at for less than $10!
Step 3: finishing touches
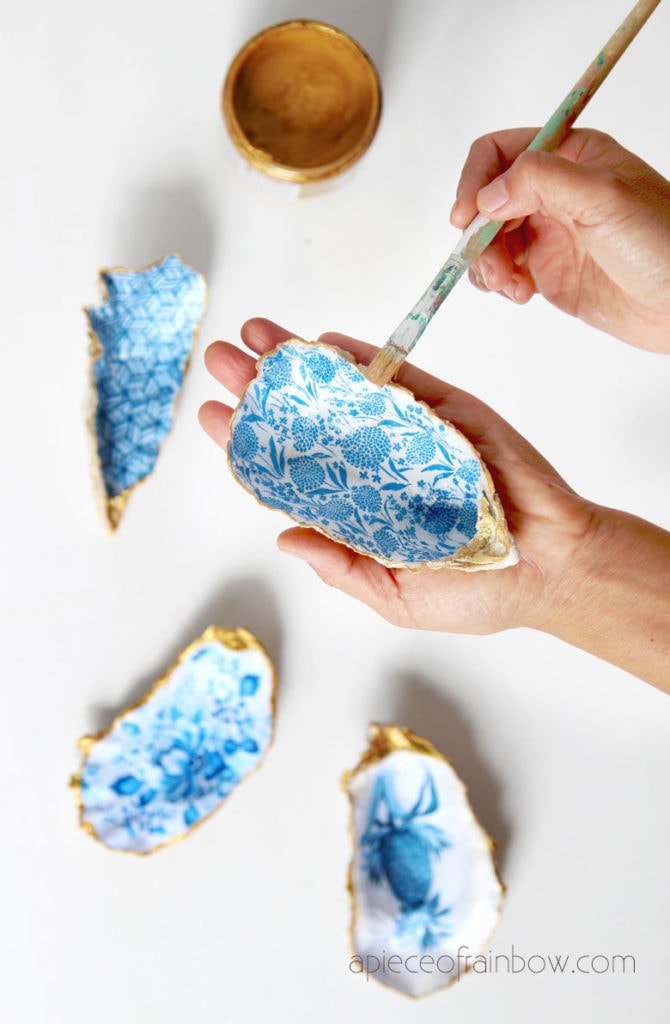
After the Mod Podge is dry, you will have a beautiful trinket or jewelry ring dish with a glossy finish. Here’s an optional step if you want to add a beautiful gold edge to the trinket or ring dish:
Take some gold acrylic paint – I used this one – and dab along the edges all the way around.
That
is it! Pretty easy right? Each oyster shell trinket dish looks like a
hand painted ceramic dish in an unique organic shape with luscious gold
edges.
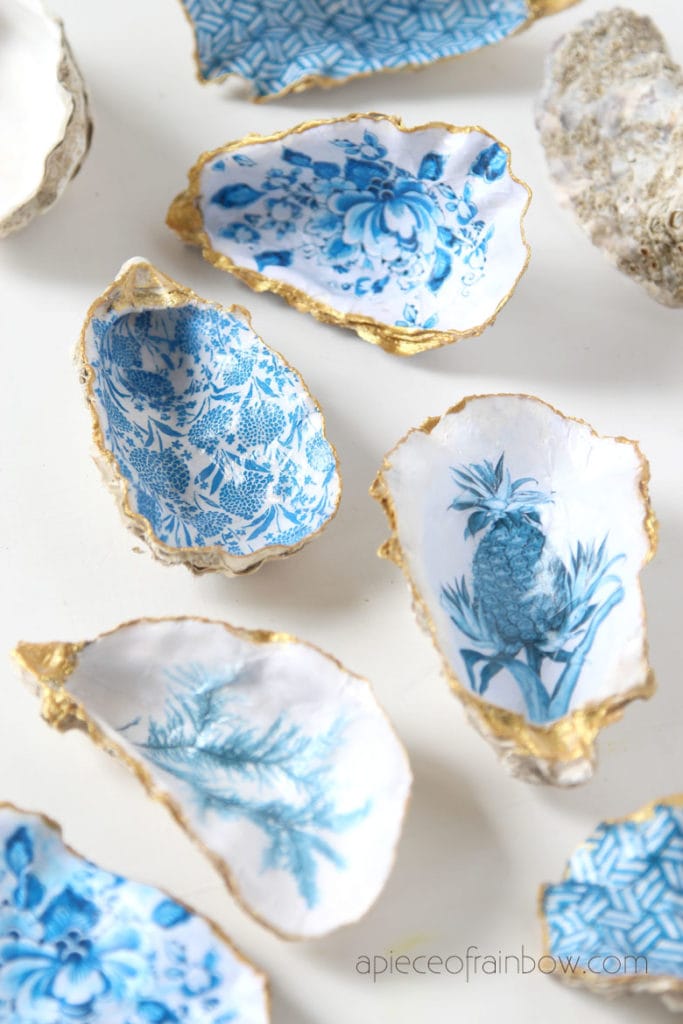
As you can see I was having too much fun and it was hard to stop! I made quite a few of them in no time, and I can already think of many friends and family members who would love them as gifts!
Download free designs & templates for this project.
The templates and designs are available in our 100% free members library with lots of downloads and creative projects added regularly. Join us today and get immediate access to all the goodies!
If you are already a subscriber, you can download all past and future free goodies on our subscribers downloads page! The link is always in our weekly newsletter and in the welcome email when you sign up!

Happy creating! See you soon!
Source: apieceofrainbow.com
