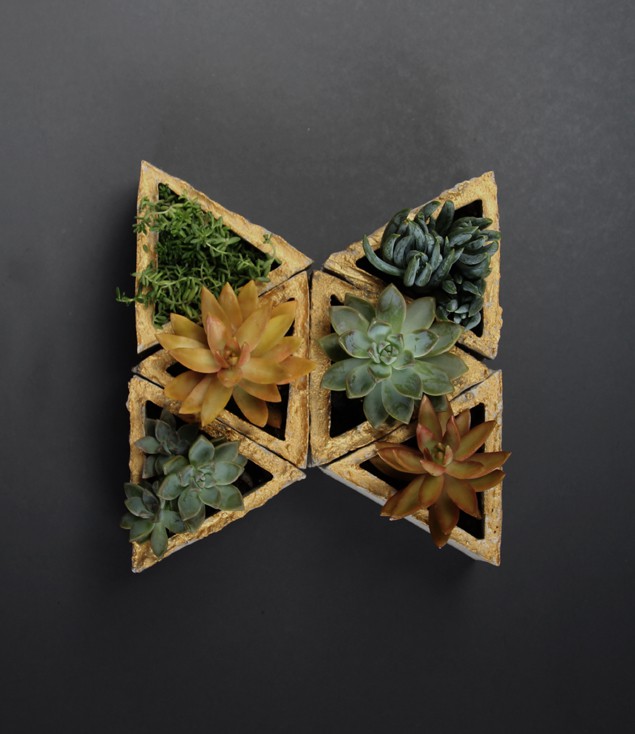
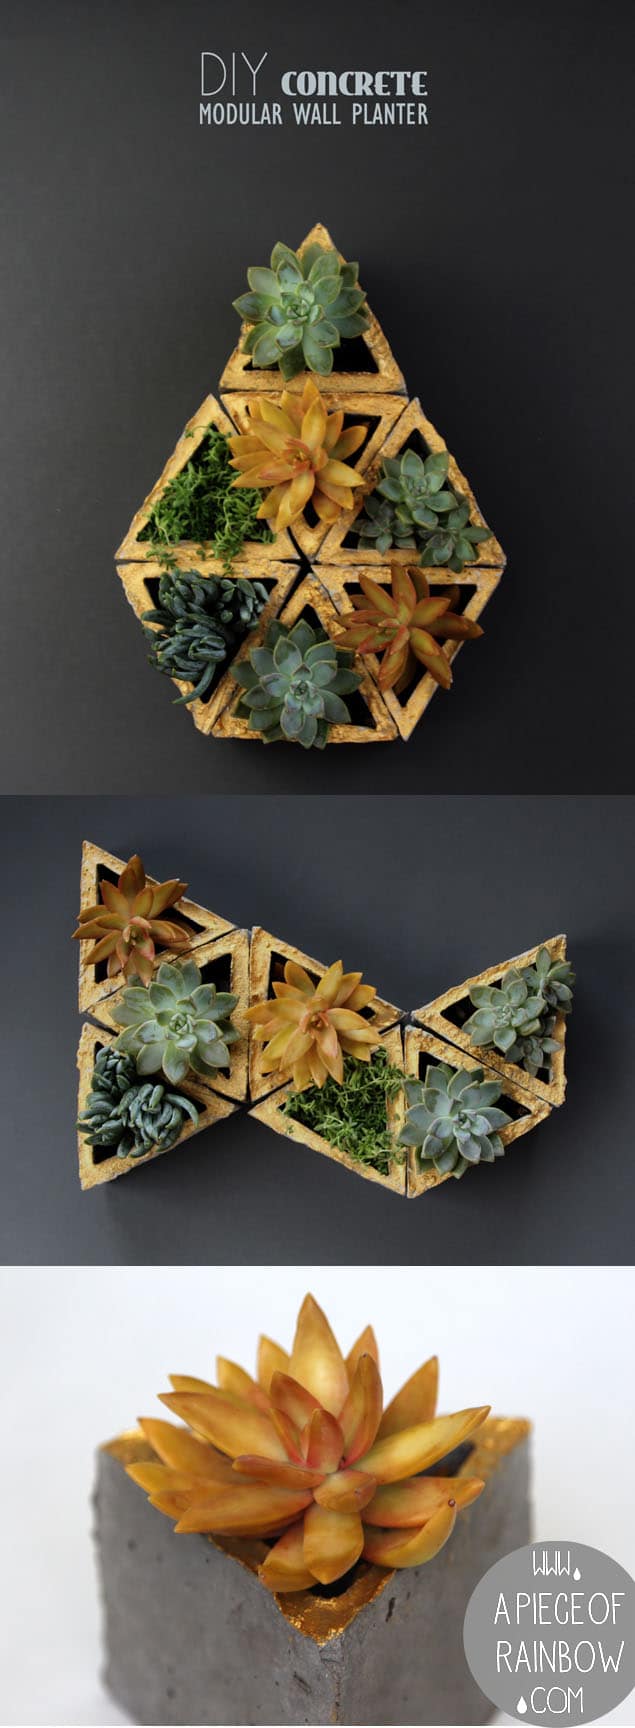
These easy to make modular concrete planters are inspired by 3 of my favorite things: geometric designs, concrete as a creative material, and the tapestry of living walls.
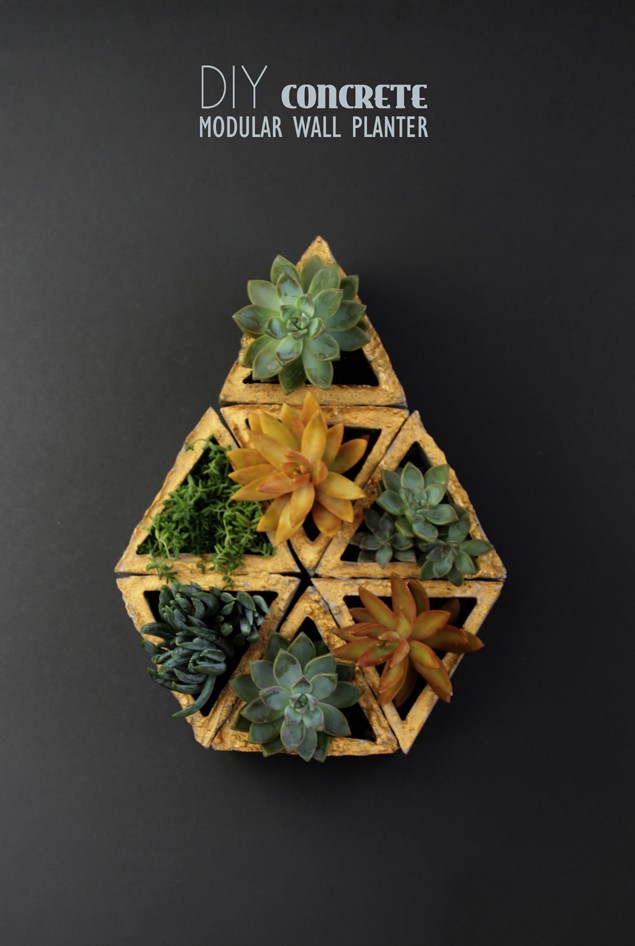
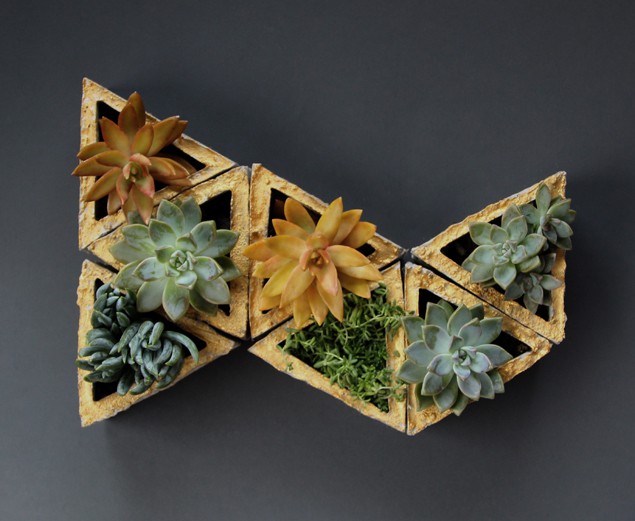
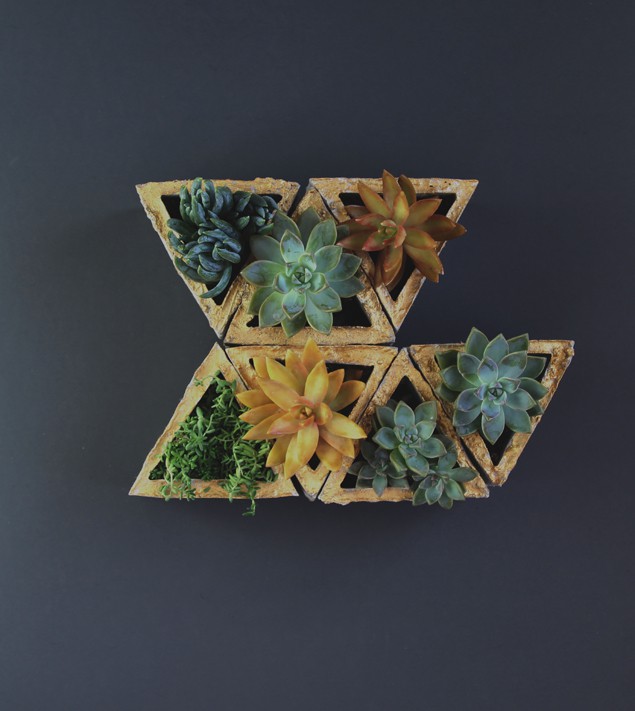
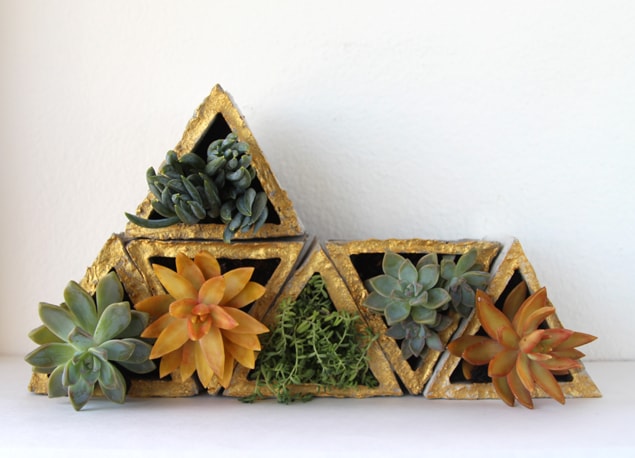
Each concrete planter module is created from the shape of an equilateral triangle, the magical geometry which allows a group of modules endless possibilities of forming new shapes and patterns.
Materials and tools:
- pourable concrete mix, such as Quikrete 3000lb (used here) or 5000lb.
- cardboard or thick card stock for making the molds
- template for the molds, formatted for 8.5″x11″ – download template (if you have trouble, , might be a browser issue, please ask friends to download and email to you! it works , thousands of downloads already)
- plastic containers to mix concrete, plastic bags for curing concrete
- box cutter or scissors, glue and tape for the molds
- gloves, dust mask
 Step 1:
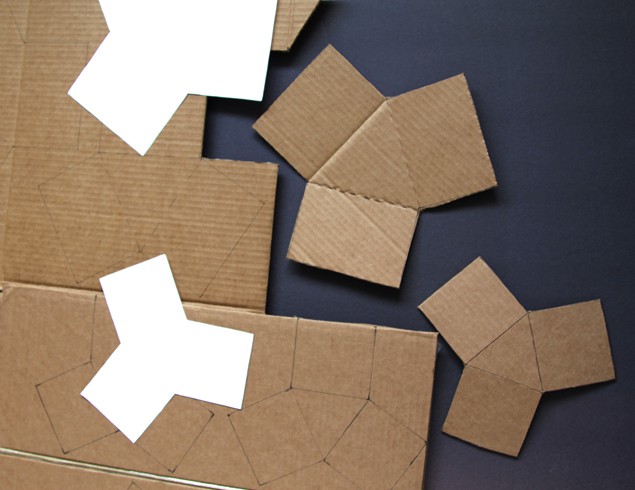
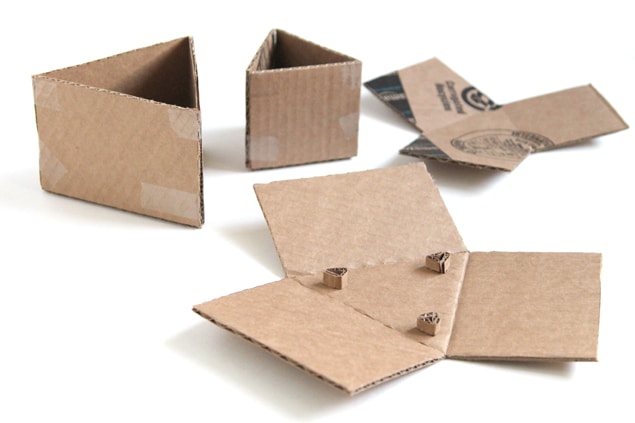
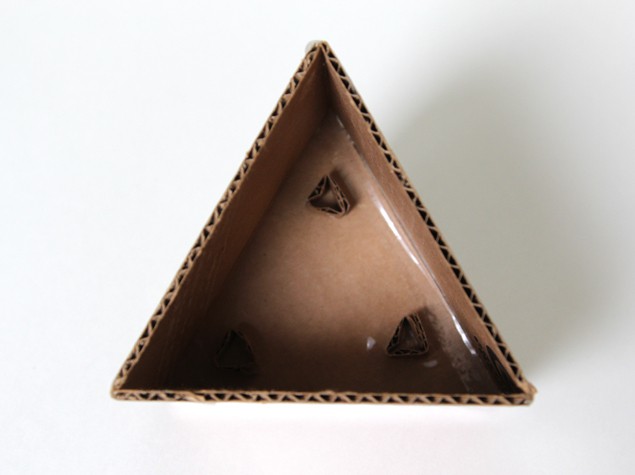
Print and cut out the template , trace onto cardboard, and cut out the inner and outer molds for the number of concrete planters you plan to make. The template for the outer mold on page 2 is larger than 8.5″x11″, so rotate it when you trace to complete the shape. Score, fold and tape each mold with scotch tape or masking tape. Fold 3/8″ wide strips of cardboard into triangular shapes and glue them to the inside bottom of the outer molds. These will function as drain holes and openings for hanging later.
 Step 2:
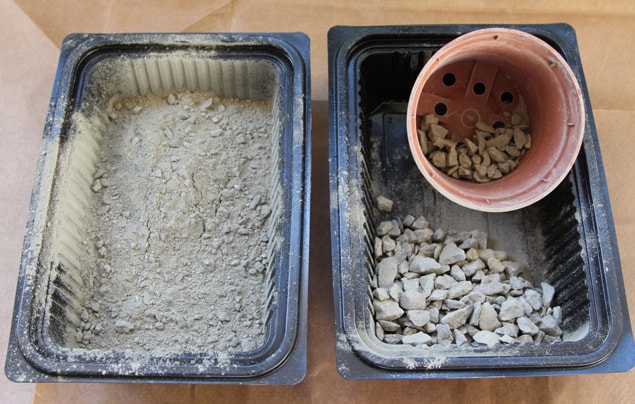
Screen those really big chunks of aggregates out of the Quikrete 3000lb mix- a plastic nursery pot works great, and leave some small aggregates for strength. Mix the concrete following the proportions recommended on the bag, using the screened concrete as if it is the original mix. Wear dust mask and gloves when working with concrete.
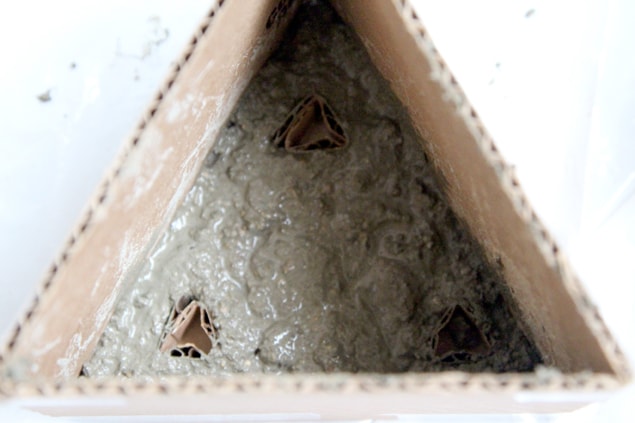
Pour the mix into the outer mold till it’s level with the triangular pieces, then place the inner mold inside, making sure it is centered. Pour the walls using a Popsicle stick to help pushing the mixture down. 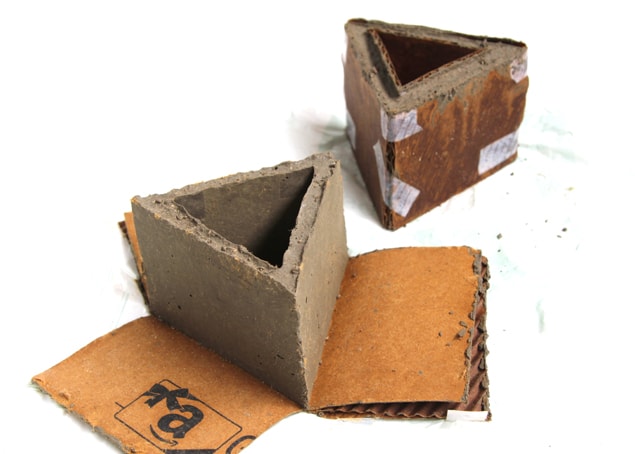
 Step 3:
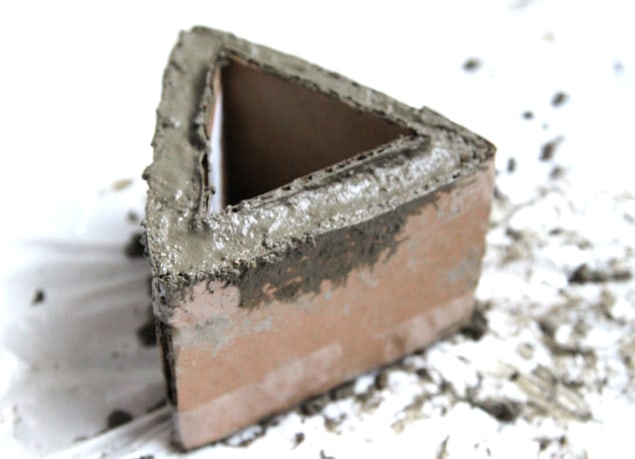
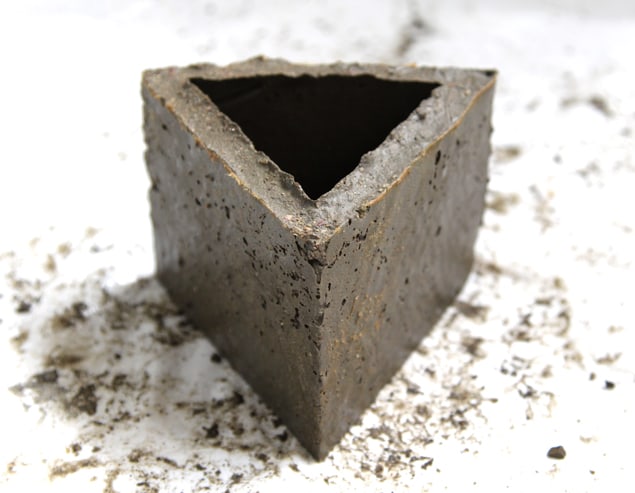
Let the concrete planters stay in the molds and cure for at least 3 days by misting them daily and wrapping them in plastic bags. This is a very important step to ensure that the concrete hardens as much as possible so they don’t chip or break. The more moisture you can keep in the plastic bag the better.
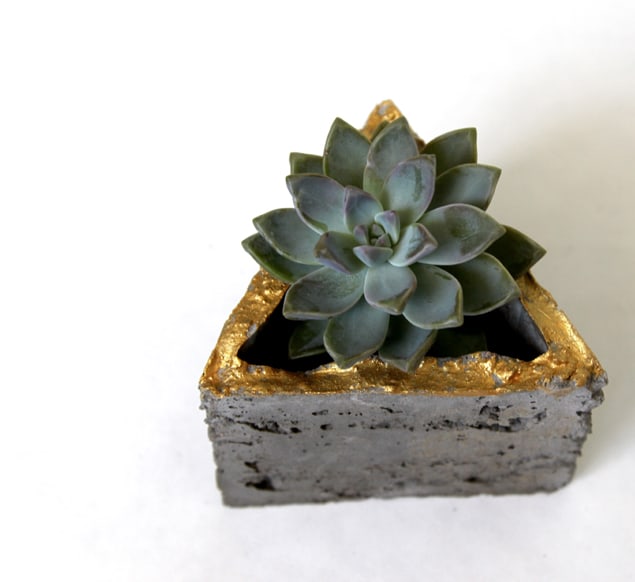
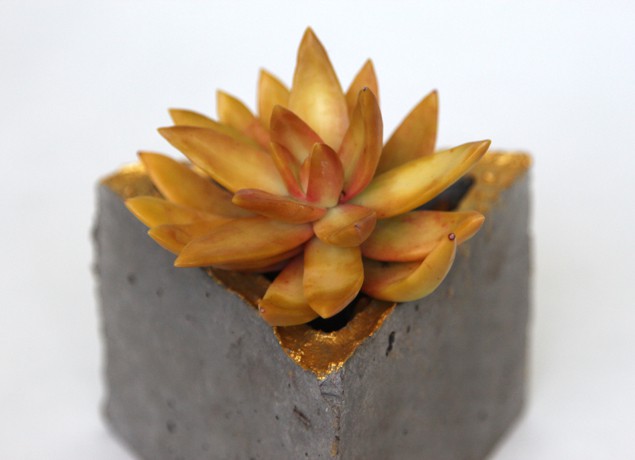
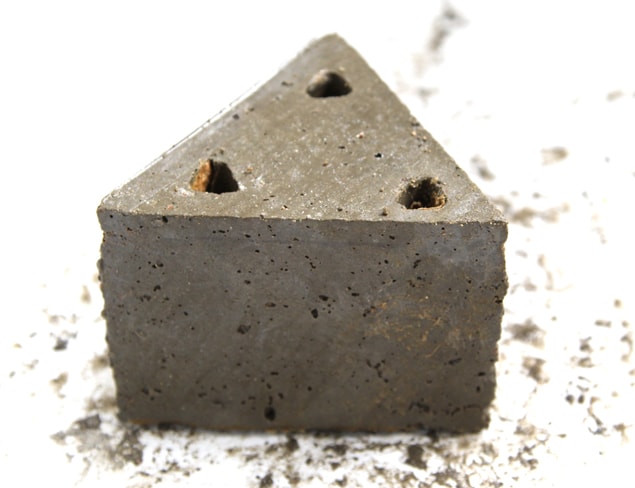
After day 3, take the concrete planters out of the molds. Since concrete is very alkaline and that can be a set back for plant growth, soak them in a tub of water for a day and let dry. I decided to paint the edges with gold acrylic paint for an added sense of mystery. 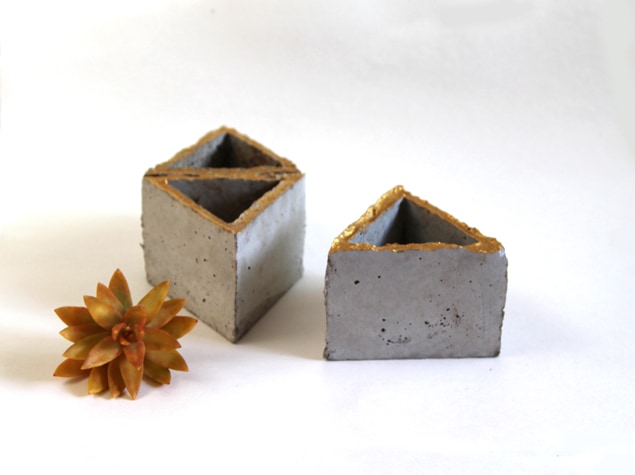
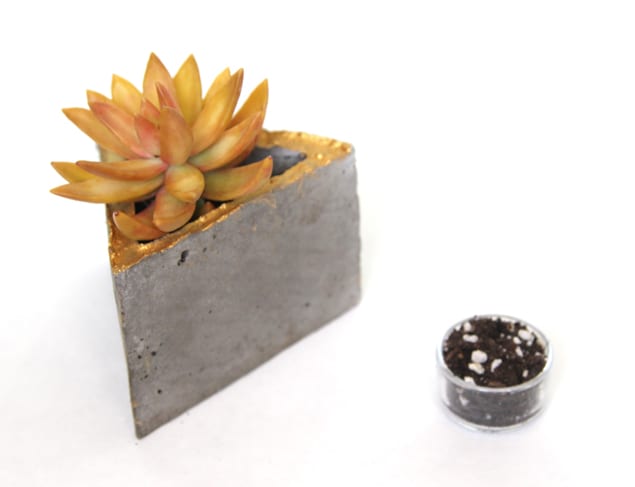
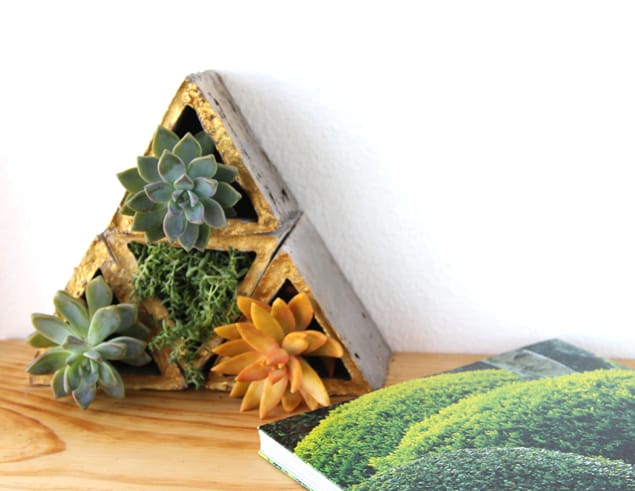

Now we are ready to plant. Succulents are great because they are easy to care for. Give the plants a couple of weeks to form roots that hold the soil in, and now we can hang or stack these planters to create our own mini vertical gardens! To create a pattern on the wall, use the template to mark where the 3 openings on the bottom of each planter are, and use 1 or 2 nail / screw for each planter depending on the pattern you want to create.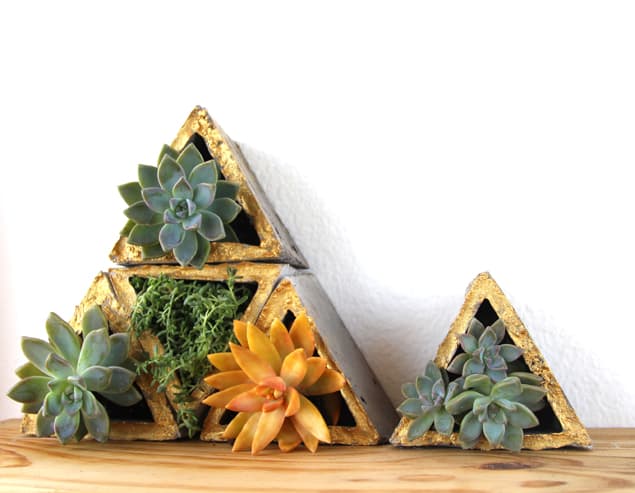
A few tips on maintenance: each week take these concrete planters out and water them thoroughly, let them get some sun and fresh air. The best way is to make twice as many and rotate them so they get to spend half the time outdoors or by a sunny window. 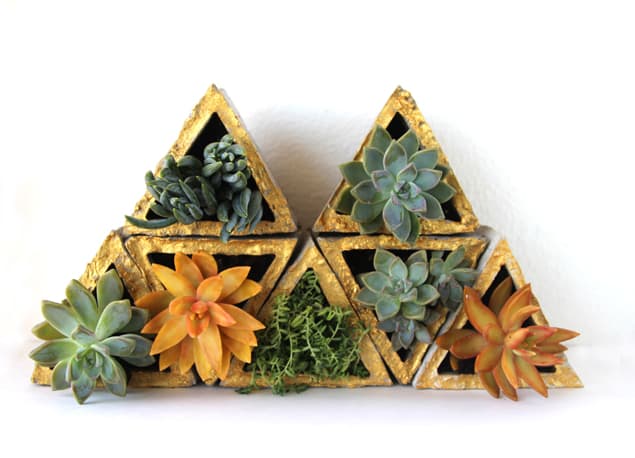
Download the free template here-

If you love the idea of DIY creative wall decor, please check out a couple of other projects here-
Make Beachy Picture Frames from Fence wood

Source: apieceofrainbow.com
