Make wood stain? Is it just spilling coffee or tea on a wood table?
Actually … no! There’s way more amazing stuff to it!
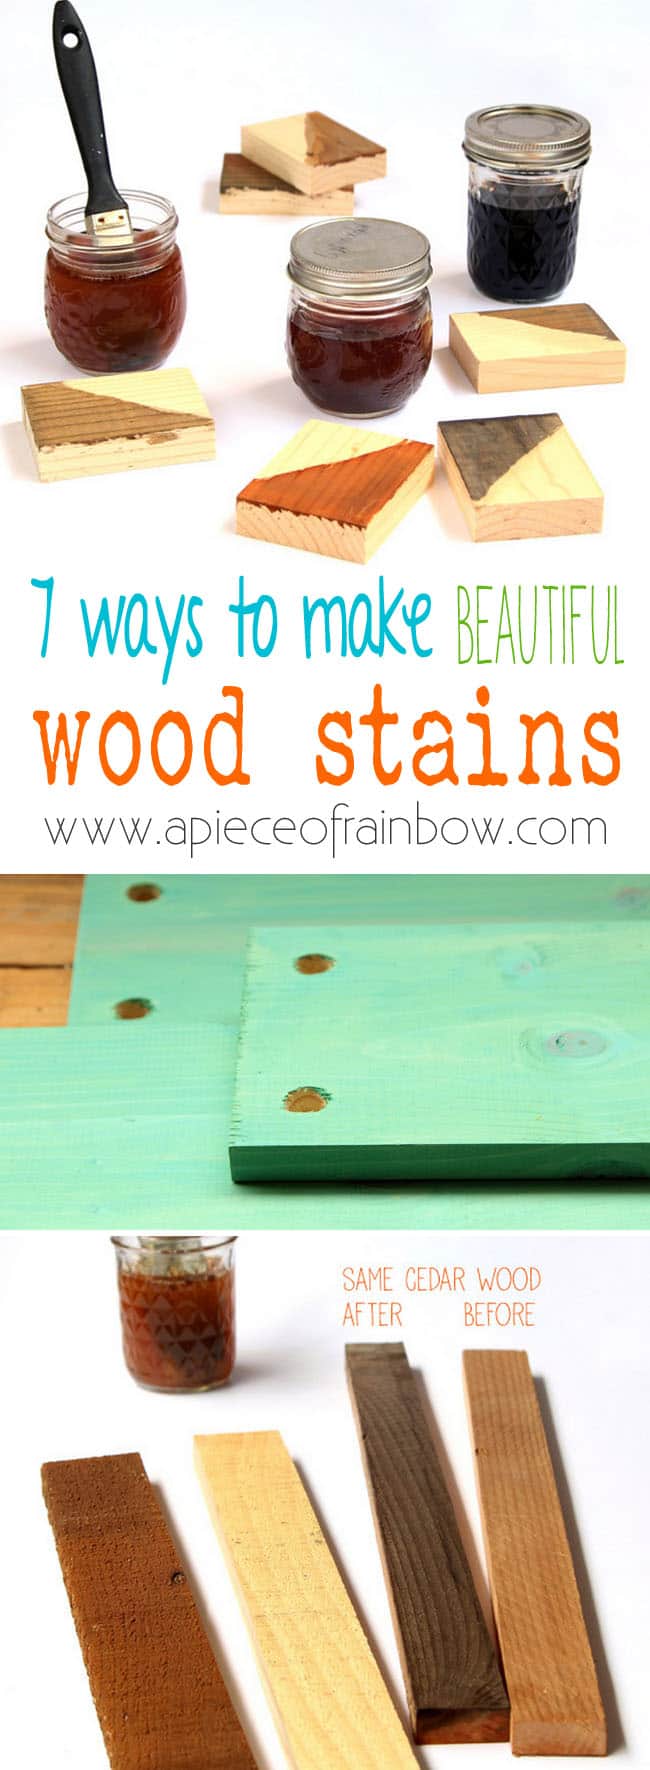
Made from all natural household materials, these quick and easy DIY wood stains are super effective, long lasting, and very low cost! And they are better for our planet as well – no solvents and no VOCs !
Since I wrote the original post a couple of years ago, lots of readers have share their experiences and new recipes. This completely updated version will include the following 4 parts:
1 . Why these wood stains work, and what is the science behind these durable wood stains.
2 . 7 easy recipes to make your own natural wood stains in any color.
3 . Pros and cons of DIY wood stains vs store bought wood stains
4 . Helpful tips and our reader’s FAQs
The first 4 basic recipes are various mixtures of vinegar and metal. Why?
Let’s start with a little bit of science behind these effective wood stains.
The iron dissolves in the vinegar (acetic acid) and forms a soluble substance (iron acetate). When this solution is applied to wood, the iron acetate reacts with the natural tannins in the wood, producing various shades of brown, grey and black.
As you can see, it is a chemical reaction, which is durable indoors and outdoors, vs when you hear “coffee stain”, “tea stain” or “beet juice stain” on wood, those are in fact natural dyes that would fade away quickly in sunlight.
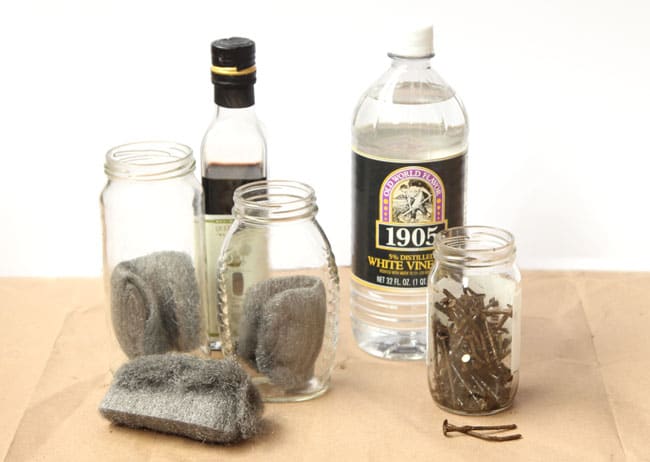
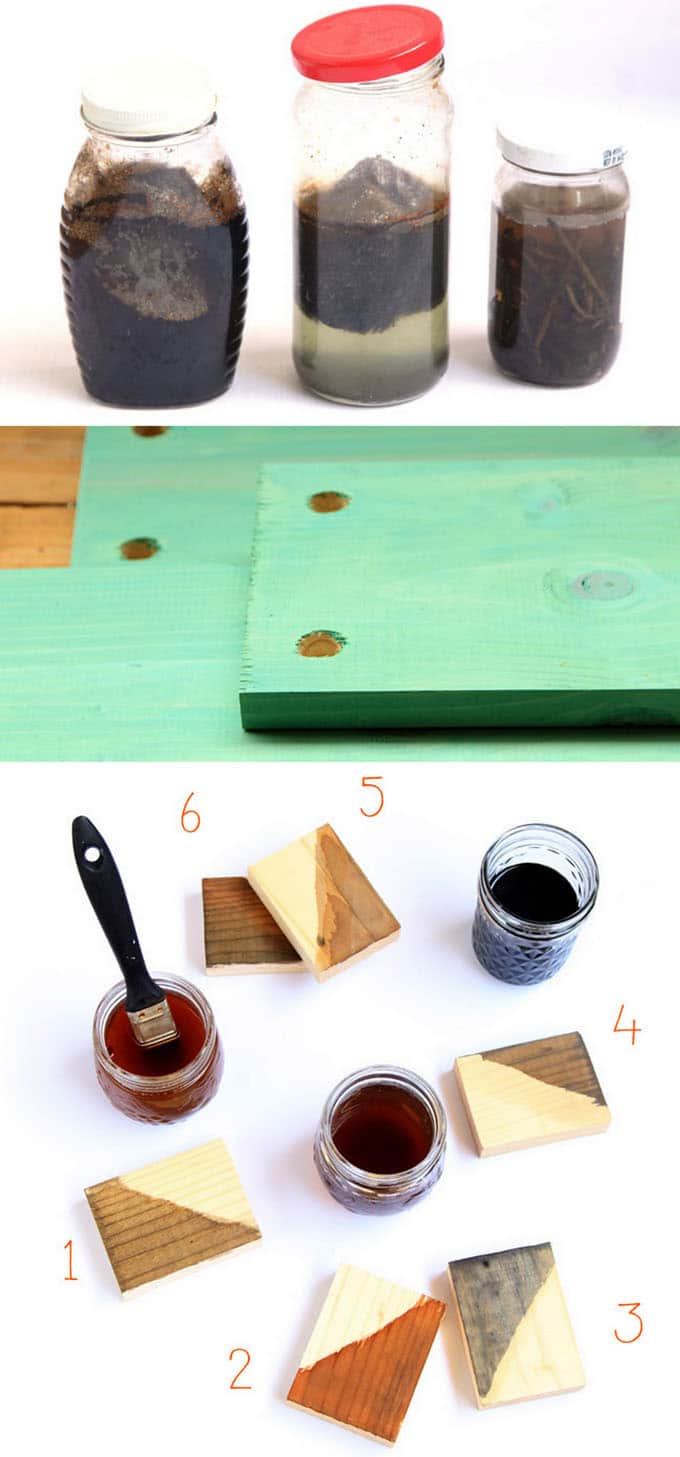
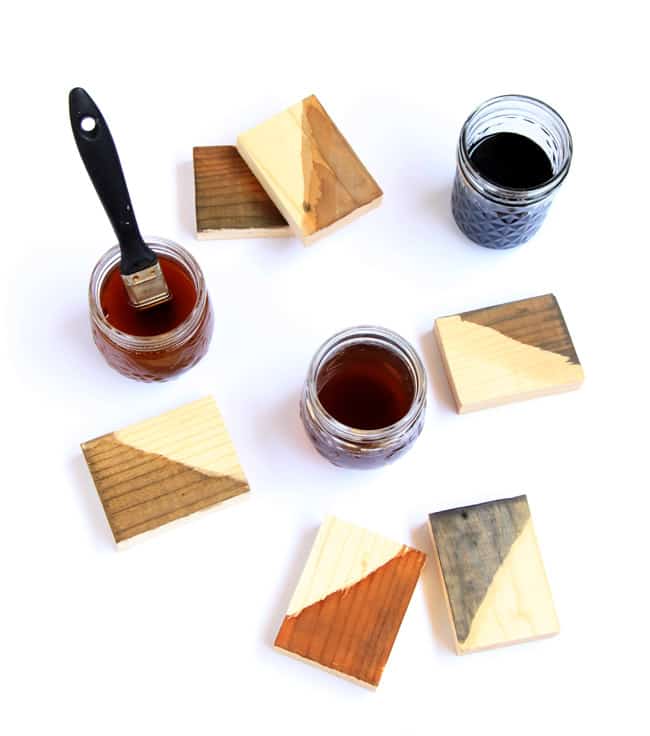
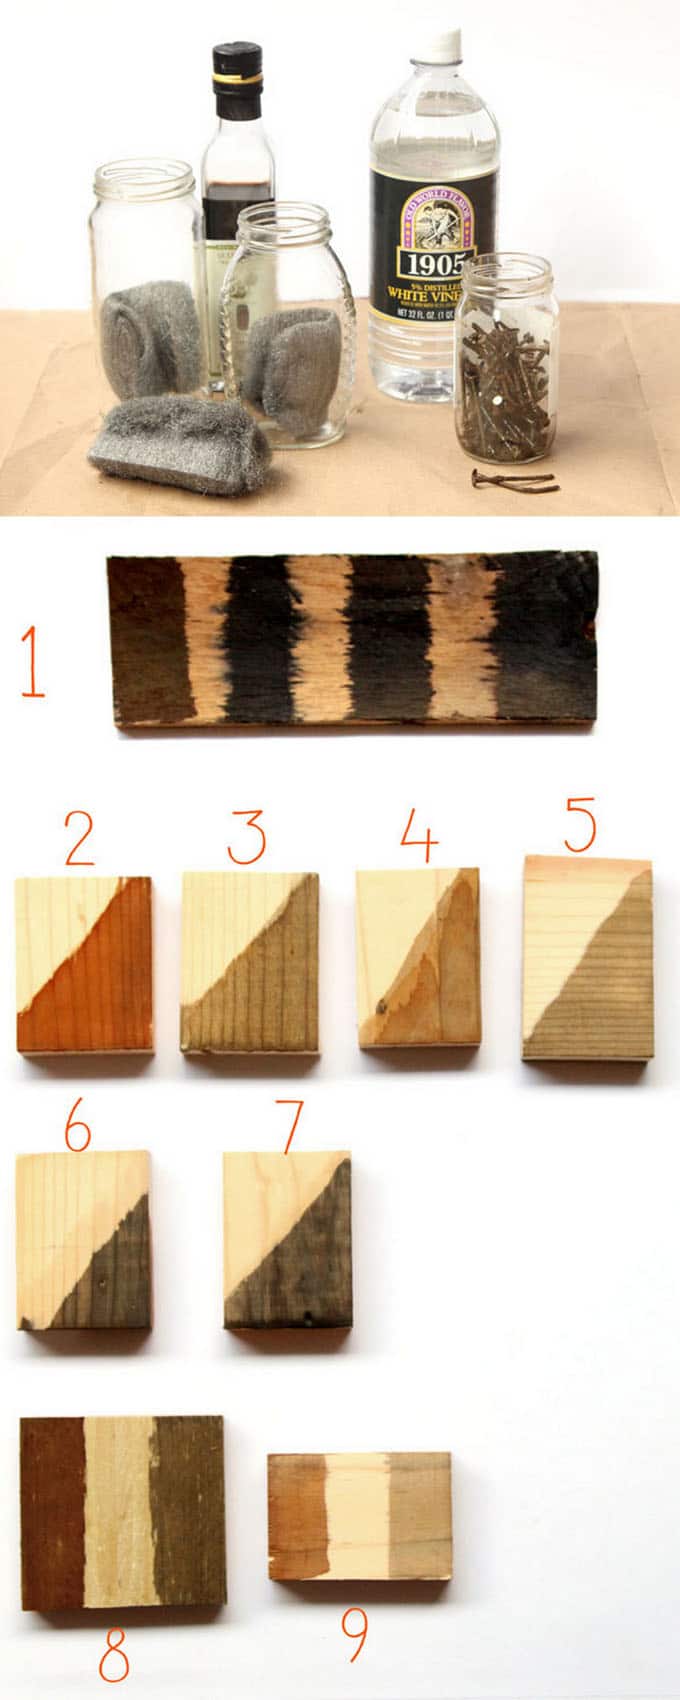
Now our four basic recipes. I started with 4 jars to test various types of vinegar and metal: ( Some of the helpful resources are affiliate links. Full disclosure here. )
Recipe 1. 1 1/2 cup of white vinegar and one steel wool pad
Recipe 2. 1 1/2 cup of balsamic vinegar and one steel wool pad
Recipe 3. 1 1/2 cup of apple cider vinegar and one steel wool pad
Recipe 4. 1 1/2 cup of white vinegar and rusty nails
You must be thinking: “Oh balsamic vinegar will be the darkest stain, due to its color! ”
Want to bet $1000? =)
To make the stains, put a super fine steel wool pad (or rusty nails as in the 4th recipe ) in the jar and pour in enough vinegar to cover it, loosely put the lid on the jar to allow for air exchange when the reaction is happening- see photo below. If the pad is not totally submersed, rust will quickly form on the portion exposed to air which is ok.

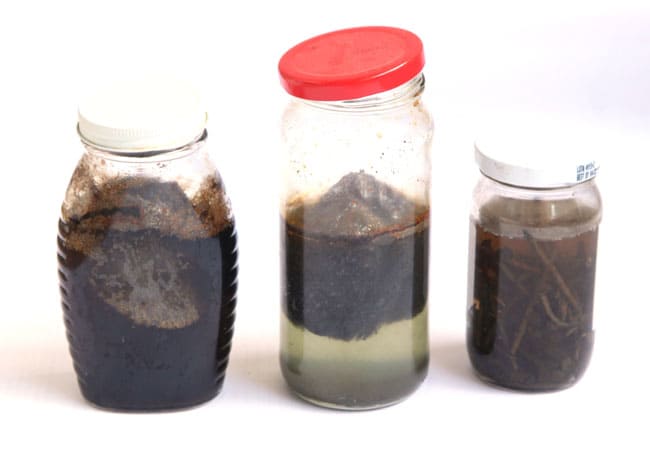
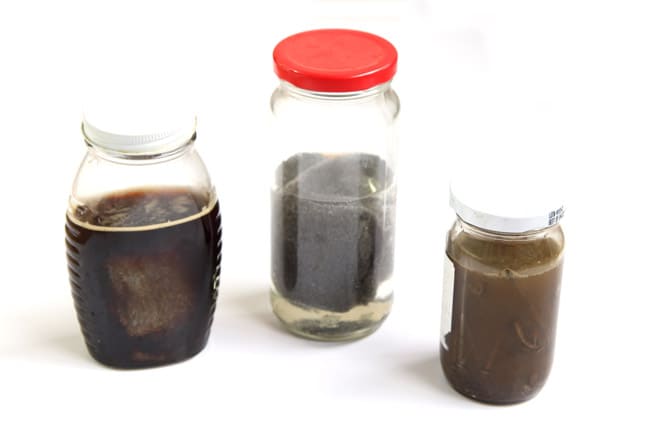
After about twenty-four hours pour the solution into another jar, or take the pads out of the jars to stop the reaction.
All the steel wool pads have shrunk to about 1/2 the size! Leaving them in the jar longer will produce a darker stain. The variations are endless!

Now watch the magic! When I first brushed some of this wood stain onto a piece of wood, I thought nothing was happening! But a few minutes later, it looks all different, wow!
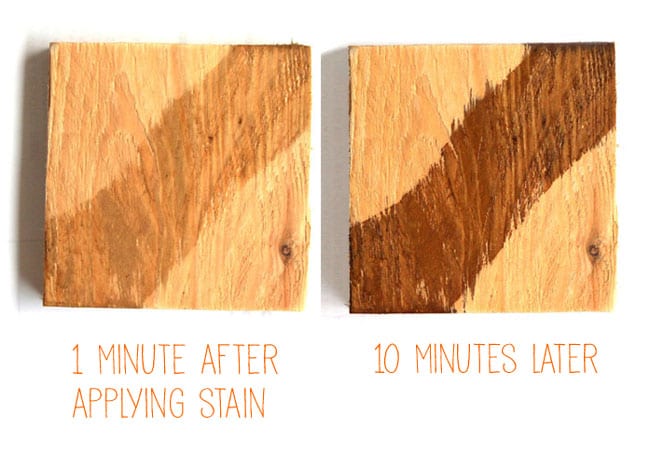
As you can see in the picture below, the stain colors has nothing to do with the vinegar color! Balsamic vinegar and steel wood solution is in the middle, but the white vinegar and steel wood solution on the left has the deepest color. The photo was take 5 minutes after the stain was applied.

Before we look at all the colors in comparison, let’s look at two more variations on these 4 basic wood stains.
Recipe 5. Coffee or tea with the basic stains
Brew some tea or coffee at 3-4 times the strength, let cool, apply this mixture to raw wood surfaces. The coffee or tea do not add darker color to the wood stain, they add tannins to the wood which will make the stains much darker. Apply the stain after the wood dries from the tea / coffee first coat.
Recipe 6. Dilute the basic stains with water
When we dilute the stains #1 through #4 with water, it produces a lighter color, much like naturally aged wood.
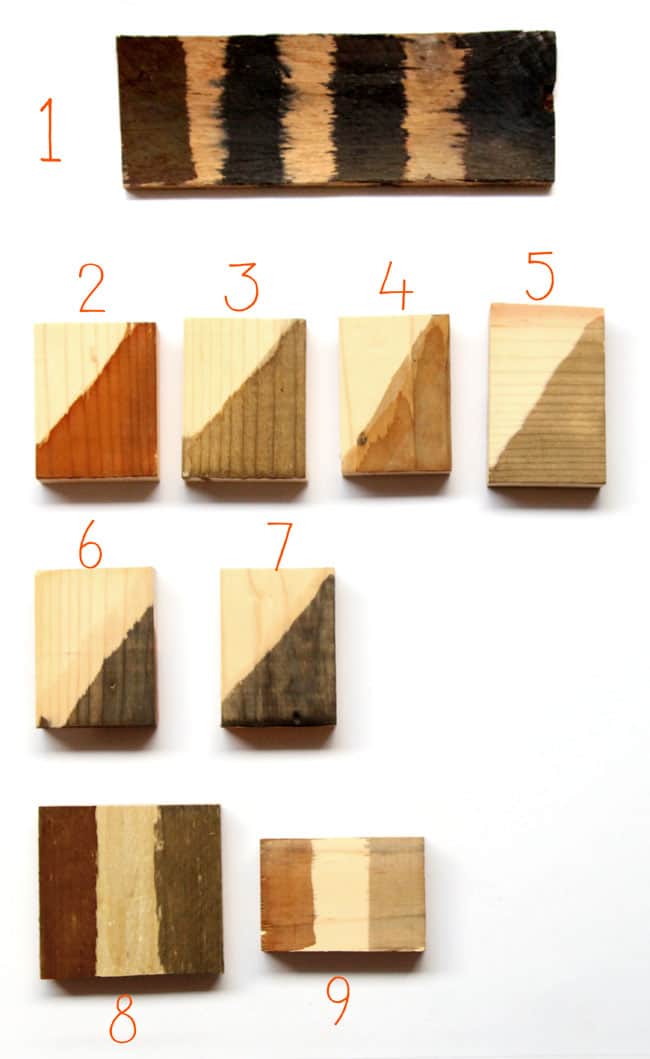
Now let’s check out all the DIY wood stains and variations in the above photo.
1. Stain #1 – #4 applied on pecan or walnut wood. This type of wood has high concentrations of tannins, so all the stains come out quite dark. No need for tea or coffee!
2. white vinegar and steel wool stain on pine: a rich brown color
3. balsamic vinegar and steel wool stain on pine: a warm gray with a gold tone
4. white vinegar and rusty nails stain on pine: a brown color lighter than the one with steel wool, i think it’s because steel wool dissolves faster, so the iron is more concentrated
5. apple cider vinegar and steel wool stain on pine: also a warm gray similar to the balsamic vinegar, more silvery gray
6. & 7. coffee and the vinegar metal stains: all the different vinegar and metal solutions produced a dark, almost black color because of the coffee
8. & 9. 50% white vinegar and steel wool stain with 50% water: both types of wood has the diluted stains on the right, and natural wood in the middle. The rich brown stain became a gray color stain after being diluted with equal amount of water.
So far we have stains in all shades of browns and grays. What about colors?
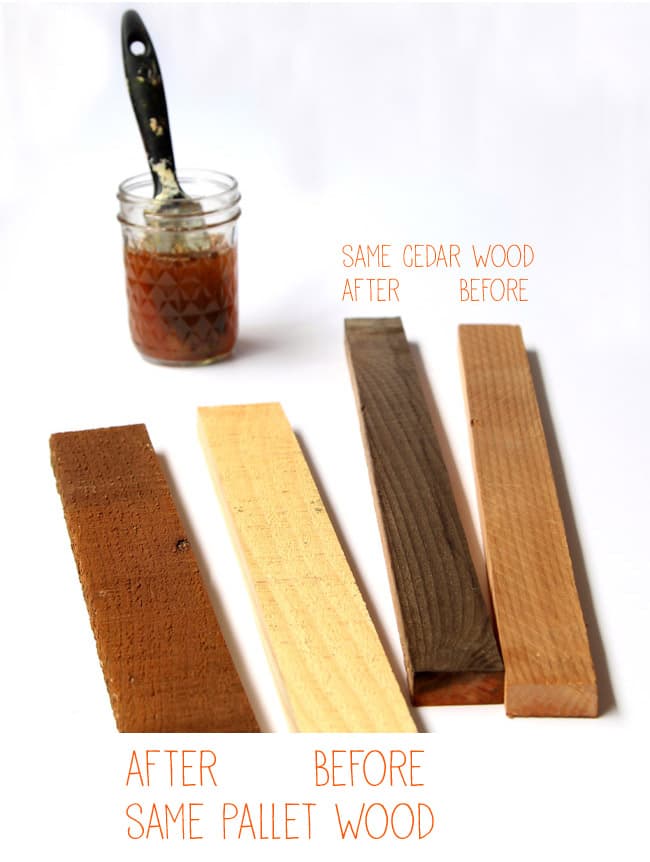
Recipe 7 – you can make wood stain any color using diluted acrylic paints! (or any water based ink or paint)
If you love colors, and you also love the grain of the wood, this method gives you the best of both worlds!
When I made the rope shelf , I had the same question like every time: “To paint, or not to paint?”
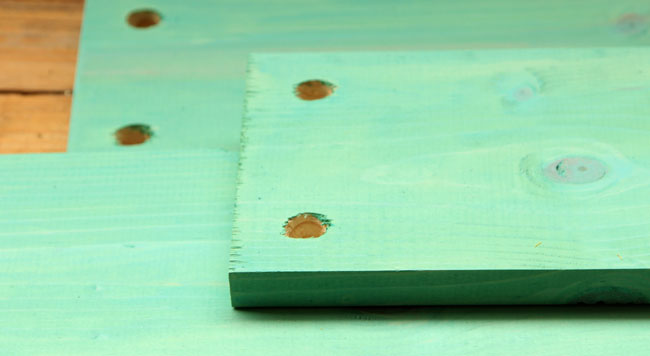
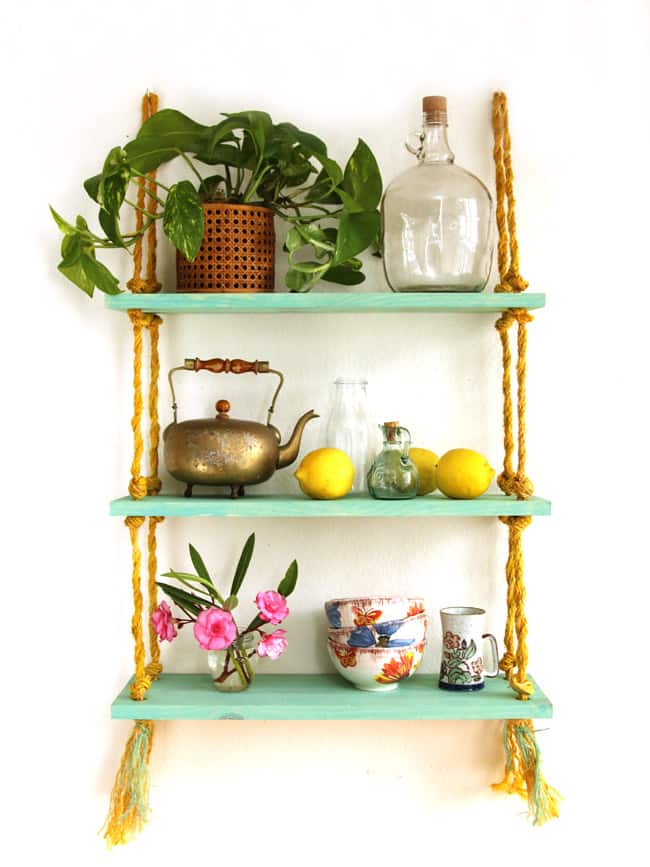
So I diluted the acrylic paint with a ratio of 1 part paint and 1 part water, and washed the wood, so it takes on the turquoise color, but still has the wood grain showing through!
Different brands of paints will have different consistencies. Choose exterior paints for outdoor projects. Remember: always choose non-toxic paints!
Pros and cons of DIY wood stain vs store bought wood stain.
The pros are: made from all natural household materials, these quick and easy wood stains are super effective, long lasting, and low cost (less than 10% of those in the store)! And they are less harsh on our planet as well – no solvents and no VOCs!
The cons: can be unpredictable. The wood stain will have different color variations on different wood species, and it can be challenging to match colors when making new batches. So planning and testing is really important!
If your goal is to stain lots of wood and have them all look as uniform as possible, then you need to either make a big batch of home-made stain and use them at once, or choose a store bought stain.
Helpful tips and our reader’s FAQs
- Use scrap pieces to do tests before you tackle a big project. Every type of wood react to the wood stain differently.
- You might go through the same “Nothing happened!” moment. Our reader Mimi left a great comment. Here’s what she said: “I tried rusty nails and steel wool. I waited several days because it didn’t look like anything wsa happening.
today was the big day. I brushed some on a piece of wood, and it was CLEAR! i was so disappointed.
I walked away and got the other jar, and when i got back, the spot was almost black. OOPS, it worked!” - The longer the metal stays in the vinegar, the darker the stain colors become. Remove the metal before using the stain so the color is consistent in the batch.
- Many woodworkers keep their stain solutions for several weeks in room temperature. I do recommend using it up with 1 month because the color is most intense when it’s freshly made.
- You can apply finishing wax or oil to the wood after staining.
- The stains can be sanded off just like commercial stains.
- There is a little bit of fine powdery rust-like residue that should be wiped off after the wood dries. Big thank you to Karen from Somewhat Quirky Design who reminded me to add this!
- These stains, except for Recipe 7, work best on unfinished wood. Wood that has been oiled, painted, or sealed will not react to the stains unless they are sanded to expose the raw wood.
If you try this on a project, feel free to share photos or tips here or on my facebook page! =)
You may also enjoy:
How to transfer images to wood with only wax paper and water, plus a home made furniture wax recipe!

All About Pallets! Where to find them, how to select them and take them apart… loads of tips!!
Happy exploring and have a wonderful week!
Source: apieceofrainbow.com
